Showing posts with label Sparkles Monthly Challenges. Show all posts

Monday, March 15, 2021

Baby Shower Card | Sparkles Monthly Challenge - #138 "Babies"


 Hello!

Today we start a new theme over on the Sparkles Monthly Challenge - "Babies!"  

I love bartering with my crafty friends and I made this card in exchange for some homemade face masks! I have had the quilt die from MFT Stamps for years and this is the first time I have used it! I die cut the quilt block from 4 different papers and assembled it on a square of white card stock. This panel was layered onto a square card base.
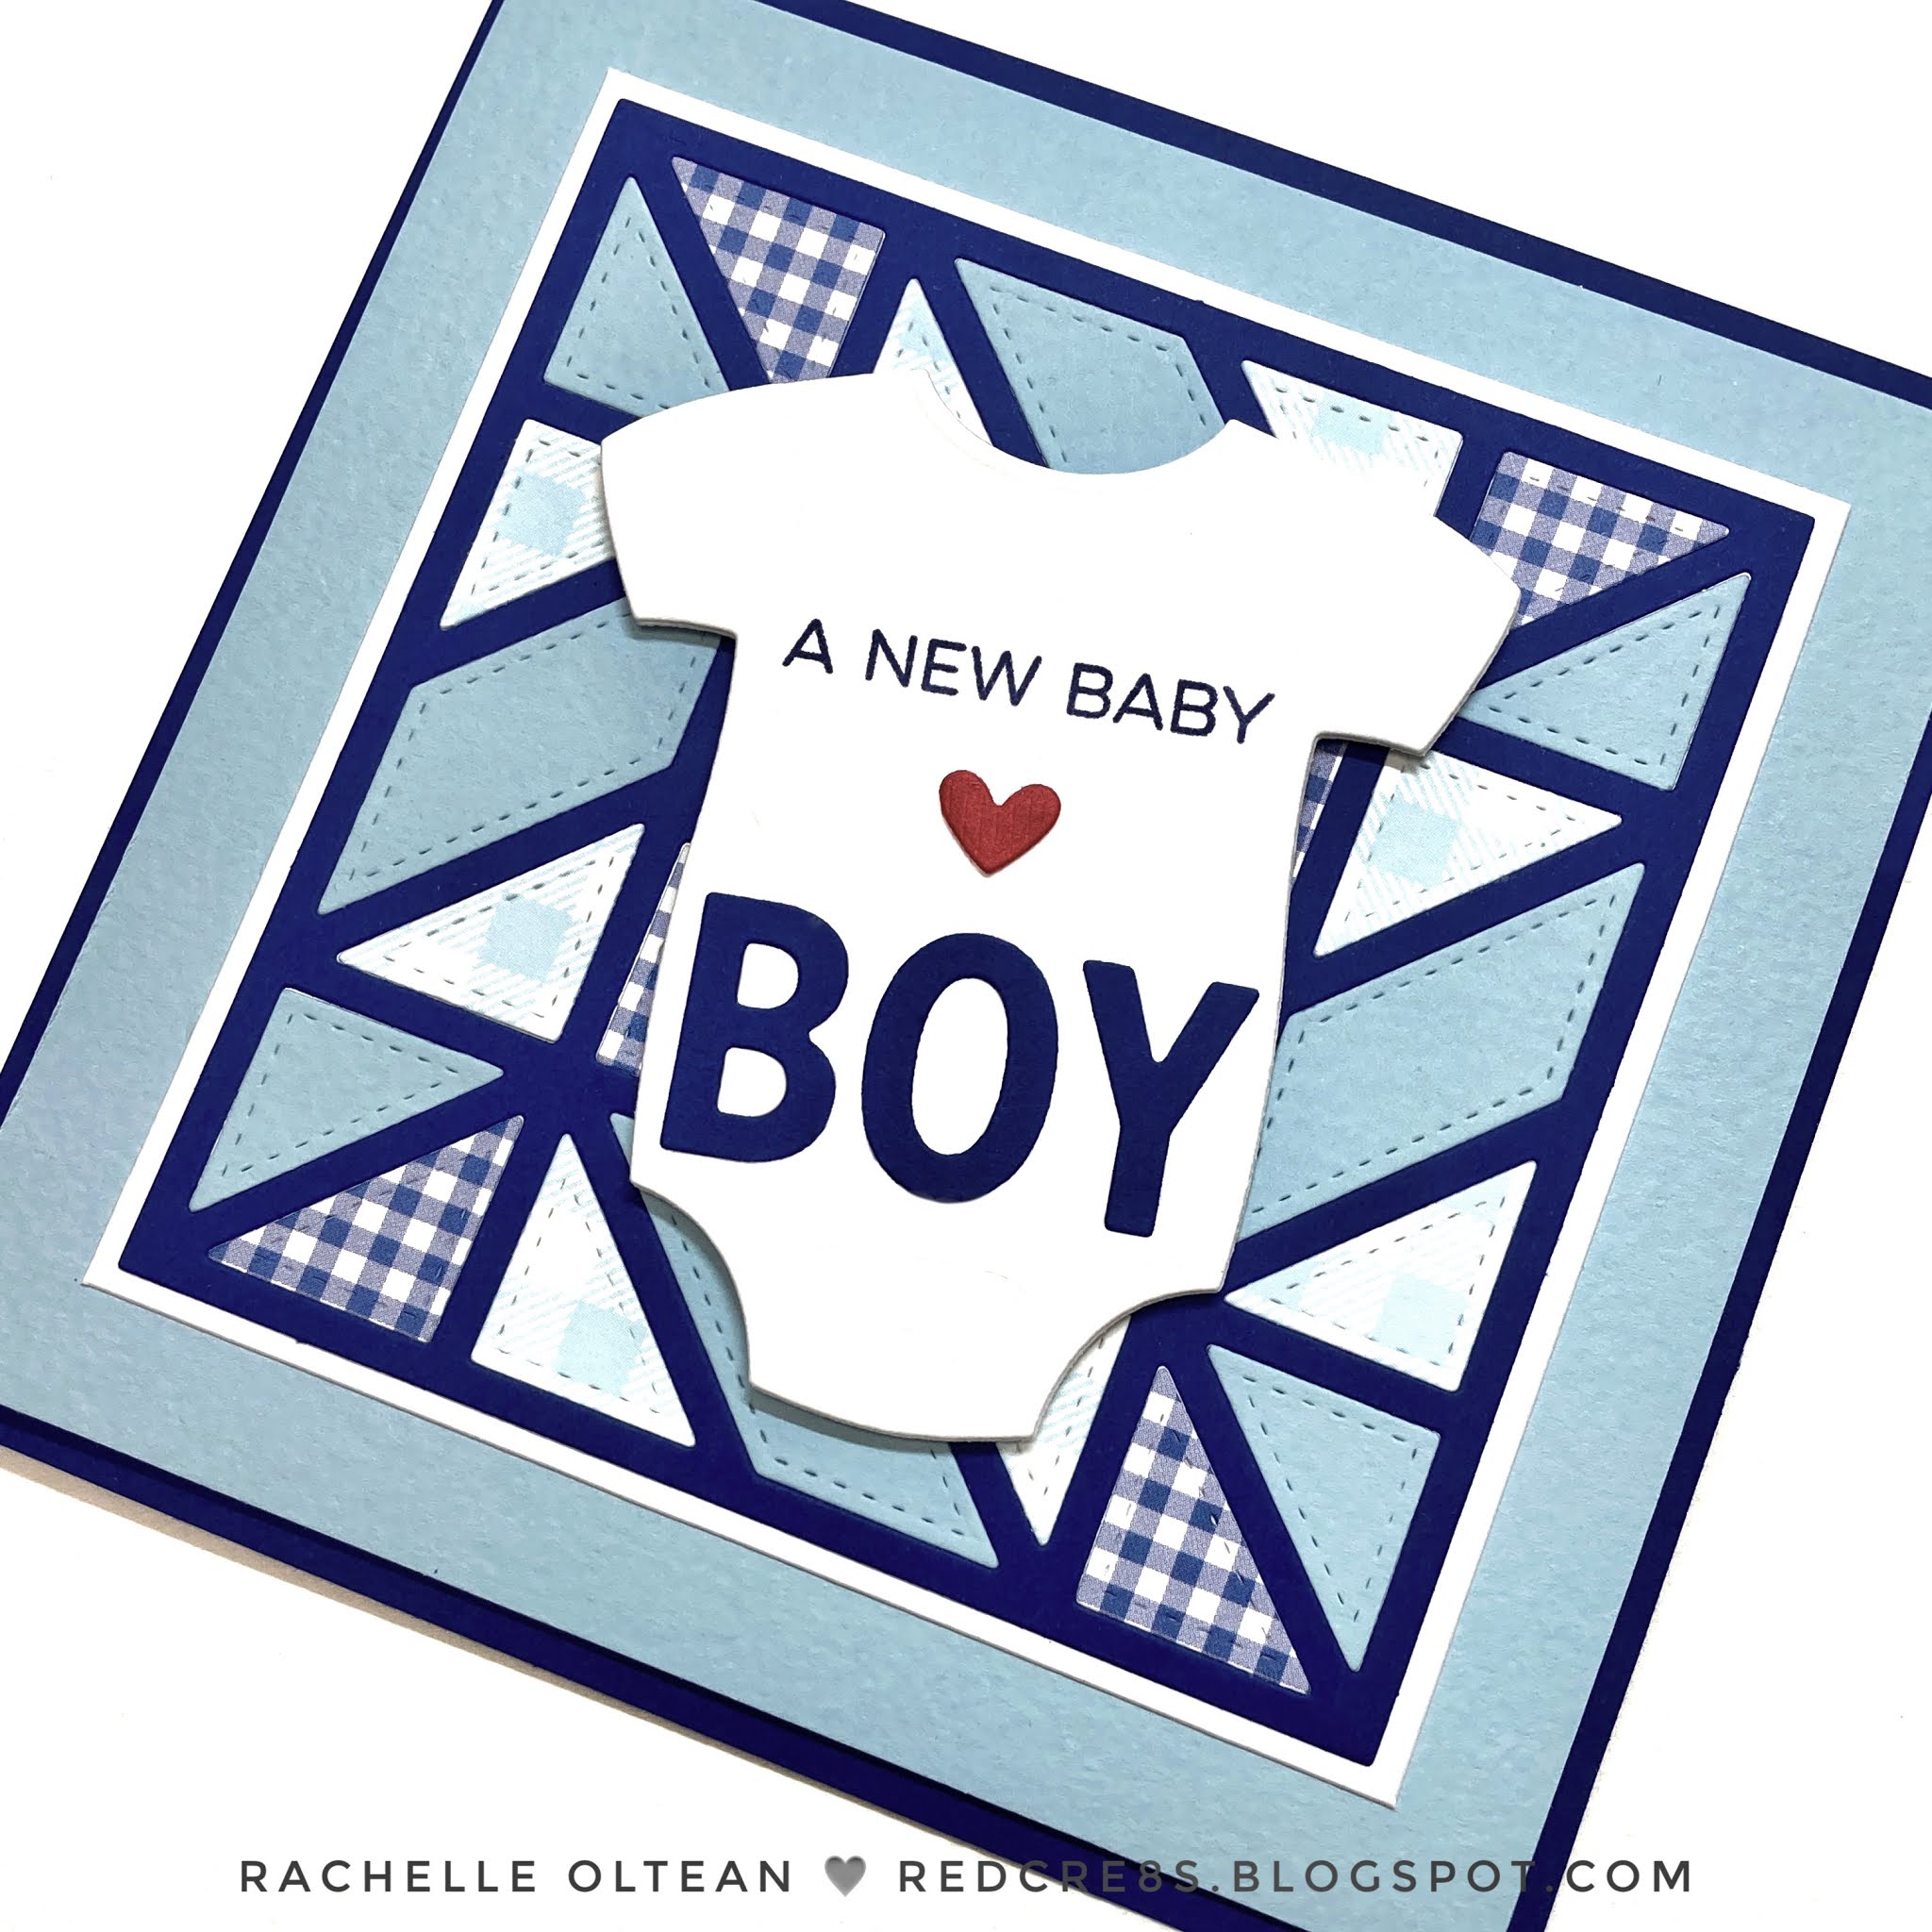

The onesie, letters and mini heart were die cut and attached together. The sentiment was stamped and this piece was adhered with foam tape to finish the card. Thanks so much for joining me today and for taking the time to comment! 

I have decided to cut back a bit on my Design Team commitments and so this will be my final post for the wonderful Sparkles Team! I have enjoyed the themes and getting to know the other ladies over the past year and I know I will see them out in blog land!

Take care and stay safe! Rachelle

Friday, January 15, 2021

Birthday Card | Sparkles Challenge - Big Birthdays Ending in "0" or "5" | Angie Blom Digital Designs - Birthday Girl Sass


Hello!


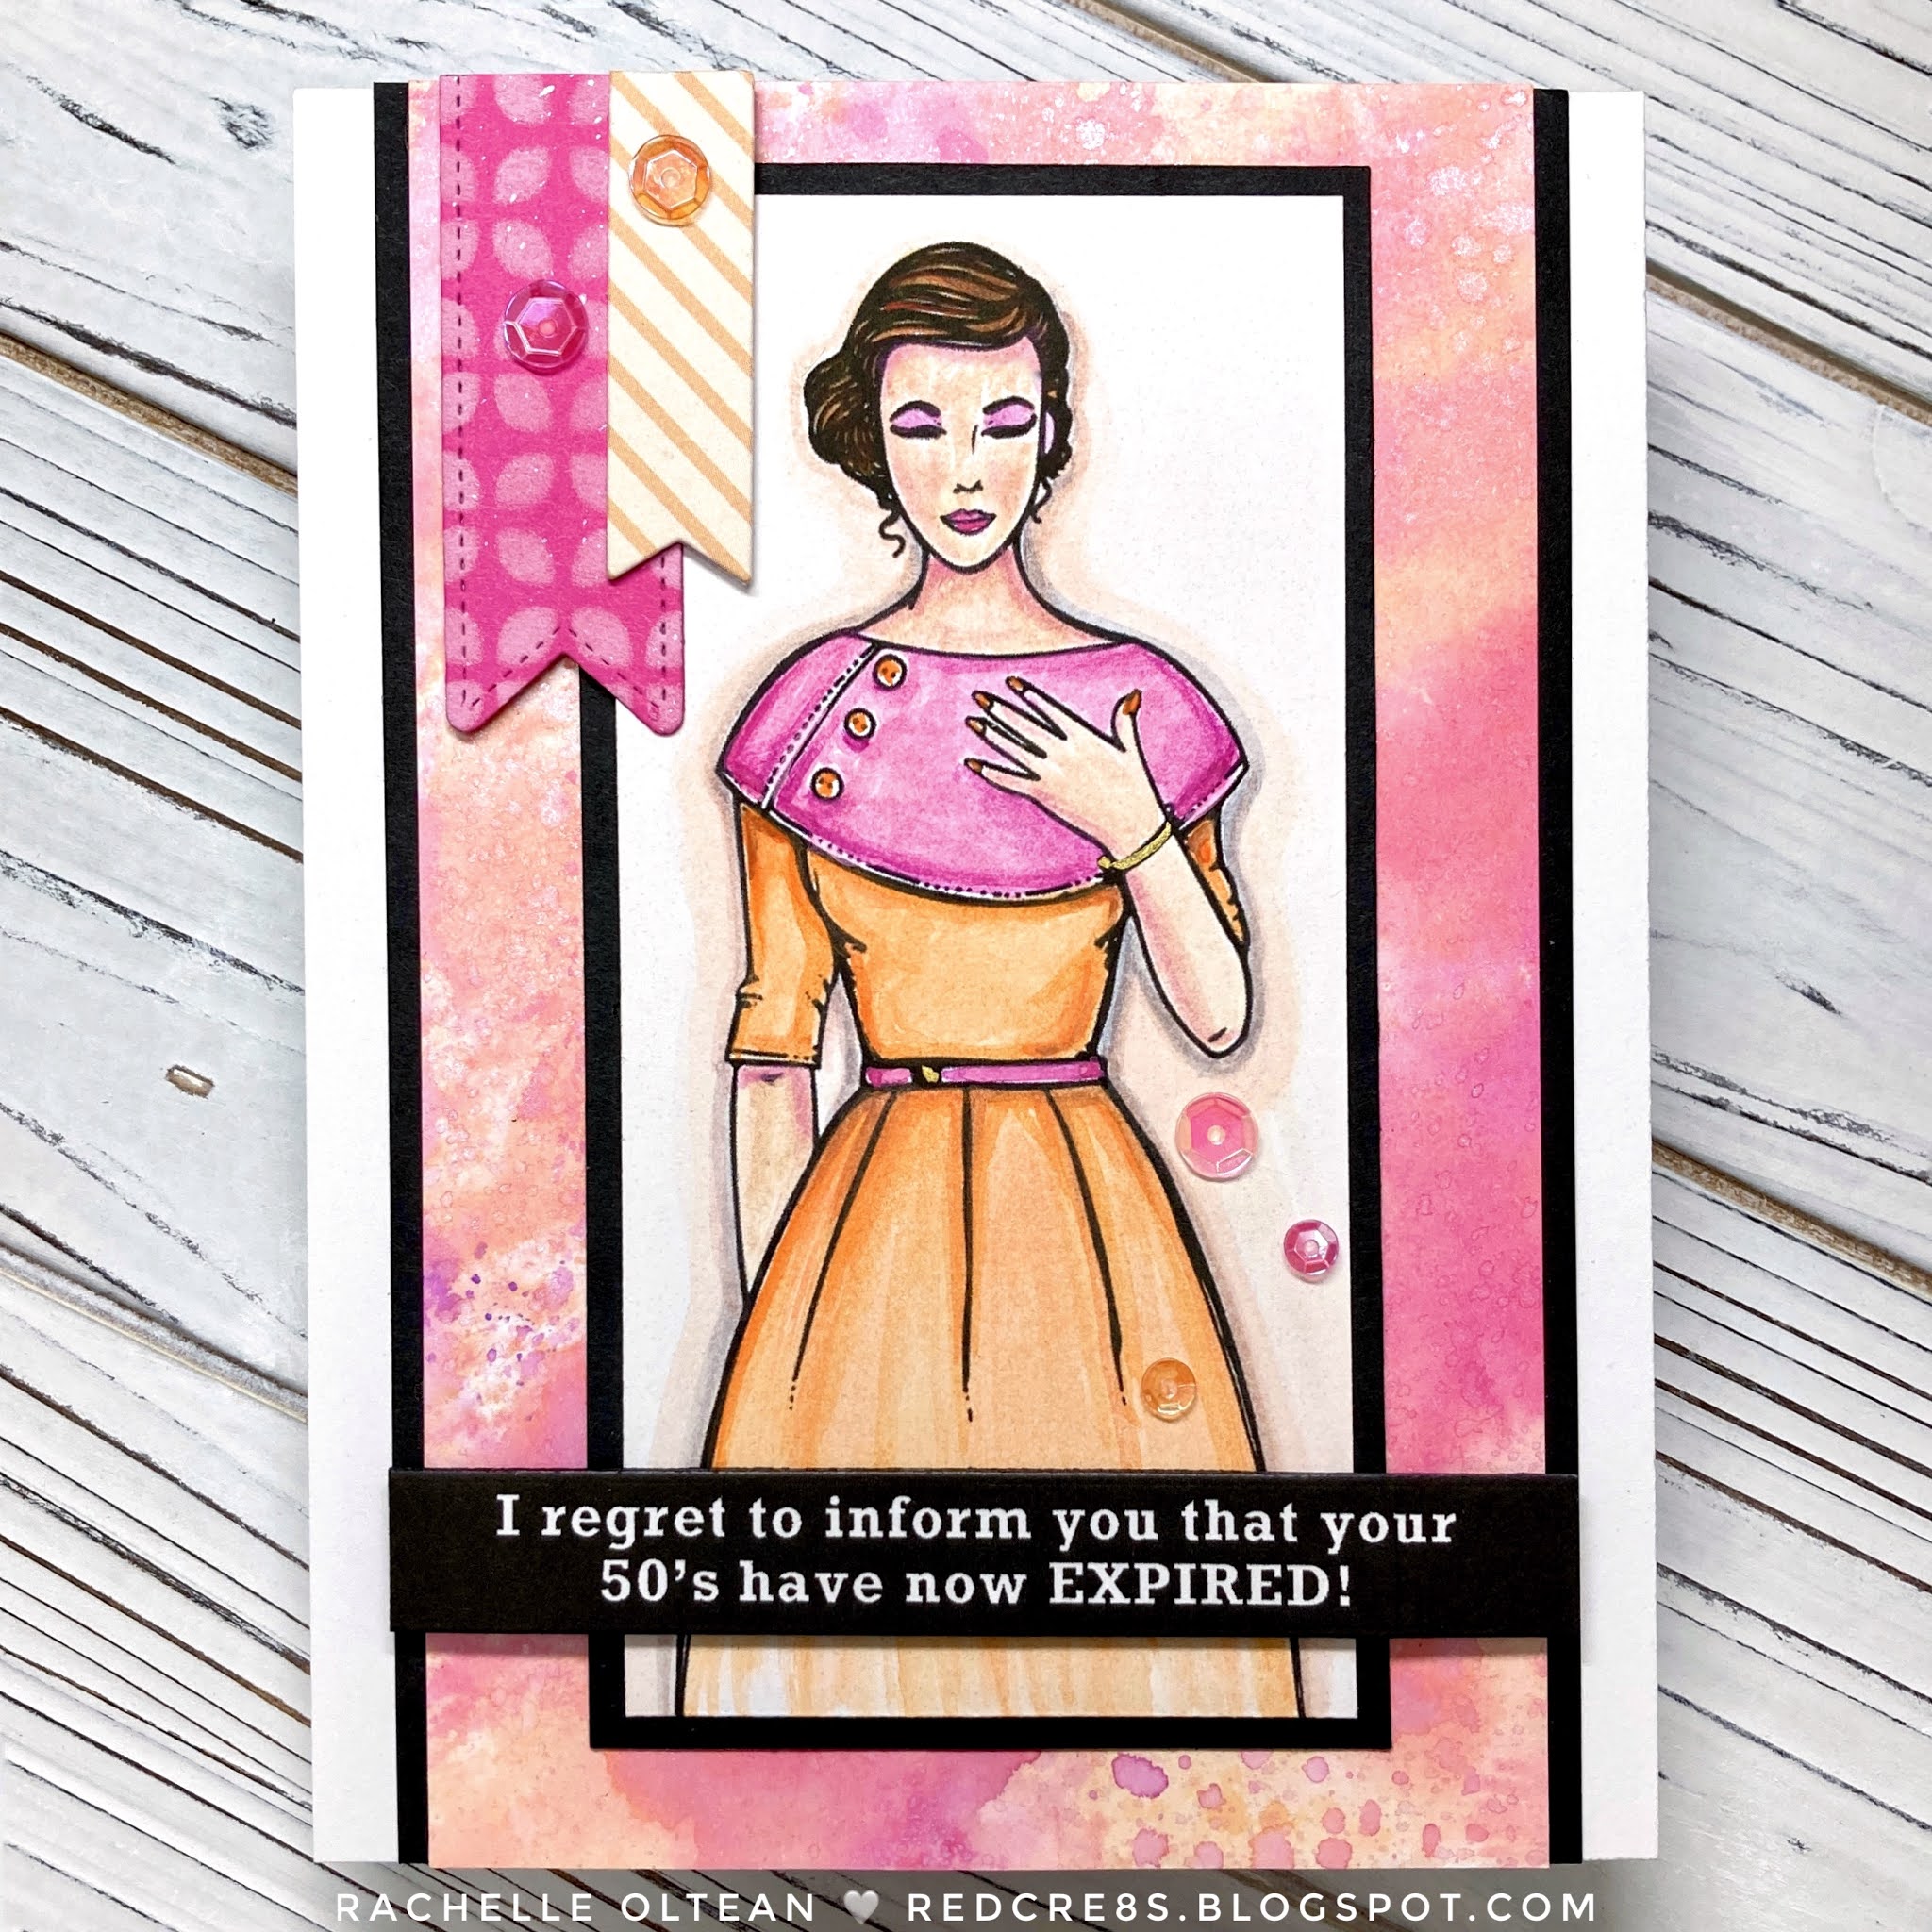
We've got a great birthday challenge starting today over on the Sparkles Monthly Blog - show us your projects for BIG Birthdays ending in either "0" or "5"! This card was designed for a good friend of mine who will be turning 60 this year and I used the "Birthday Girl Sass" image from Angie Blom Digital Designs. 

I inked smooshed a card stock panel with Carved Pumpkin, Worn Lipstick and Picked Raspberry Distress Oxide Inks, and sprayed it with shimmer mist. The Sass Girl was printed, watercolored and trimmed to size. 


I created/printed my own sentiment strip, die cut a couple of fishtail banners from coordinating pattern papers and assembled all the pieces together after first framing the inked and image panels with black card stock. This is such a great digital stamp and I will be able to use it for so many different occasions!


Thanks so much for joining me today and for taking the time to comment! We can't wait to see your big birthday projects in our Sparkles Monthly Gallery!

Additional Challenges:


Take care - Rachelle

Tuesday, December 15, 2020

Christmas Card | Sparkles Monthly Challenge - #135 White on White + One Color for Sentiment

Hello!

We have a new challenge theme over on the Sparkles Monthly Blog - "White-On-White + One color for Sentiment." White color challenges have always been a bit tricky for me and this one was no exception! It was so fiddly and I ended up scrapping my first card and starting all over again! : ( 

But once I got a simple design figured out, it all came together! : )

I cut the snowflake shapes and the omit sentiment rectangle with the Cricut from white pearlized card stock. I stacked 4 sentiment cuts together to give it some dimension and backed it with red card stock as my one extra color. All of these pieces were adhered onto a stitched scalloped rectangle and then glued onto an A2 card base. I added white pearlized confetti to finish up the card...whew, you'd never know it, but this took me two fulls days to complete!!!

I really can't wait to see what you come up with for this challenge - link your projects up in the Sparkles Monthly Challenge Gallery! 

Thanks so much for stopping by and for commenting!

Challenge Submissions:

The Cutie Pie Challenge Blog #154 - White Christmas

Make My Monday #137 - Christmas Theme

The Paper Girls #213 - Snowflakes

Use Your Stuff #412 - Winter/Christmas/Snow

Crafty Calendar Challenge December 2020 - Christmas

Rachelle

Sunday, November 15, 2020

Christmas Card | Sparkles Challenge #134 - "Use A Stencil"


Hi!

Our November theme over at the Sparkles Monthly Challenge is one of my favorites - "Use a Stencil"  and  I decided to use one of my tried-n-true patterns...a random dotted snowfall in this pink and green winter scene! 

The pink background was blended with Spun Sugar Distress Oxide Ink, the dots with Picked Raspberry and the entire piece was spritzed with shimmer mist. Once dry, I attached the circle die cut panel on top and glued everything to the front of a top-folding A2 card base. 

The mouse and tree were stamped, colored and die cut. I added a paper-pieced present to the mouse instead of the basket that is attached to the original image to fit into my Christmas scene! The die cut sentiment strip was glued to the front and the tree/mouse were adhered into place on top. I glued an iridescent star to the tree top and die cut snowflakes/assorted gems were added last.  

We can't wait to see your stencil projects in our Sparkles Challenge Gallery!

Additional Challenges:

A Gem of A Challenge #23 - Anything Goes

Aud Sentiments #264 Christmas/Winter Animals + A Sentiment

Craft Rocket #76 - Christmas/Winter


Thursday, October 15, 2020

Thank You Card | Sparkles Monthly Challenge #133 - "Hello Autumn!"


Hello Autumn!

Our new challenge over at the monthly Sparkles Challenge is in keeping with the season and we would love to see your "fall-inspired" projects in our gallery this month! 

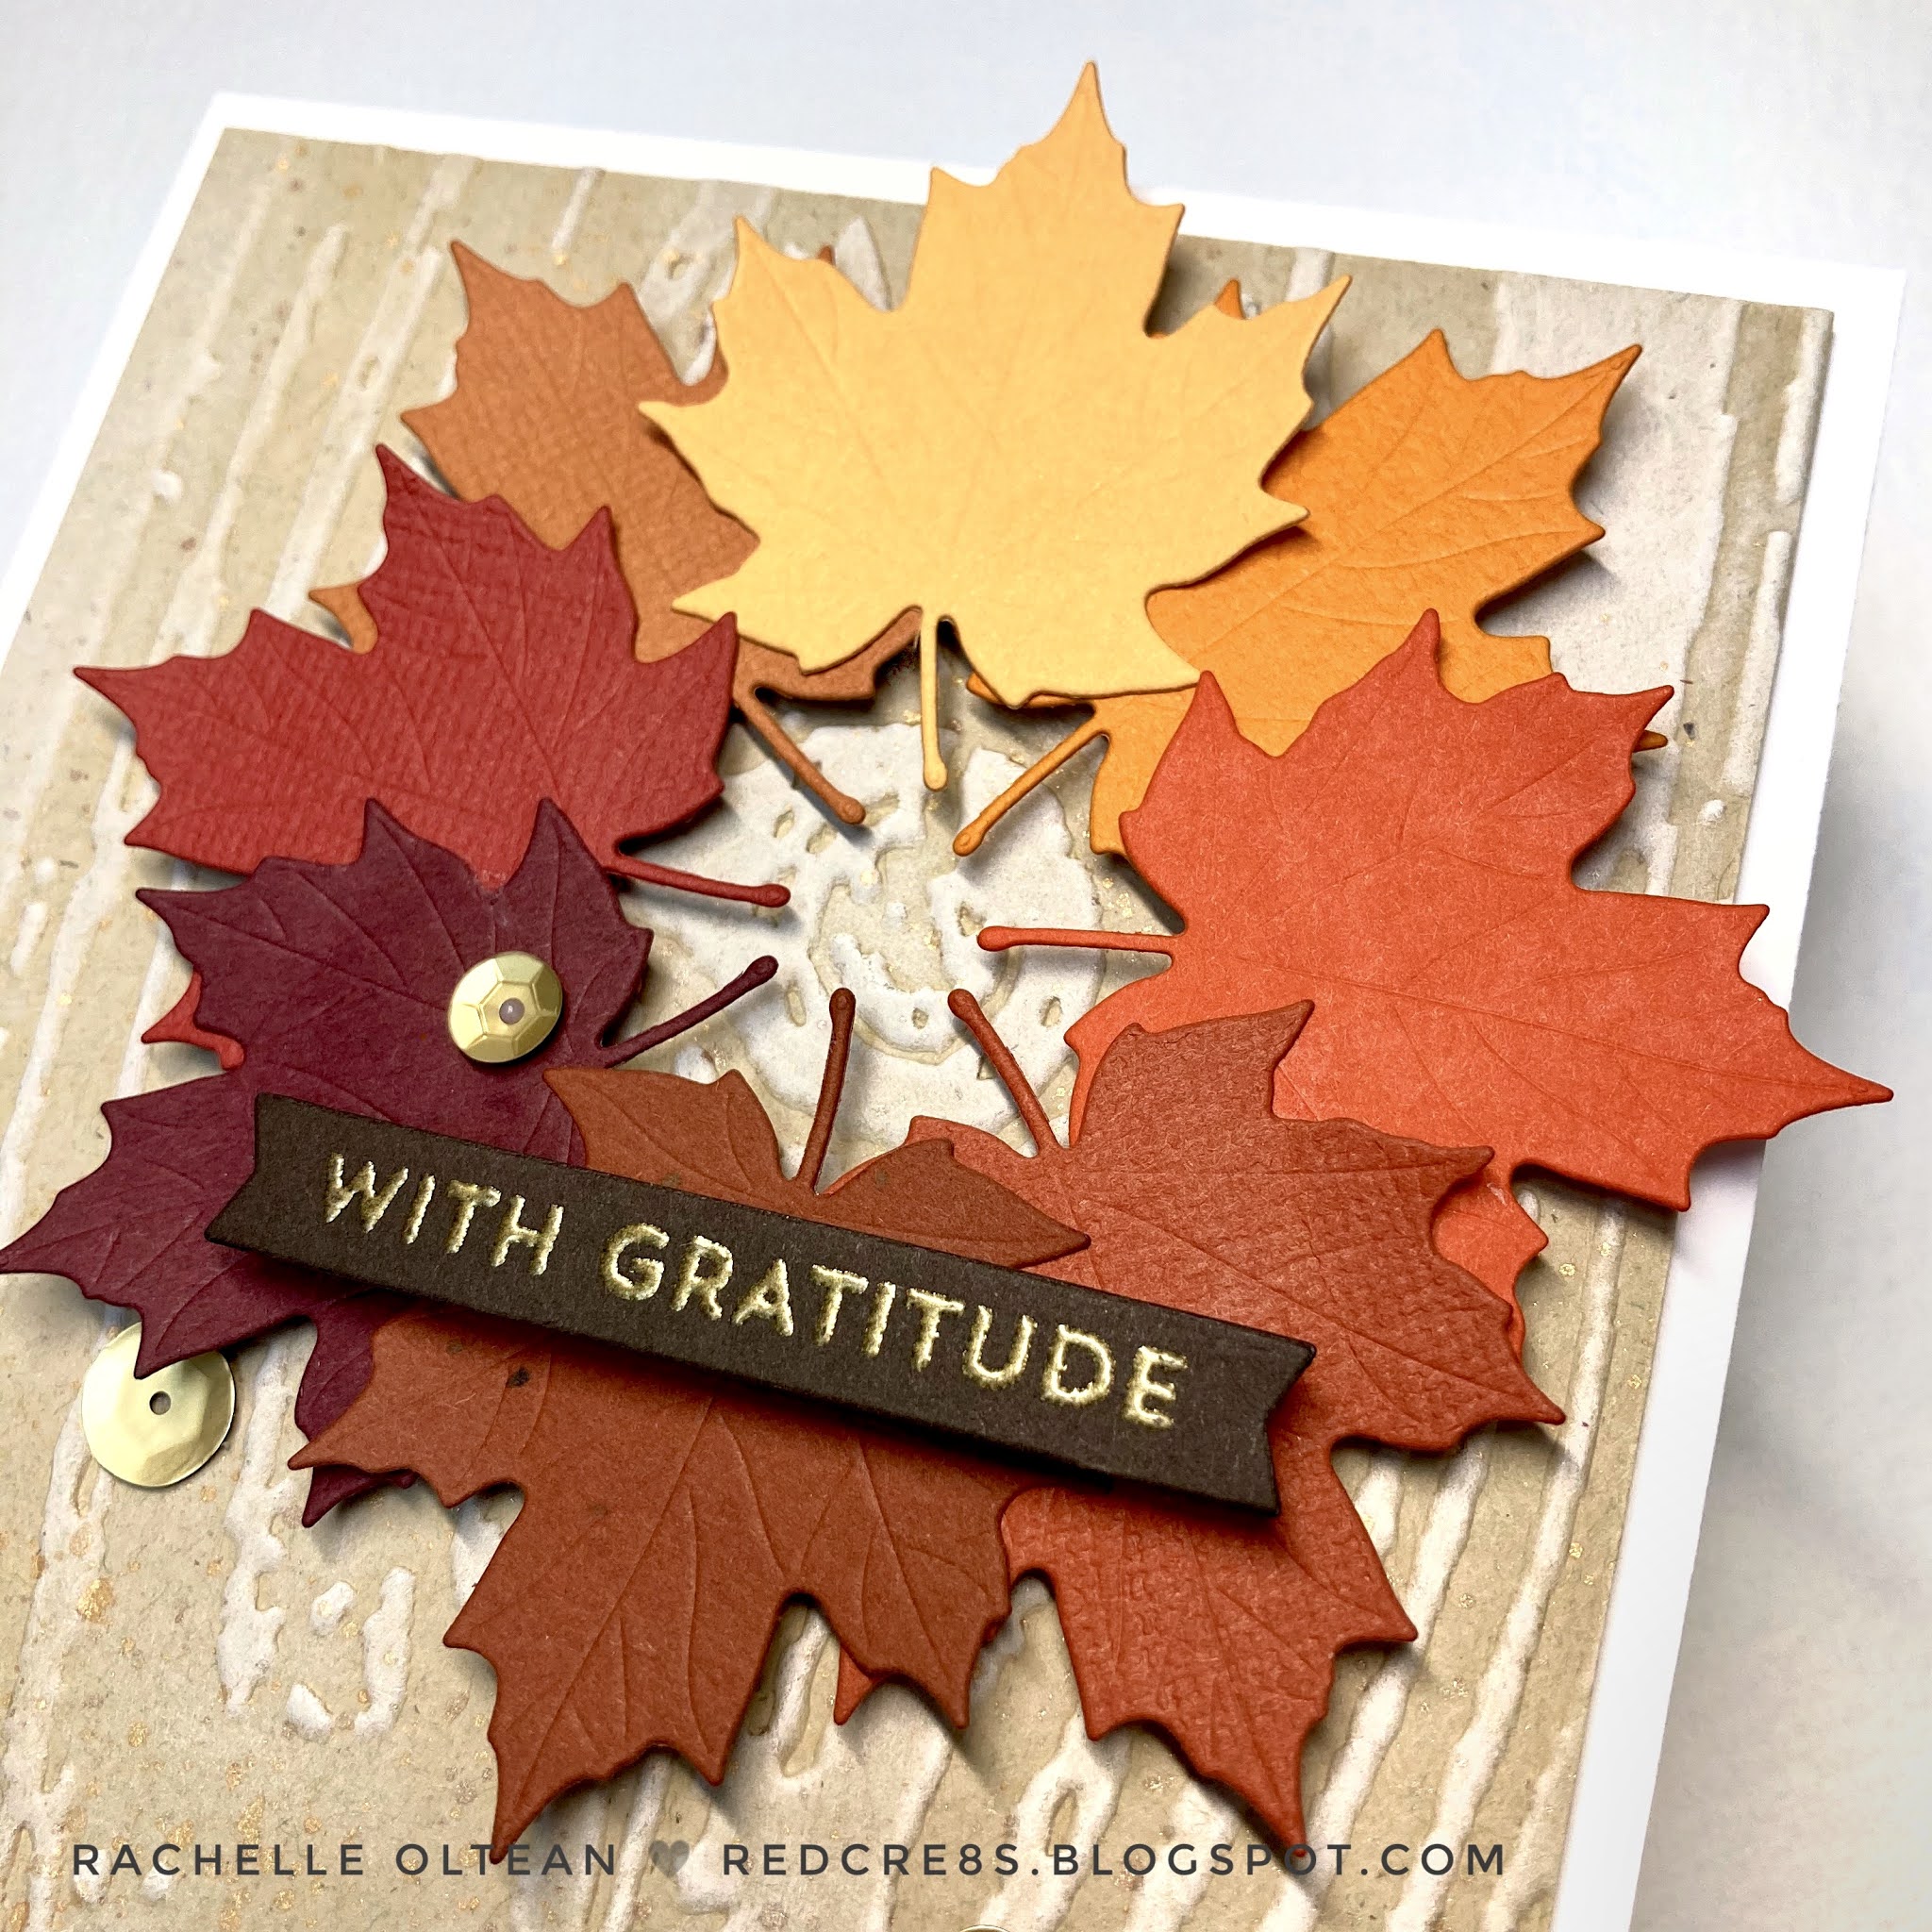
This CAS leaf wreath was created by die cutting a warm rainbow of maple leaves from assorted card stock and gluing them to a circular die cut. I created the woodgrain background by running a piece of Desert Storm card stock through an embossing folder and highlighting the top with white ink. The panel was spattered with copper paint and attached to the front of a top-folding A2 card base.


The wreath was popped onto the card front with foam squares and the heat-embossed sentiment strip/sequins were added on top to finish the card! We can't wait to see your "Autumn" projects over on the Sparkles Monthly Challenge!

Additional Challenges:


Thanks so much for joining me and for taking the time to comment!
Rachelle

Tuesday, September 15, 2020

Thanksgiving Card | Sparkles Monthly Challenge - “Shaped” Card


Hello!

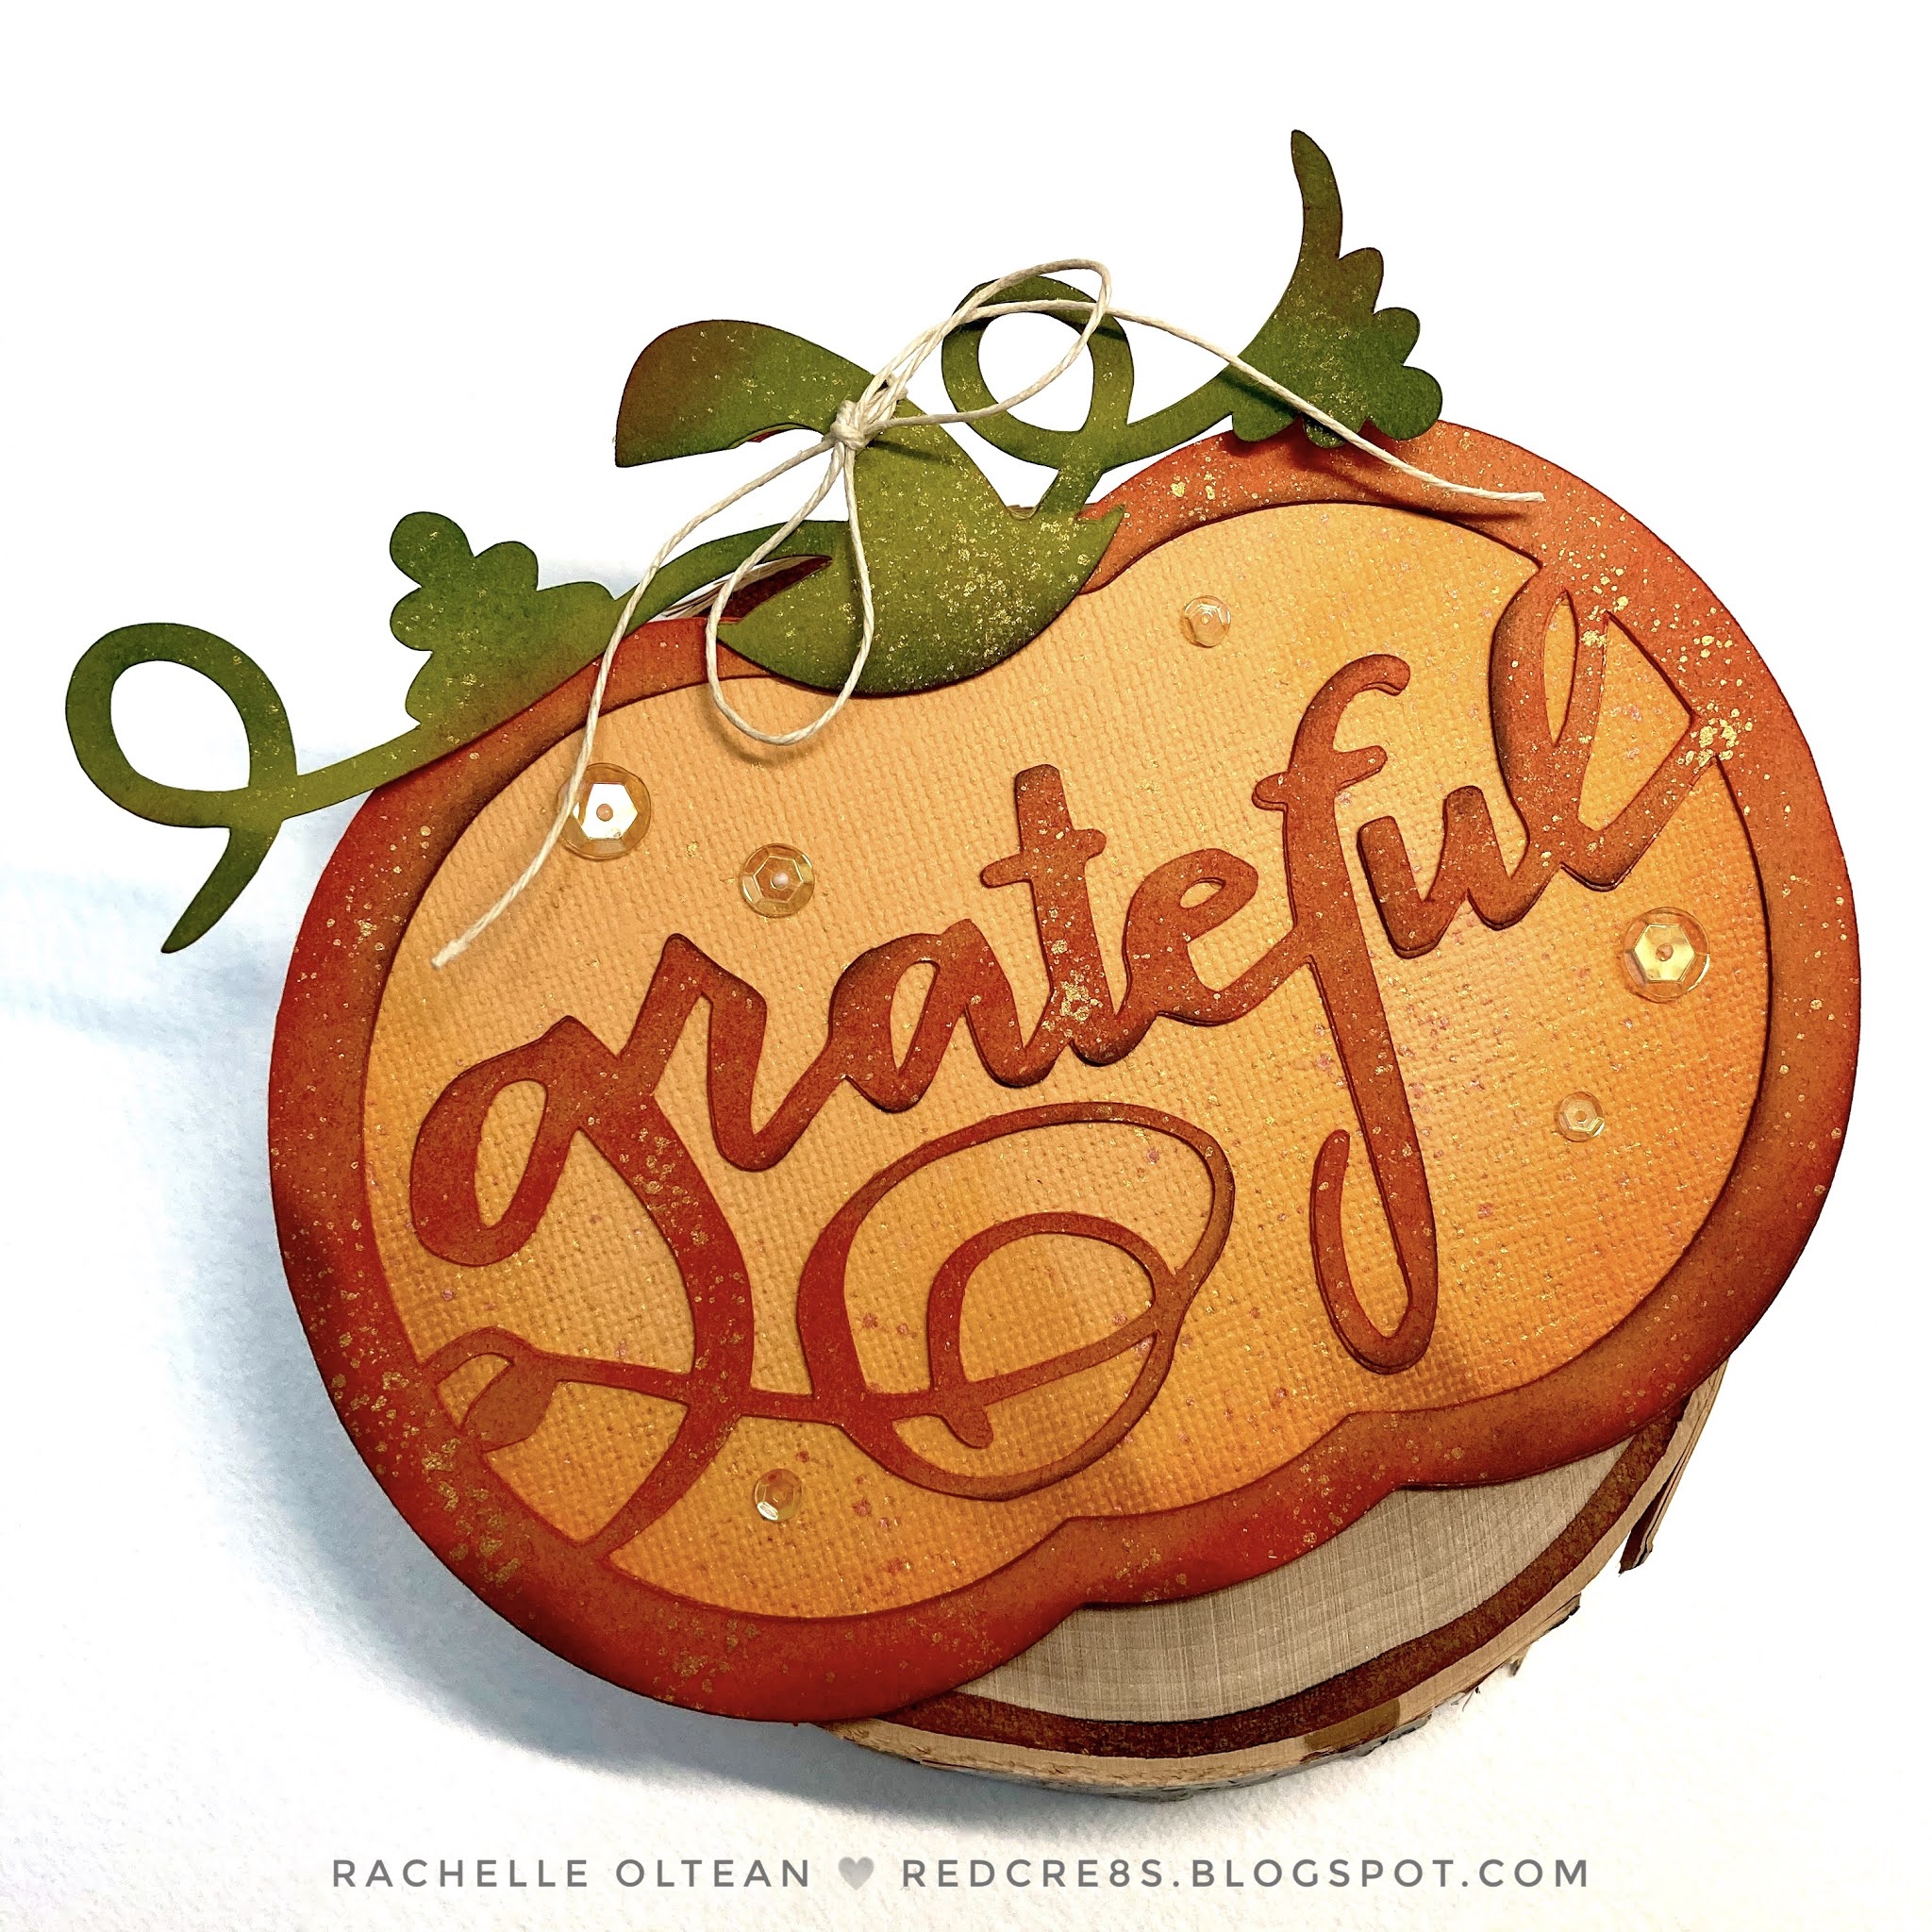
Our new theme at the Sparkles Monthly Challenge Blog is to create a shaped card and I decided to get a jump start on my Thanksgiving cards with this pretty pumpkin!

I created this image in the Cricut Design Space and die cut all of the pieces. After adding some ink blending, I assembled the card, tied a hemp bow around the stem and added some sequins to finish it up.  This project came together pretty quickly and will be great to mass produce before Christmas Cards take over my drawing table!

The Design Team has created some really wonderful inspiration and we can’t wait to see your shaped card designs over in our Sparkles GalleryThanks so much for stopping by!

Additional Challenges:


Rachelle

Saturday, August 15, 2020

All Occasion Card | Sparkles Monthly Challenge #131 - "Use At Least 3 Pattern Papers" | Paper Rose - "Cactus Quotes"


Hi!

We have a great new theme over on the Sparkles Monthly Challenge Blog - "Use At Least 3 Pattern Papers" in your project! This challenge was a bit tough for me because I don't use a lot of pattern paper and so I went looking for a bit of inspiration! I headed over to Julee Tilman's blog, "Poetic Artistry", and instantly fell for her latest Mojo Monday Sketch #543!


I pulled out my 6" x 6" paper packs and found a handful of patterns to mix-n-match for this layout. The papers were cut (per the sketch design) and adhered onto a top-folding A2 card base. I stamped/colored/die-cut the potted aloe plant from Paper Rose's "Cactus Quotes" and popped it up with foam tape for a bit of dimension. I added the tiny heat-embossed sentiment and a few iridescent jade sequins to finish up the card. 


I really ended up loving this sketch and already have several ideas for future cards using this great layout!  Thanks Julee!!! I often forget how much fun it is to use a sketch as my starting point because I'm usually so focused on some other challenge requirement! Thanks so much for stopping by and be sure to head over to the Sparkles Blog to see the inspiration from the Design Team!

Additional Challenges:


Thanks so much for joining me!
Rachelle

Wednesday, July 15, 2020

Birthday Card | Sparkles Monthly Challenge #130 - Red, White & Blue | Ellen Hutson/Julie Ebersole "Stay Salty"


Ahoy!

WOW - can you believe it's the middle of JULY already? Somehow that doesn't seem possible but here we are with our next challenge over on the Sparkles Monthly Blog! This month's theme is "Red, White & Blue" and I chose to go nautical with a great now-retired set from Ellen Hutson, Julie Ebersole's "Stay Salty." 

I die cut a white dotted panel, backed it with craft foam and glued it onto a top-folding A2 card base. The sail boat and clouds were stamped, colored and die cut. The bottom corners were rounded on the light blue ocean panel, the top was cut with a wave edge die and the waves/sentiment were stamped using the MISTI. I tied bakers twine around this panel and adhered it to the front with foam tape. The stamped images were glued into place and I added a few iridescent blue sequins to finish off the card. This card took much longer to design than it did to actually make so once I had the layout set, I went ahead and cranked out a few more to add to my birthday card stash! Does this ever happen to you? : ) 

We can't wait to see your Red, White & Blue creations over on the Sparkles Monthly Challenge this month!

Additional Challenges:


Thanks so much for stopping by and for all of your comments...they make my day!
Rachelle

Monday, June 15, 2020

Wedding Card | Sparkles Monthly Challenge - "Wedding" | Ellen Hutson - Hands Dies by Julie Ebersole

Hello Everyone!

We've got a very timely new challenge over on the Sparkles Monthly Blog..."Wedding!" and I decided to go with a pretty bride-focused design using one of my favorite die sets from Ellen Hutson,  Julie Ebersole's "Hands"! This versatile set features two pairs of hands-only dies and this well-manicured gal is just about to toss her wedding bouquet!

I scored a piece of rosy pink card stock every 1/2", trimmed that panel to size and cut out a center frame with a large stitched heart die. I also die cut a piece of heavy white card stock in the same way, glued these pieces together and backed this framed panel with a piece of craft foam. A piece of dark rose card stock was also glued to the front of a 6"x6" square card base.

The bouquet was watercolored and fussy cut to fit the smaller hand die. I made the scalloped edge sleeve by trimming a piece of die cut white card stock down to cover the arm underneath and added small pearls to the cuff. I painted the fingernails with pink pearlized watercolor, added a gem for the ring and adhered the dress sleeve to the arm/hand.


I glued the bouquet to the hand, added several layers of foam tape under both and adhered this to the dark rose base; the scored top panel was glued on top. The embossed sentiment strip was attached with foam tape and an assortment of pink sequins finished the design. There is so much depth created with this fairly simple imagery and it's so pretty for a contemporary bride! We can't wait to see your wedding-themed projects in our Sparkles Monthly Gallery!

Thanks so much for joining me and I really appreciate all of your comments!

Additional Challenges:


Rachelle

Friday, May 15, 2020

Birthday Card | Sparkles Monthly Challenge "Use a Real Stamp" - Lawn Fawn


Hola!

Sharing a festive bridge card card with you today that mixes Hero Arts, MFT Stamps and Lawn Fawn products together! I did some friendly bargaining with one of my neighbors and traded some homemade face masks for hand crafted birthday cards; this special creation was designed for her daughter! This is also my DT submission for the new challenge over on the Sparkles Monthly Blog - "Use a Real Stamp (Non-Digi)." 

Using a stencil, I ink-blended a large cloud panel with Salty Ocean DO Ink and spattered it with water. This card ended up being 5.5" x 7" and I trimmed the cloud panel to fit the 5 sides of my scored bridge card base and adhered them in place. I really like how this creates a continuous sky in this scene!

I colored two sets of Hero Arts' Tree Arch Fancy Die and glued stacked them together. Once I determined where I wanted my piñata to hang, I trimmed and scored the trees in order to fit inside. Similarly, I die cut/ ink blended two grassy border panels the scored them the same way to fit behind the trees to give me more dimension. I began the assembly by adhering the grassy panel in place inside the niche using strong two-sided tape and then added the trees in the same way. I LOVE the shadows and depth created by these trees!


The Lawn Fawn piñata was stamped/colored/die cut and hung from the tree with a piece of twine. I cut stitched Ric Rac strips using MFT Stamps' Die in colors to match my piñata and glued them together to create my bottom border. The ric rac band was reinforced by gluing it to a smaller piece of white card stock before adhering it to the card front. This really helped keep the card together since this is the pressure point necessary for stability. The sentiments and sequins were added to finish up the card. 

We can't wait to see your stamping skills over in our Sparkles Monthly Gallery!

Additional Challenges:


Thanks so much for taking the time to comment!
Rachelle

Wednesday, April 15, 2020

All Occasion Card | Ellen Hutson - Mondo Gerbera Daisy - Sparkles Monthly Challenge #127 "Spring Is In The Air"


Hi There! Time for some FLOWER POWER to celebrate spring!

We are finally getting over heavy pollen season here since most of the trees have leafed out and hopefully we can spend a bit more time outside now that the "golden haze" has dissipated a bit! I am so excited to announce that I will be joining the great design team over on the Sparkles Monthly Challenges Blog with his month’s theme: “Spring Is In The Air” and this Mondo Gerbera Daisy Stamp from Ellen Huston just feels like a burst of Spring to me!


I stamped the daisy onto 110# white cardstock with VersaFine Onyx Black Ink and heat embossed it with clear powder. The image was colored with water colors, spattered with diluted paints, and die cut using an A2 stitched rectangle die. This panel was adhered to a top-folding A2 card base.


Using Pinkfresh Studio's "Pretty Frame Set", I die cut four frames from white cardstock, separated just the skinny inner frame and glued/stacked these together. I added another ink-blended green frame on top, which gave me a dimensional accent window and I glued it into place over the flower. 

I stamped the sentiment using the MISTI and added a few sequins to finish the card. I can’t wait to get this out in the mail to spread a bit of springtime to someone in my family who lives up north - they got more snow over the weekend!

Challenges:

Creativ Fusion Arts & Crafts Blog #16 - Spring Flowers

The Paper Girls - #197 - Florals

Dragonfly Dreams - Add a Flower

Inspirational - #210 - Word Prompt: SPRING

Artistic Stamper - Creative Team Blog - April - In The Garden

Make My Monday Challenge #120 - Spring Flowers

The Flower Challenge #43 - Spring/Autumn

Thank you so much for joining me today and I hope that you stay safe and healthy!

Rachelle