Showing posts with label All Occasion. Show all posts

Thursday, June 27, 2024

All Occasion Card | Krafty Chicks Challenge #722 - "All Occasions" Week


Hello!

It's "All Occasions Week" at the Krafty Chicks Challenge and here's a colorful card that tells the recipient how wonderful they are! I think we could all use a card like this from time to time! I hope you will join us this week for some crafty fun!


This design started with the great neon sign image from an old Stampin' Up set that I watercolored in a primary palette and fussy cut. The yellow background was stenciled, trimmed and attached to a top-folding A2 card front. I die cut the comic window from royal blue card stock and attached it to the background; the sign was backed with foam tape for a bit of dimension and adhered to the card center. A few sequins, confetti and gold starts were added to finish up the design.

Please pop in and say "Hi" to the other Krafty Chicks and check our their awesome projects!

Thursday, June 20, 2024

All Occasion Card | Krafty Chicks Challenge #721 - CAS Week


Hey there!

It's everyone's favorite challenge week over at the Krafty Chicks Challenge - Clean & Simple!


This challenge can sometimes pose a problem for me but in this case, I dreamt about this design one night and then I woke up and created it with a little help from my favorite washi tape pattern! My hubby tells me I have crafting on the brain at all times and I think he might be right!

I stamped the Jeep image onto 130# white card stock and then watercolored\fussy cut it on the outside line. I brushed the outside edge with a black Sharpie marker to get rid of the white paper outline and covered the back completely with foam tape. I ran a line of the tire track washi tape at an angle on the front of a top-folding A2 card base, popped the Jeep in place along the top and stamped the sentiment using my MISTI. I was so happy with the way this design turned out and it's going to a very special older couple who actually still drive a convertible Jeep and because they both have beautiful white hair, their license plate reads..."Q-TIPS"!

I hope you will join us this week with your CAS creations and leave some love for the Krafty Chick Gals! 

Thanks for stopping by today and happy crafting!
Rachelle

Thursday, June 6, 2024

All Occasion Card | Krafty Chicks Challenge #719 - Stamps Week


Hello!

It's "Stamps" Week over at the Krafty Chicks Challenge and I hope you will join us with your wonderful stamped (Digital or Inked) creations!


I chose to use a couple of digital stamps from Graciellie Designs for this sunny, summery design! I sized the separate images to fit an A7 card front, printed it out on 110# white card stock and watercolored the image. The image was trimmed down to 4.75" x 6.75" and attached to a dark yellow panel, which was then glued to the A7 card base. I added a die cut word sentiment and a spattering of sequins to finish up the card.

We would love to have you share your stamped projects with us this week and be sure to visit the Krafty Chicks to see their wonderful creations and say 'Hello!"

The KRAFTY CHICKS!

Rachelle

Thursday, May 30, 2024

All Occasion Card | Krafty Chicks Challenge #718 - Anything Goes


Hello!

We're back this week over at the Krafty Chicks Challenge with week 5 and that means "ANYTHING GOES"! Today I've got a mixed media card that features some vintage-inspired washi tape, hand stitching with beadwork and some antique buttons from my grandmother's sewing drawer!

I covered a piece of 130# white cardstock with strips of washi tape, aligning them right next to each other to cover the panel, and then attached a piece of skinny cotton lace to cover one of the seams. I added some stitching and beads to the lace and a bit more to a strip below, matching the colors to the washi tape.

The antique dress form image was stamped onto kraft card stock and the edges were inked. I cut the image down to fit a skinny tag, distressed the edges with sand paper and attached a peachy silk ribbon to the top. The collage images and sentiment were stamped with similar colors and distressed to coordinate. 

The tag was popped up with foam tape and attached to the washi tape panel. I added the collage pieces, buttons and bobby pin to finish off the front panel, which was then attached to a black card base.

Please join us this week with our Anything Goes Theme and share some love with the Krafty Chicks!

Rachelle 

Thursday, May 16, 2024

All Occasion Card | Krafty Chicks Challenge #716 CAS


Hello!

I've got a CAS shaker card for the #716 Krafty Chicks Challenge this week! CAS designs can be challenging for someone who likes to color like me but this great word die from MFT made it easy peasy! I created a mixed media background using Brushos Powders and watercolors in lots of different blues and set is aside to dry under a stack of heavy books!

I glued two panels of 130# white card stock together and die cut the word towards the top center; this panel was then cut down to 3.75" x 5". I adhered the blue background to the front of a top-folding A2 card front to fit underneath the shaker panel. An acetate window was attached to the omit panel and backed with a double layer of craft foam. The exposed edges of the foam were brushed with anti-static powder and the skater bits were piled onto the front. I attached the front panel over the embellishments and glued the word into the window to finish up the design!

I hope you will join us over the Krafty Chicks Challenge this week with your own CAS creations! 

The KRAFTY CHICKS!

Sunday, January 7, 2024

All Occasion Card | Graciellie Design - “At The Right Time” Digital Stamp Set


Yippee!

After an 11-week hiatus due to rotator cuff surgery recovery, I was finally able to head back to my drawing table! It’s about time - and this card is the perfect way to kick start the New Year using the beautiful clock image from Graciellie Design’s “At The Right Time” Digi Stamp Set! 

I cropped the main clock image to fit an A2-sized card, added the scripty background (from the “Vintage Papers” Set) and printed the design on 110# white card stock. I blended Distress Oxides onto the script background and spritzed the panel with shimmer mist. The image was watercolored and spattered with gold paints.

The image was trimmed to 4” x 5.25” and adhered to a black background panel; this finished piece was attached to a top-folding A2 card base. I added a scattering of opal sequins to complete the card! 

Thanks so much for joining me today and happy crafting!

Rachelle

CHALLENGES:

Crafty Calendar Challenge - January - AG

Krafty Chicks Challenge #697 - Stamps

Little Red Wagon Challenge #737 - What’s New? New Digi Stamp Set!

Saturday, July 22, 2023

All Occasion Card | Graciellie Design - "Vintage Peony 2" Digital Stamp Set | Guest Designer


Hello!

Here's a "Pretty In Peach" Shaker Card featuring Gracie's NEW Vintage Peony 2 Stamp Set! I really love this amazing release full of these well-drawn images! 


I loosely watercolored the background image and spattered it with pearlized paint. The panel was trimmed and mounted to a black card base - but I didn't stop there! I die cut three decorative frames, glued them together and adhered an acetate panel to the back. Skinny strips of foam tape were adhered behind the frame, shaker bits were piled onto the center of the card front and the acetate window was pressed into place on top. 


The word sentiment is from an older Graciellie set which was printed, die cut and adhered into place with strong two-sided tape. I think there are at least fifty ways to color these beautiful images and I'm just getting started! 

Thanks so much for joining me today and happy crafting!
Rachelle

Friday, July 7, 2023

Birthday Card | Graciellie Design - Vintage Peonies | Guest Designer


Hello and happy Friday!

I'm excited to say that I've been invited back to join the Graciellie Design Team as a guest designer for the month of July! I'm doubly excited because the images include lots of peonies, which happen to be one of my favorite spring flowers! My grandma always had peonies growing near her fence by the railroad and I remember smelling them as a small child and getting a nose full of black ants! They do love the sweet nectar of the peony flowers! My first card this month is using the main flower cluster from the NEW "Vintage Peonies" Digital Stamp Set. This gorgeous set features so many wonderful images and I really like the word pairings on the sentiments!


I always start by designing the layout in a PowerPoint presentation; this allows me to get the sizing right on all of the elements and play with the placement! Once I get a rough design of something I like, I copy that image onto a separate slide and print it on 100# white card stock. This is an A7 (5" x 7") card base and so the main floral is pretty large, which made it super easy (and fun) to watercolor. 


I fussy cut the finished floral and set it aside. Next I created a mixed media background starting with two of my Brushos Colour Crystals. I taped a piece of the same 100# white card stock onto a heat-resistant cutting board with painter's tape and wet down the surface thoroughly with water. Then the page was dusted with just a bit of the Crimson powder and sprayed with Shimmer Mist. I let the color bleed all over the sheet and dabbed the excess runoff with a paper towel. I added a bit of the Leaf Green Powder around the edge using this same technique. When I got the coverage I liked, I used my heat gun to dry the sheet on the cutting board. The panel was spattered with gold and opaque white paint and dried again with the heat gun. 

After the surface was dry, I used Hero Arts' Unicorn White Ink and randomly stenciled a pattern onto the background to add a bit of texture. This softened the overall intensity of the color and added some extra interest. I cut my favorite part of the panel to fit the card front and adhered it into place. Several sentiments were printed in different sizes and die cut. Then I played with the placement of the design elements and added a vellum leaf die cut behind the peonies. Once the layout was figured out, everything was attached in place and I added a few sequins to finish up the card!


I can honestly say that this is one of my favorite floral cards I've ever made and it's going to my Great Aunt Phoebe for her 98th birthday! The new peony cluster is so beautifully drawn and I really like the accompanying sentiments. The rest of this July's Digi Releases are equally fantastic so be sure to head over to Gracie's Shop for all of the details!

Thanks so much for joining me today and happy crafting!
Rachelle

CHALLENGES:


Tuesday, November 16, 2021

All Occasion Card | Picket Fence Studios - "Slim Line Blending Roses" Stencil

Hello!

Today's project uses a great stencil from the new release, "Slim Line Blending Roses" Stencil. The roses in this stencil can be colored so many different ways and it literally took me 10 minutes to ink this image up! This card was born out of necessity because the pressure pins on my 15-year old die cutting machine cracked off while I was working on another design and so without a way to die cut, I had to come up with another approach! : )


I ink blended the rose diagonally across an A2 panel with Distress Oxides, selectively cut through the image with my craft knife and fussy cut around the left side of the rose. The panel was backed with craft foam and the sentiment (from the "Songbirds" Stamp Set)  was stamped using the MISTI.


I ink blended the pattern from the "Slim Line Basket Petals" Stencil onto an A2 card front with some of the same Distress Oxides, sprayed it with water and dabbed it dry. After laying the rose panel on top, I determined the area of the stencil pattern that would be visible and then added gems (from the NEW "Celebration" Gem Mix) into the petal centers; the rose panel was adhered into place with liquid adhesive to finish the card. This gem mix is so pretty will go with a lot of my floral cards - here's a close up of the colors!

CHALLENGES:

The Creative Crafters Challenge #46 - AG

Daisy Chain Challenge - #58 - Add Sparkle

Crafter's Castle - November #47 - AG

Time Out Challenges #200 - Precious

Thanks so much for stopping by today and happy crafting!

Hugs - Rachelle

Sunday, November 14, 2021

All Occasion Card | Picket Fence Studios - "Aquarius Girl"


Hello!

It's the 14th and that means it's release day at Picket Fence Studios! I'm sharing a card created with the NEW Horoscope Girl: "Aquarius." Even though she's a child of the air, she reminded me of a mermaid so I went with an ocean color palette! Here's what the stamp set looks like - isn't she beautiful?

The background panel was ink blended with Distress Oxides (Salvage Patina, Salty Ocean and Prize Ribbon), sprayed with water, and spattered with gold metallic paint and diluted inks. This panel was die cut and adhered to a top-folding A2 card base. The sentiment (Word Die Topper Subtitles) was heat embossed with gold powder.


The Aquarius Girl was stamped with Picket Fence Studios' Black Hybrid Ink, watercolored and fussy cut. I die cut a circular frame and coated it with a mix of "Snow Drifts" and "Lime Christmas Green" Paper Glitz. When the frame was dry, it was glued/stacked onto two additional frames for strength and dimension. The Aquarius Girl was slipped into the circle and attached on the back side with adhesive.


The main image/frame was attached to the card front with liquid adhesive to finish the design! I was really happy with the bright coloration and the way she is framed in that sparkling circle! There are so many great new products in this month's release and I hope you'll head over to the PFS Shop to check them out!

Thanks so much for stopping by today and enjoy the rest of your weekend!
Hugs - Rachelle

Wednesday, November 3, 2021

All Occasion Card | Picket Fence Studios - "Watercolor Roses"


Happy Wednesday!

I've got a rich floral card to share featuring the NEW "Watercolor Roses" Stamp Set! This set has already become a favorite and can be used for so many different occasions!

I began by heat embossing the rose bouquet image with gold powder onto heavy (130#) white card stock and I watercolored/die cut the floral with the matching die. 


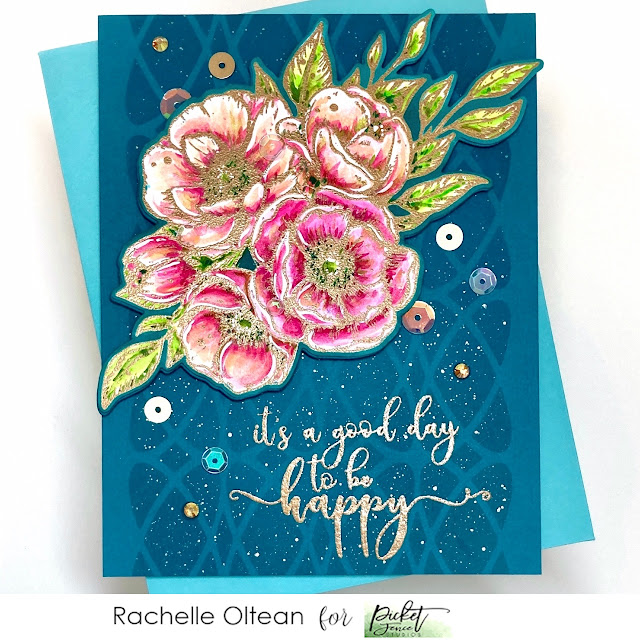
I LOVE Art Nouveau design and was so excited to see the NEW Slim Line Changes Stencil! The curved line work on this design is absolutely beautiful and is a special addition to my Picket Fence Studios' stencil collection! I placed the slim line stencil down the middle of an A2 card base and applied "Peacock Feathers" Distress Ink onto the teal card stock with my "Life Changing Blender Brush." I really like the framing effect this slim line pattern gives to this A2-sized panel! I left the stencil in place and flecked gold watercolor paint on top so that the speckle would only be visible within the stenciled pattern. Once the panel was dry, I glued it to a top-folding A2 card base and heat embossed one of the wonderful sentiments from this stamp set with the same gold powder onto the teal finished background.


I added a couple of drops of my "Peacock Feathers" Reinker to a plastic palette and carefully painted around the edge of the white die cut margin so that the floral would blend into the teal background. This keeps the color on the roses bright and clean (with white highlights) but removes the harsh contrast of the white edge against the dark card stock. I popped the roses up with foam tape for a bit of dimension and added a mixture of embellishments in coordinating colors: "Iridescent Moonshine" Sequins"Sands Of Time" Gem Mix, and the matte gold circle sequins from the "Pumpkin Cookies Sequin Mix Plus."

Thanks so much for stopping by today! Take care and happy crafting!
Hugs - Rachelle

Saturday, October 30, 2021

All Occasion Card | Picket Fence Studios - "Iconic Beauty Sara" Stamp Set

Hello!

I created a mixed media piece featuring this beautiful new image from the "Iconic Beauty Sara" Stamp Set. Sara is somewhat abstract and so I thought she would fit right into a heavily textured background. I began by applying ink washes directly onto a page from an old French book and spattering it with pearlized paints. I stamped Sara onto the bottom right corner allowing the image to bleed off the page.  

Iconic Beauty Sara


I then went back into the page with additional ink blending using the NEW Slim Line Changes Stencil to add pattern around the image. Several areas were highlighted with white color washes and details added to her hair/face. I also painted lots of small highlights/patterns with gold paint and went back into the black ink with a fine-tipped permanent marker to add hashmark textures to soften the edges.


I added just a bit of the "Black Rainbow" Paper Glitz to her hair for a bit of depth and shine and stamped the sentiment (from this same set) on top using my MISTI. The panel was trimmed down to 4" x 5.25" and attached to a top-folding A2 black card base. I added some of the iridescent sequins from the "Midnight Tales Sequin Mix Plus" to finish up the card. I love these sequins because they look blue from one angle and gold from another - a perfect match for this palette!


Thanks so much for stopping by today and I hope you enjoy the rest of your weekend!

Happy crafting!
Hugs - Rachelle

Tuesday, October 26, 2021

All Occasion Card | Picket Fence Studios - "Watercolor Roses" & "I Love You" Word Die


Hello!

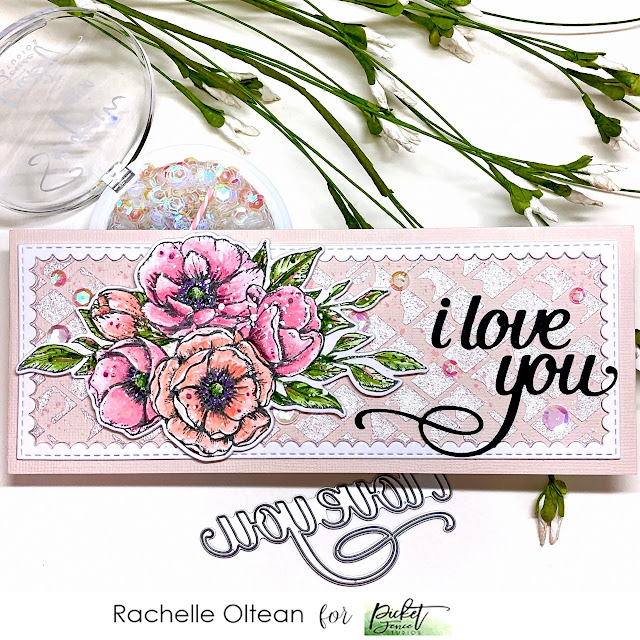
I've got a soft floral card to share with you today featuring this lovely new stamp set, "Watercolor Roses" from Picket Fence Studios! I wanted to try a pale blush background and top it with coral/pink roses - this is not a go-to color palette for me but I'm trying to stretch myself a bit to try some different color combos!

Here are some of the products I used:


Slim Line Stitched & Scalloped Rectangles and Alpha Die Cutting System

The watercolor roses were stamped, water colored and die cut. I die cut the stitched scalloped rectangle from a pale blush card stock and applied a light coat of Paper Glaze Lux Color "A" from the Nutcracker Ballet Ombre Set through the Slim Line Plaid One Stencil onto the center panel and I spattered it with a bit of watercolor; this added a wonderful pearly texture to my background!

Once this panel was dry, I reassembled the scalloped rectangle onto the front of a slim line card base, adding a white die cut frame on top for a bit of dimension. The scripty word sentiment was die cut twice and glued/stacked together. The floral bouquet was popped on top with foam tape and the words were glued into place. I finished the card with an assortment of sequins from the "Birthday Candles Sequins Mix Plus" - this is an amazing mix of pastel candies, pink-ish iridescent sequins and striped birthday candles!


Thank you for taking the time to stop by today and please take care!
Happy crafting!
Hugs - Rachelle

Tuesday, August 3, 2021

All Occasion Card | Pink & Main - "Big Hello" Die Set


Hello!

Today I’ve got a shiny butterfly card I created for a special friend with a sparkly personality! I combined some of my favorite recent products - the “Butterfly Sketches” Stamp/Die Set and the “Stained Glass” Stencil with the NEW “Big Hello” Die Set.

I started by ink blending a panel with “Worn Lipstick” and “Picked Raspberry" Distress Oxide Inks. I then used glitter paste to create this gorgeous pattern with the stencil - the moisture of the paste reacted with the DOI’s and created small areas of shadows that add so much dimension! I can’t wait to try this product combination again! The inked panel was die cut with a “Layered A2 Rectangle Die” measuring 3.75” x 5” and attached to an A2-sized card front.  

I die cut the word only from the NEW “Big Hello” Die Set twice from heavy black card stock and glued/stacked them together; another silver glitter paper die cut (from the Metallics Glitter Paper Pack) was attached on top and the word was glued to the stenciled panel. I added the silver heat embossed butterfly and a few of the “Essential Pearls” to finish up this card!

Thanks so much for joining me and I hope you have a wonderful day!
Rachelle 

Thursday, July 29, 2021

All Occasion Card | Pink & Main - Scrapbook & Cards Today Blog - "Be A Mermaid


 Hello!

I'm so excited to be up on the Scrapbook and Cards Today Blog with a special inspiration project featuring the "Be A Mermaid" Stamp/Die Sets from Pink & Main's June Release! These adorable mermaids (and their underwater companions) are beautifully drawn and a perfect match for the punny sentiments! I've got lots of great crafty tips for card construction over on the SCT Blog Post so be sure to check it out!


I kept the card front simple since the star of this design takes place inside and the softly ink blended A2-sized sky is a nice counterpoint to the ink smooshed, embossed ("Catch A Wave" Embossing Folderpanel! However, I did add just a bit of bling with the gorgeous "Vitamin Sea" Glitter Enamel Dots!


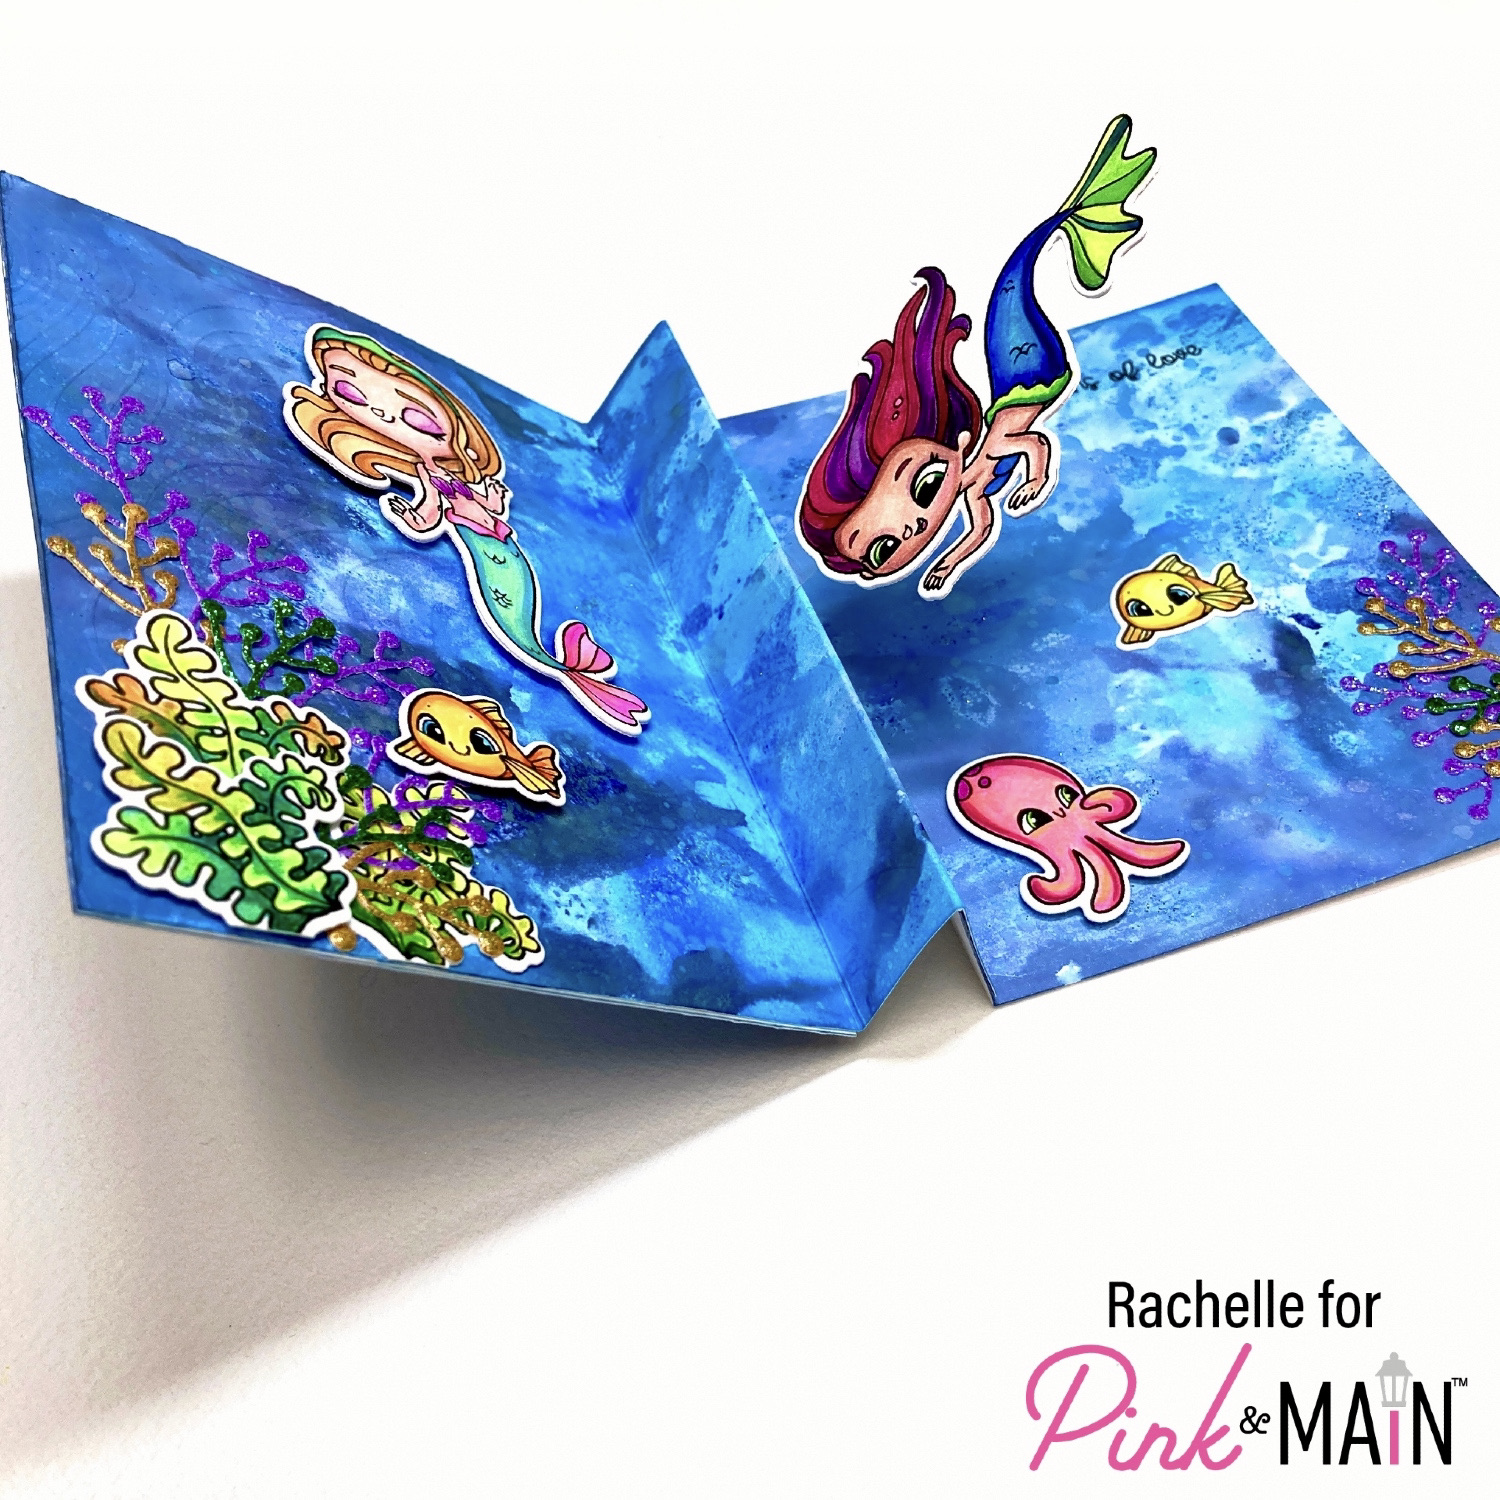
The interactive design on the inside is very simple and uses a 1" mountain fold in the middle, which gives you a spot to attach images with an acetate strip - like the mermaid on the right! Here are the measurements for the inside panel:

I stamped, watercolored and die cut all of the images. To add just a bit more texture to the underwater scene, I created additional aquatic plants with glitter paper using the berry stem die from the "Wreath Base 2 Die Set". I layered these die cuts pieces in with the sea kelp images to create my ocean garden and then adhered my other images in place! I stamped the sentiment using the MISTI and added the swimming mermaid to the left side of the mountain fold with a small strip of acetate. I love how it really looks like she's swimming in the water! All that was left was to attach the card front onto this interior piece to finish things up! Here's a good view which shows the way the mountain fold works and this card looks great standing upright on display!


Be sure to head over to the Scrapbook & Cards Today Blog Post for lots of additional tips and tricks for this card! Thanks so much for stopping by!

Challenges:


Happy crafting and have a great day!
Rachelle

Tuesday, July 27, 2021

All Occasion Card | Pink & Main - "Sweet Greetings" & "You"


Hello!

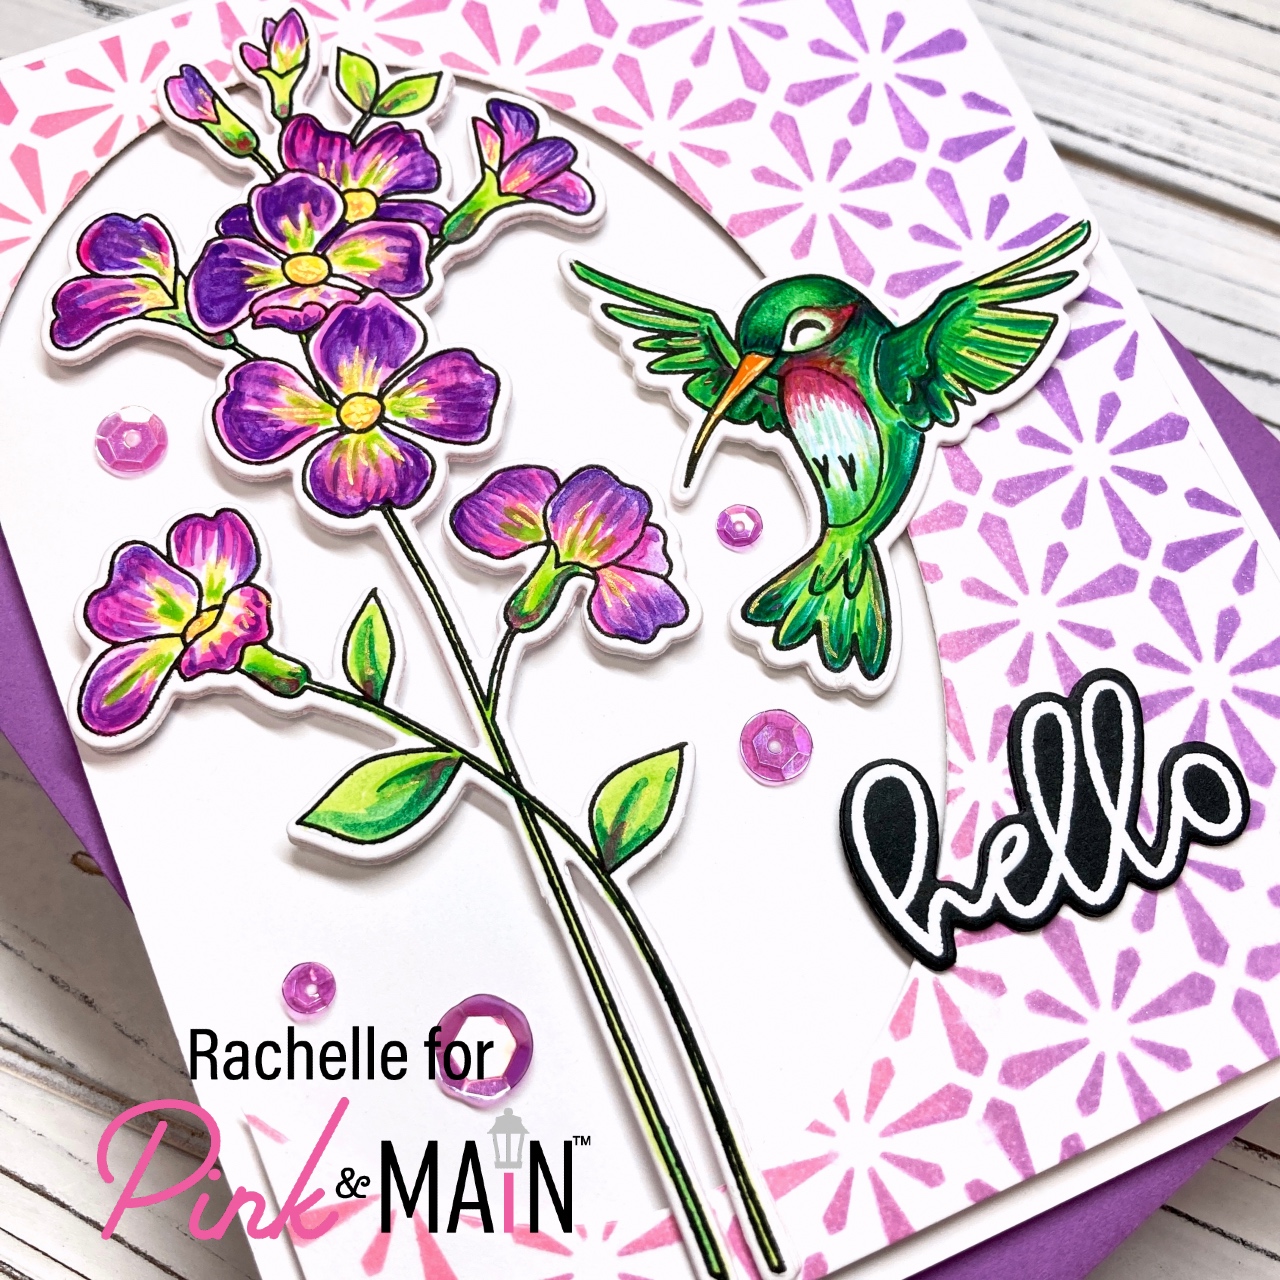
I am lucky enough to have a hummingbird feeder right outside the window of our home office and it’s the busiest spot in the yard! There are literally dozens of ruby throated beauties feeding all day long and this bright card features one of the wonderful hummingbird images from the NEW “Sweet Greetings” Stamp Set.

I stamped, colored and die cut the bird and the large floral stem from the NEW "You" Stamp Set. I heat embossed and die cut the word sentiment from the "Cherry Blossom" Set on black card stock.


Using the "Stained Glass" Stencil, I inked a panel (measuring 4" x 5.25") with "Worn Lipstick" and "Wilted Violet" Distress Oxide Inks; a large oval (from the Layered Oval Die Set) was cut on the left side to create a window. This panel was backed with a layer of heavy chip board (a recycled Cheerios box) and attached to the front of a top-folding A2 card base. The floral stem, hummingbird and sentiment were adhered in place with foam tape/liquid adhesive and a handful of sequins finished up the card.


Here are the two new stamp sets that I used on this card - they work perfectly together and I love all of the great sentiments!


Thanks so much for stopping by and for all of the encouraging comments! Take care!

Challenges:


Love To Craft #59 - Anything Goes


Happy crafting and have a wonderful day!
Rachelle