Showing posts with label Mother's/Father's Day. Show all posts

Friday, April 9, 2021

Mother's Day Card | Graciellie Design - "You Go Girl"


Happy Friday!

It's Release Day at Graciellie Design and she's got another wonderful floral set ready to go just in time for Mother's Day...or any other day for that matter! I really like all of the sentiments in this digi set and these floral elements could be used for so many different kinds of cards!


I printed the image on watercolor paper and taped it to my heat proof cutting board. The image and background were painted with Altenew Watercolors and spattered with metallic paints. Once dry, I trimmed it to fit an A7-sized card front.

I wanted to try something a bit different with this card so I added some hand-beading and stitching. Using gold thread, I stitched small gold seed beads into the center of each flower and added a running stitch to accent the linework in the leaves. I also stitched the sequins in place by using the same beads. You can see the stitch details in the close-up photo above - it really adds dimension and a tactile quality to the card!


This color palette is a bit different for me and I'm please with the way it turned out! I hope you'll head over to Gracie's IG Page to check out all of the wonderful DT projects posting this weekend as she showcases this beautiful new set! Thanks so much and have a wonderful weekend!

Challenge Submissions:


Take care and stay safe! Rachelle

Sunday, June 21, 2020

Father's Day | Stampin' Up - "Whiskey Business"


Happy Father's Day!

I'm sharing the card I sent to my 95-year-old Father-In-Law this week! He still has a Highball nearly everyday and enjoys good whiskey so this great new set from Stampin' Up! was perfect for him!

I wanted to keep this layout CAS and so the images were stamped, watercolored and fussy cut; a generous coating of Wink of Stella shimmer was added to highlight the glass reflections. I die cut a strip of kraft paper as my table/base and adhered it to the bottom of the front panel. Once I determined the image placement, I drew the edge of the decanter onto the drinking glass to make this scene appear more realistic/translucent. The sentiment was stamped and the images were glued in place. I added some clear Raindrops as my only embellishment - they really looked like little water beads on the glass...so cool! Thanks so much for stopping by! 

Challenges:


Thank you so much for taking the time to comment!
Rachelle

Tuesday, June 9, 2020

Father's Day | Stampin' Up - "A Good Man"


Hello!

Today I am sharing the CAS Father's Day card I made for my dad this year. Even today, I still call him "Daddy" and because of him this sentiment is true. This stamp set, "A Good Man" from Stampin' Up, has some wonderful images/sentiments and this particular drawing reminds me of an old photo with my dad.

The image and sentiment were stamped onto an A2 panel that had been cut with a stitched rectangle die. I loosely watercolored the image and adhered it to a top-folding card base. I die cut several skinny rectangular frames and glued/stacked them together. This dimensional frame was then glued onto the front to finish the card.

Challenges:


Thanks so much for joining me and I really appreciate all of your comments.
Rachelle

Saturday, June 15, 2019

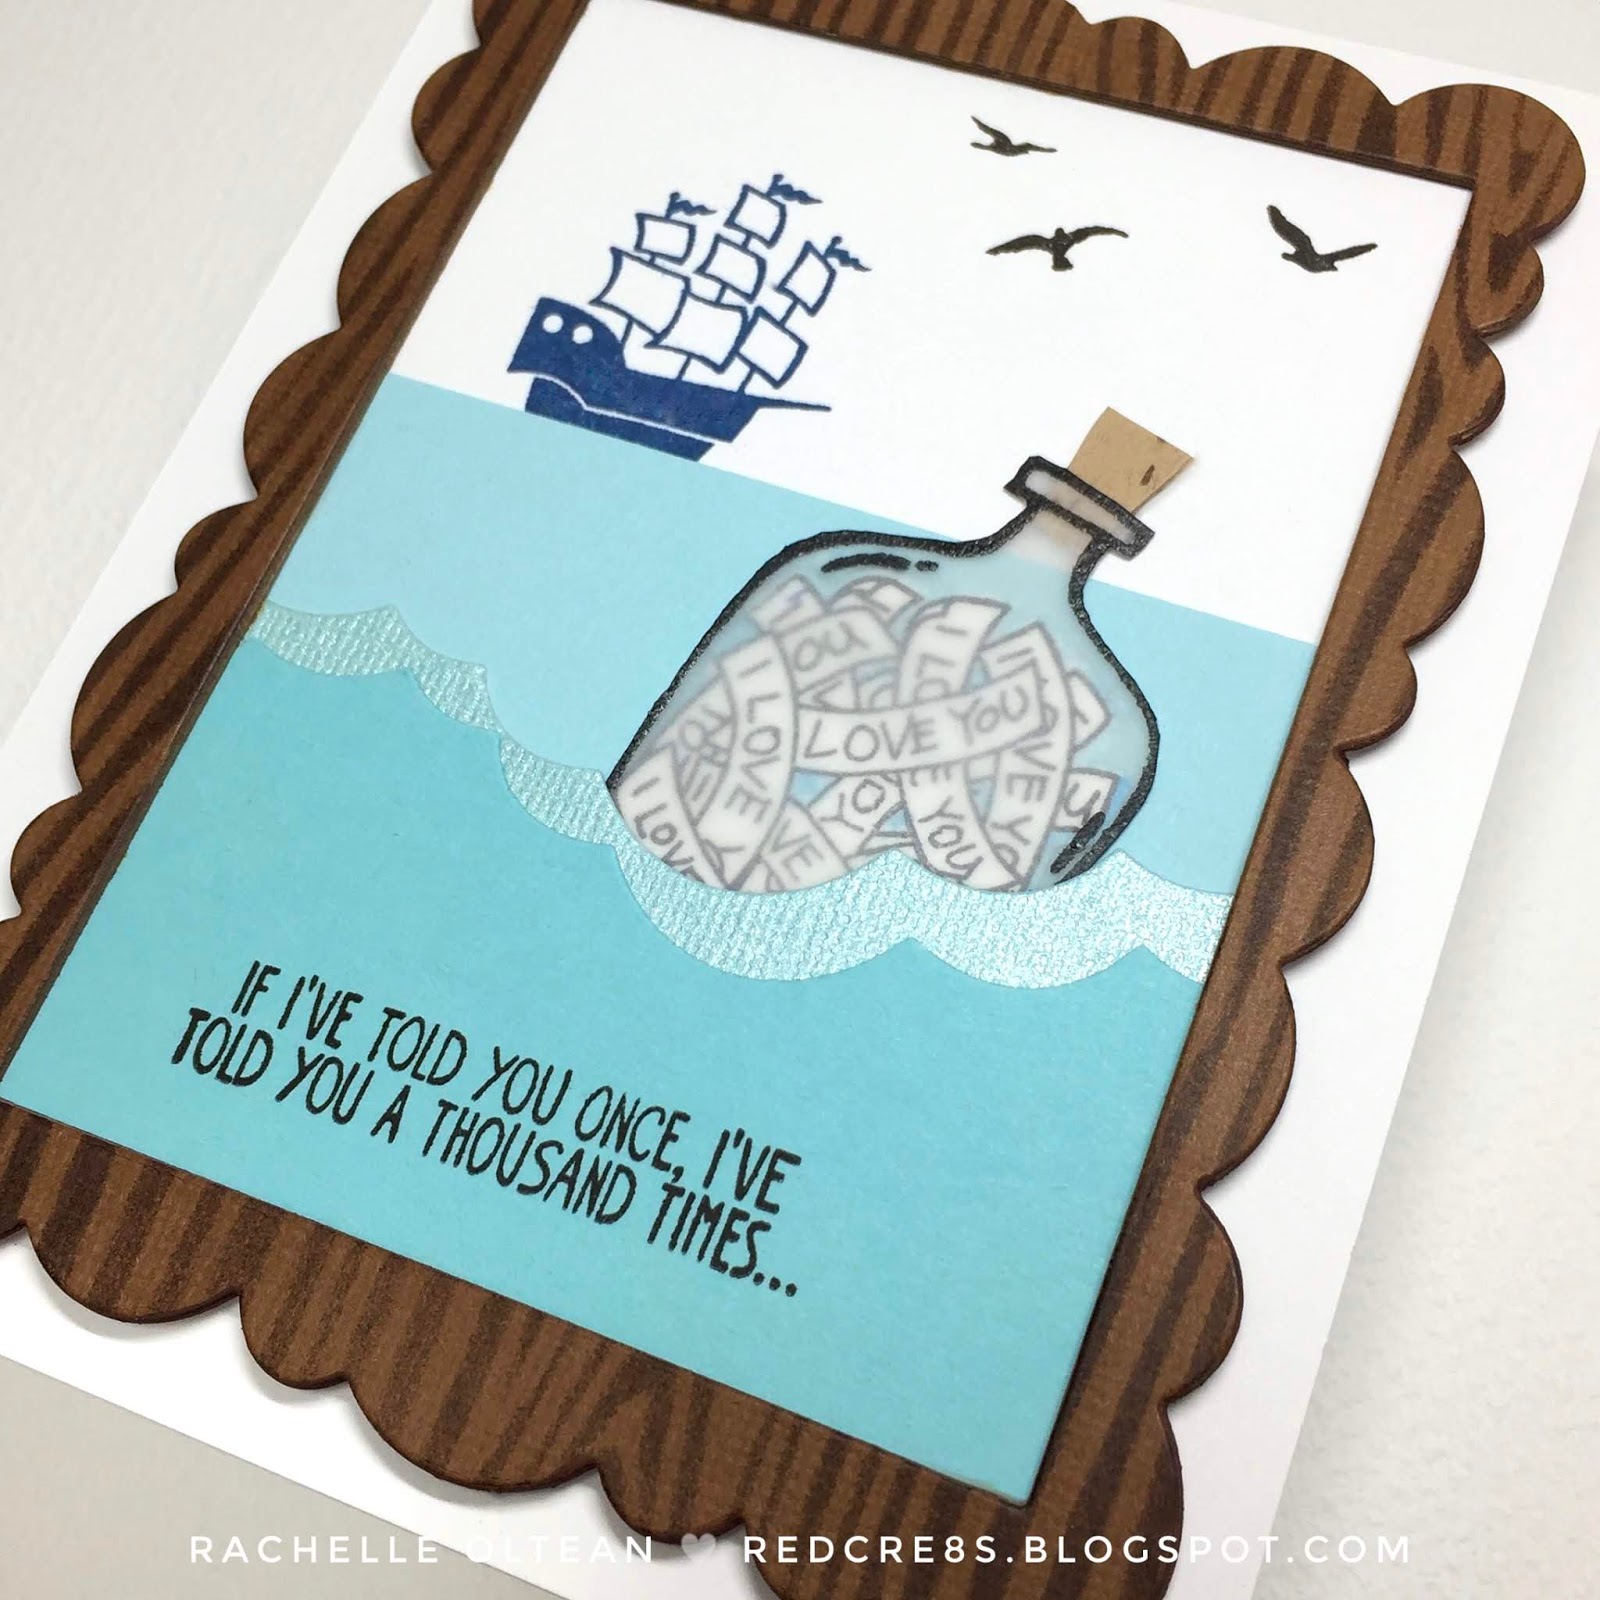
Father's Day Card | Stampin' Up - Message in A Bottle


Ahoy!

I'm sharing a Father's Day Card today that features a nautical-themed stamp set from Stampin' Up, "Message In A Bottle." I used Hero Arts' Woodgrain Stencil and blended Espresso Distress Oxide Ink onto a piece of mid-tone brown card stock. Using the largest frame from Avery Elle's Wonky Scallop Frames Die Set, I cut the frame from the stenciled paper; 4 more frames were cut/stacked/glued together to give it a substantial "wood" feel. I used the same Espresso Ink and darkened up the edges to give it even more dimension.  

The sailing ship was stamped onto white card stock with Faded Jeans Distress Ink and a piece of light aqua card stock was adhered into place to create the horizon line. The "love notes" were stamped onto white card stock, fussy cut and lightly colored to match the aqua tones. The glass bottle was stamped onto a heavy vellum with VersaFine Onyx Black Ink and quickly heat embossed with clear powder. I fussy cut the bottle right up next to the embossed lines and adhered the love notes in behind the vellum. I  LOVE  how this turned out - the transparency looked really cool on the final card! I cut a small cork from kraft card stock and glued it behind the vellum. I die cut additional pieces of aqua-tone papers to create some foreground waves and glued them together. After I determined the bottle's location, it was adhered into place with the waves on top. I put this scene panel into the MISTI and stamped the sea gulls/sentiment using VersaFine Ink. This panel was trimmed down to the correct size, adhered to the back of the wooden frame and then glued onto the front of an A-2 top-folding white card base. 

I used the scrap die cut pieces to create a secondary frame for the sentiment on the inside of the card:


I have entered this card in the following challenges:


Thanks so much for stopping by!
Rachelle

Sunday, April 14, 2019

Mother's Day | MFT Stamps - A Place to Start Challenge Blog (3 of 5 Challenge)


Hey There!

I'm so excited to join the wonderful design team over at A Place To Start Challenge Blog, which is a great resource for newbies and seasoned crafters alike who may be looking for tips/tricks/tutorials on  all kinds of styles, techniques and design theory. My first DT submission is a "3 of 5" card featuring flowers, die cut, water color & vellum...and yes, I was an overachiever using 4 of the challenge parameters! The only item I did not use was a tag.

Using MFT Stamps' "Geometric Star Stencil", I blended a background using Distress Oxide Inks onto a piece of white card stock. This was spritzed with shimmer spray and die cut with a stitched rectangle die. I stamped MFT's "BG Fresh-Cut Flowers" onto 110# white card stock using VersaFine Onyx Black Ink in my MISTI, then water colored and fussy cut the image. I stamped Lawn Fawn's "Happy" sentiment onto the same card stock and die cut the word three times; these cuts were glued/stacked and finished with an application of Wink of Stella. I blended the same ink onto the back of a piece of vellum, flipped it over and prepped it with my anti-static tool. The sentiment was stamped onto the vellum with VersaMark ink, heat embossed with Lawn Fawn's white powder and die cut with a fishtail banner die. 


I glued the stenciled background onto the front of a side-folding A-2 card front. Using my fingers, I carefully curled the edges of the leaves and flower edges up before gluing the spray onto the background. This really helps add dimension without popping the entire image up with foam tape. Even after it goes through the mail, these areas will still be lifted from the surface. Both parts of the sentiment were adhered into place and the card was finished with iridescent jewels from Lucy's Little Things.

This floral spray is beautifully drawn and I know that I will reach for it again and again because it can be colored in so many different ways.


Thanks so much for joining me today! Head over to the blog and check out the great mid-month designs by the other design team members :)

I have entered this card into the following challenges:


Rachelle

Monday, June 4, 2018

Father’s Day Card | Flying By – Lawn Fawn


Hey there!

My father-in-law was a pilot in WWII and he continued to fly small prop planes well into his 60’s. So this Father's Day Card focuses on Lawn Fawn’s paper airplane from the “Flying By” stamp/die set being piloted by the adorable mouse from the "Elphie Selfie" stamp/die set.

I created my own sun ray stencil from cereal box chipboard and blended Distress Oxide Inks (Wild Honey/Mustard Seed) onto a piece of pearlized white paper. Keeping the stencil in place, I flicked water and small spatters of gold paint from the Kuretake Gansai Tambi Starry Colors Set onto the paper - I really wanted the sun rays to glow. The painted background was trimmed and glued onto a top-folding A-2 white card base. I stamped, colored and die cut the mouse/paper airplane. After cutting a small slit in the paper airplane, I slipped the little mouse down inside and taped him into the cockpit on the backside of the images. I LOVE how cute he looks flying the plane! I blended Salty Ocean Distress Oxide Ink on a small piece of the same pearlized paper, spritzed is with shimmer spray and die cut a circle to create my sky scene. I wanted the mouse to be flying onto the paper so I taped the die cut onto the card front with washi tape. Using my MISTI, it was easy to position the little dotted line stamp exactly where I wanted it across the card base and into the sky.


Small clouds were die cut from Waffle Flower’s "Rainbow Panel" set and the sentiment was stamped into the wide banner from Lawn Fawn’s “Bannertastic” stamp/die set. Instead of ending the sentiment with the word “hi”, I used a post-it note to cover it so that I could add dots leading to the inside of the card instead. The sky was popped up with foam tape and adhered to the card front – aligning the dotted lines. The clouds, sentiment banner and flying mouse were also attached to the scene with either glue or foam dots. There was a lot of dimension to this card and I added tons of additional sparkle with small sequins and Wink of Stella. I used Happy Father’s Day from Lawn Fawn’s “Happy Happy Happy” stamp/die set for the inside of the card and attached another little paper plane next to the sentiment. I think he's gonna love this card!


Thanks so much for stopping by!

Rachelle


Thursday, May 24, 2018

Mother's Day Card | Honey Bee Stamps - Zen Bouquet


Hey there!

This recent Mother's Day card is my submission for the 5/23 Simon Says Stamp Wednesday Challenge: 'Use More Than One Stamp' - featuring Honey Bee Stamps. This card is a BIG Boy because I didn't want to trim down the beautiful Zen Bouquet any more than I had to...so it comes in at a whopping 8.5 x 5.5 inches!

After prepping the Strathmore Bristol with my anti-static powder tool, I used my MISTI to stamp the image with VersaMark ink. This took a few reinkings to get really good coverage on this large stamp and then I embossed it with an antique gold embossing powder. 

To color the image, I smooshed my palette of five Distress Oxide Inks onto a craft mat, spritzed the inks with water and let the fun begin! I dipped my embossed image onto the mat several times, moving the image to reposition after each contact. I wiped the mat clean/reinked it a couple of times so that the colors wouldn't get muddy and hurried up the drying process a bit with my heat tool. I then selectively popped-up the floral definition by painting the inks into a few areas. The entire image was spritzed with a shimmer spray to re-activate the ink and daubed with a paper towel to give it some texture. 

The bouquet was cut with the coordinating die, trimmed slightly and glued to the card front. The only embellishment I used was a mix of regular and chunky Rainbow Sparkle Jewels that I purchased from Little Things From Lucy's Cards. I was so excited when she recently introduced chunky-sized jewels because sometimes you just need a bigger bit of bling (and it was awesome getting a craft supply delivery from "across the pond".) See how beautiful they are?!!


I LOVE the medium-sized "happy" script from the appropriately named "happy happy happy" stamp/die set by Lawn Fawn and glued several individual die cuts together before adhering it onto the card; the mother's day sentiment is from this same stamp set.

After it was carefully padded in its 6 x 9-inch envelope, this card ate up a bunch of my 'Forever' stamps but it made it from North Carolina to Ohio in perfect condition. : )

Thanks so much for stopping by and have a great day!

Rachelle