Showing posts with label Christmas Card. Show all posts

Thursday, August 8, 2024

Christmas Card | Krafty Chicks Challenge #727 - Christmas


 Welcome to the "Throw Back Thursday" Edition - and we're going way, way back for this one the very first Christmas card I ever made in 2001!

My mother passed away in 2022 and my dad ended up selling/moving out of our family home of 56 years in 2023. He made sure that I got the large box that held the hundreds of handmade cards that I had given them over the past two decades. My mother had saved them all and it was such fun to look at each one and read all of notes I had written to them both over the years! Included in the collection was this Christmas card, the first one I ever made and still one of my favorites! It was made without most of the latest, greatest crafting tools/products I have today and just goes to show that a simple handmade card, means the world to the person who receives it! 

I hope you will join us this week over at the Krafty Chicks Challenge with your Christmas projects!

Thanks for joining me today and happy crafting! Rachelle

Thursday, July 11, 2024

Christmas Card | Krafty Chicks Challenge #724


Hello!

It's Christmas Week over at the Krafty Chicks Challenge and I've got this bright red cardinal to share!


I pulled out some old pattern paper that I am trying to use up - it may take me the next 30 years or so to get through it all but I'm up to the challenge! I chose mini stripe and abstract snowflake patterns and adhered them to the card front, using a ribbon to hide the seam. The edges were inked with red ink and the sentiment was stamped with the same color. I drew the cardinal and swirl freehand and hand cut the pieces since the shapes were simple. I glued the pieces together and used a small black brad for the eye. The shapes were then adhered to the card to finish up the card.

I hope you will join us for some Christmas in July fun this week and be sure to head over to the Krafty Chicks' Blogs and leave them some love!

The KRAFTY CHICKS!

Thursday, June 13, 2024

Christmas Card | Krafty Chicks Challenge #720 - "Christmas" Week


 Hello and welcome to Christmas Week at the Krafty Chicks Challenge!

I wish it felt a bit more wintery here in North Carolina but the temperatures are about to explode into the upper 90's this weekend! I love it here in the winter but the summers can be brutal!

This mini-slimline design came together as I was trying to use up some pattern paper scraps in my Christmas folder! I simply mixed-n-matched a couple scraps together with a vintage Santa image to create this collage-style card! A tiny spring clip was added to a mini tag with ribbon and velvet rickrack accents. Buttons and brads finished up the design as the key embellishments!

I hope you will join us this week for some winter inspiration! Please stop by and share some love with the Krafty Chicks!

The KRAFTY CHICKS!

Thursday, May 9, 2024

Christmas Card | Krafty Chicks Challenge #715 - Week 2 Christmas


Hello!


It's Week #2 over at Krafty Chicks Challenge and that means it's Christmas Week! I've got a fun snowman card for you today filled with lots of polka dots! I stamped, colored and fussy the snowman image and added a lime green mini pompom on his hat!

I attached the dotted pattern paper and coordinating card stock to a top-folding 6" square card base and covered the seam with a piece of bright navy grosgrain ribbon. I die cut a circle from a similar blue color, glued it in place and popped the snowman up in front of it with foam tape. The sentiment was stamped with a navy ink using the MISTI to finish up this design!

I hope you will join us this week at Krafty Chicks for some Christmas fun! Be sure to check out what the Chicks are up to by popping over to their blogs!

The KRAFTY CHICKS!

Thursday, April 11, 2024

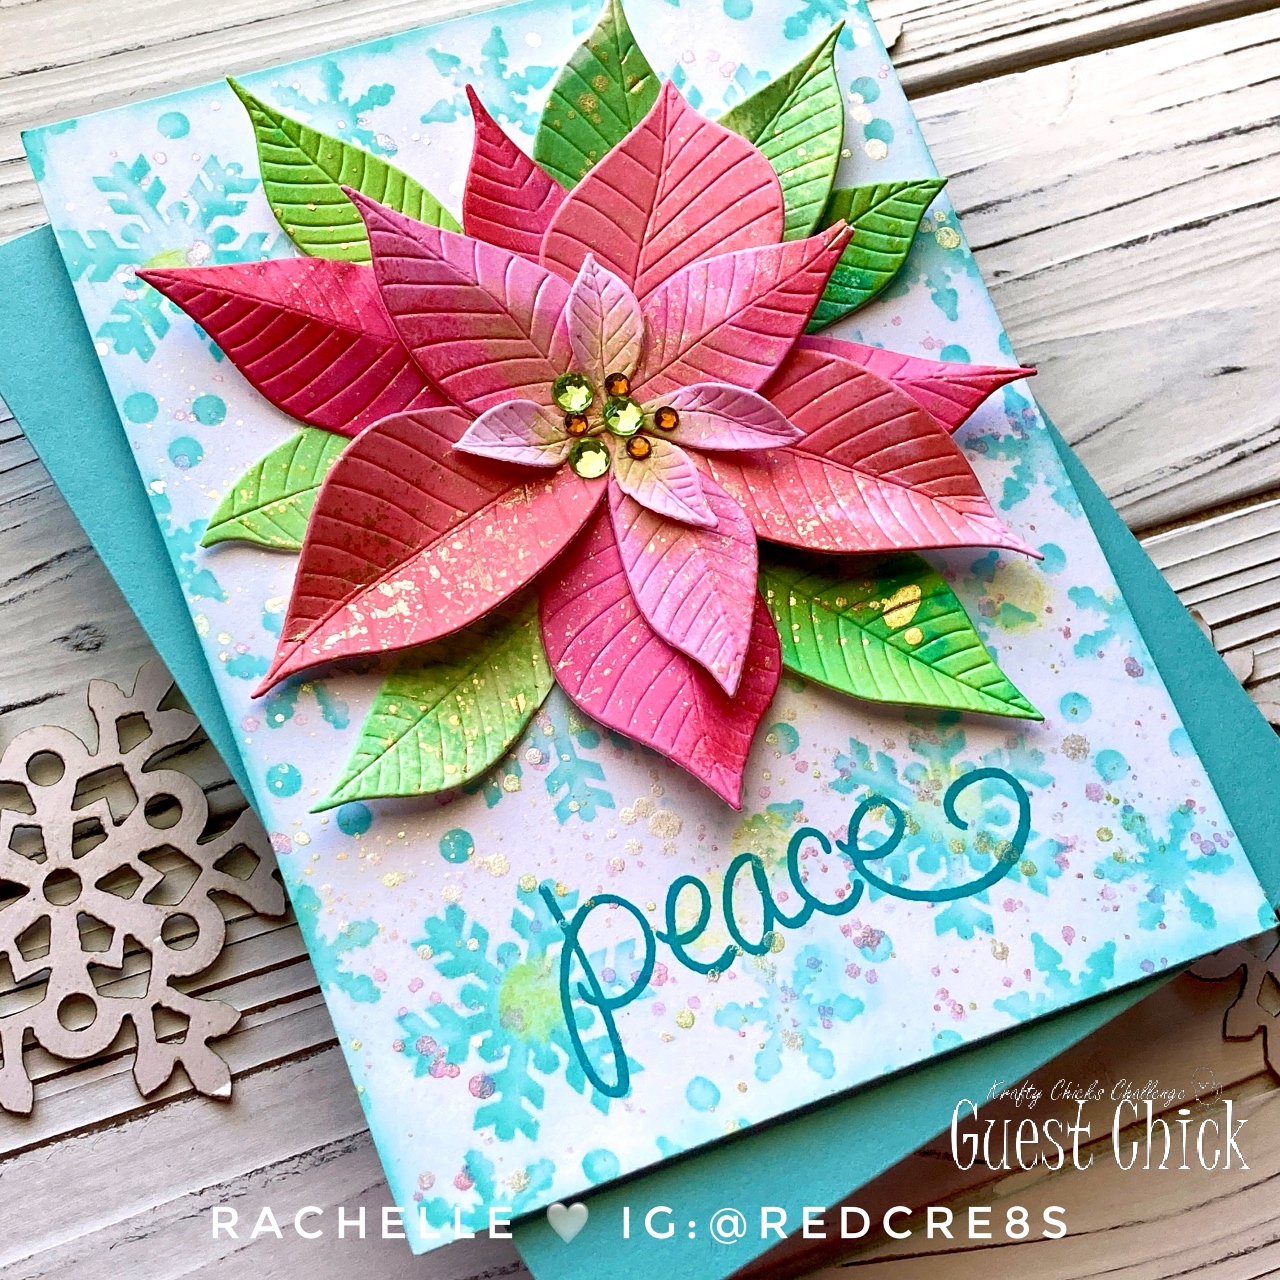
Christmas Card | Altenew "Poinsettia" Dies | Krafty Chicks Challenge #711 | Week 2 Christmas


Hello!

We are at Week 2 over at the Krafty Chicks Challenge and that means "CHRISTMAS!" I have had these Altenew 3D Poinsettia Dies for a while now and decided it was the perfect time to pull them out for this project! 
 

The snowflake background was stenciled using Distress Oxide Ink: Salvaged Patina, Peacock Feathers and a bit of Twisted Citron. The panel was cut down to fit an A2 card base, spattered with pearl watercolors and a little bit of ink shading was added to the edges. I attached the panel to the card base and stamped the one-word "Peace" sentiment at the bottom.

To create the flower petals, I ink smooshed Distress Oxides onto several panels of white cardstock in different color/value combinations using Spun Sugar, Abandoned Coral, Festive Berries and Candied Apple. I copied this same technique for the leaves using Twisted Citron, Mowed Lawn and Peacock Feathers. Once all the panels were dry, I spattered them with gold watercolor and spritzed them with Shimmer Mist. I allowed them to dry again and then started die cutting.

Once all of the shapes were cut, I began to dry fit the pieces together on the card front. When I liked the layout, I took a photo with my cell phone, removed the top layers and started gluing all of the pieces back together, (using my reference photo) and gently folding each petal along the score line before the final attachment. By using a combination of both mountain & valley folds, there is so much dimension in this design! To finish off the card, I added some gems to the middle of the poinsettia.  


I hope you will join us this week at Krafty Chicks with some Christmas creations!

CHALLENGES:


Thanks for stopping by and happy crafting!
Rachelle
Wednesday, December 1, 2021

Christmas Card | Pink & Main - "Homespun Christmas Card Kit"


Happy December 1st! 

For those of you who stop by the blog on a regular basis, I will be taking a bit of a break because of a retinal tear in my right eye that requires some rest, monitoring and surgery. 

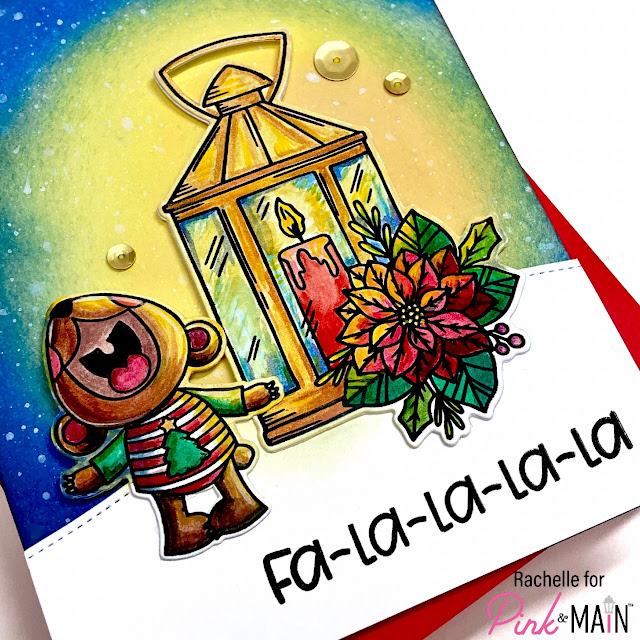
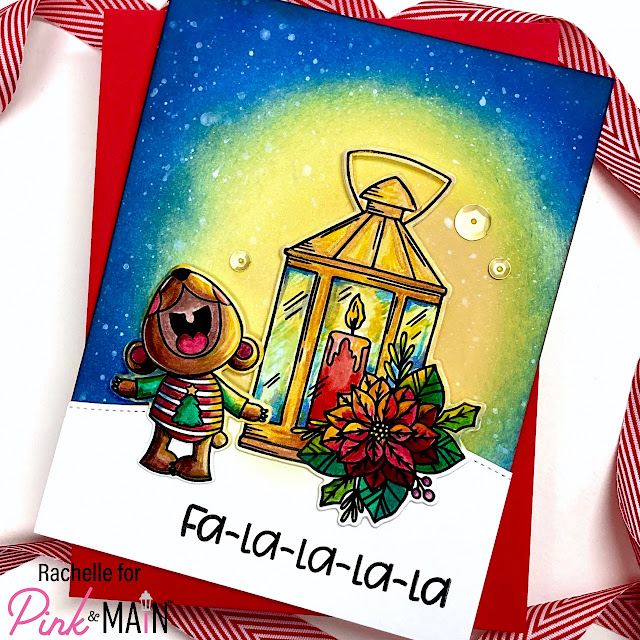
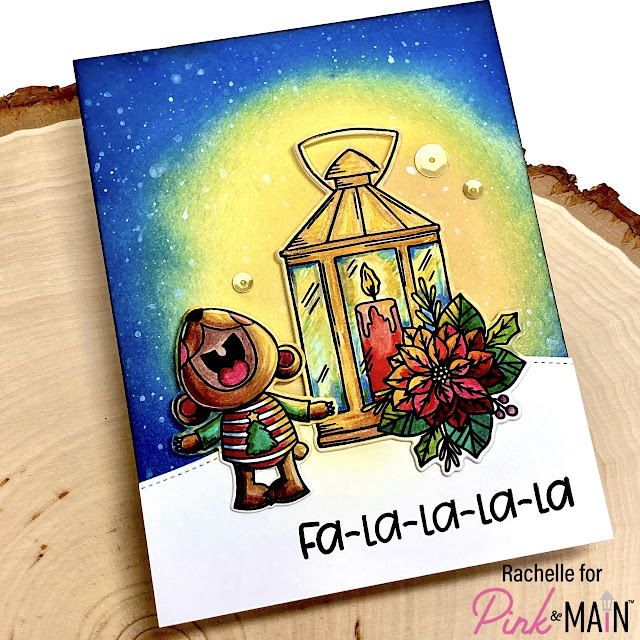
Hopefully I will be back to creating after the first of the year! But this card was already completed and I combined the singing "Pete" image from the NEW "Polly & Pete Carols" Stamp Set with the Christmas Lantern from the "Homespun Christmas Card Kit" to create this winter's night caroling scene!


The A2-background panel was ink blended using Distress Oxides Inks and spattered with diluted white paint and shimmer watercolors. When it was dry, the panel was attached to a top-folding A2 card base. I stamped, watercolored and die cut the two images focusing my coloring on capturing the glow of the single candle in the lantern. I made sure to paint around the white margin of the die cuts so that they would blend into the scene.


I die cut the snow bank from heavy-weight white card stock, stamped the sentiment using my MISTI, backed it with a cereal box chipboard and glued it to the card front. Adding this additional layer of chipboard creates depth and strengthens the panel. The images were adhered into place and a few sequins finished up the card! I just love how he is singing with all of his heart - it's so cute!

Thanks so much for stopping by and have a wonderful holiday season!
Love - Rachelle

Saturday, November 27, 2021

Christmas Card | Picket Fence Studios - "Holly Jolly" Stamp Set


Hello and welcome to Picket Fence Studios' "25 Days of Christmas"! It's Rachelle here today with some crafting inspiration and I'd like to share a new technique with you that mimics the look of mercury glass! I was experimenting with the Paper Glaze Enhancer in combination with some of the Paper Glitz colors and while you should NOT mix Glitz & Enhancer together into a single blended product, I did try using them separately on top of each other and came up with something that really resembles one of my favorite finishes - antique mercury glass.


The Paper Glaze Enhancer is a soft, matte lightweight paste (resembling spackling compound in texture) and dries to a semi-transparent dull finish when used on its own. I thought that I might be able to accent some areas by applying "Sparkle" Paper Glitz on top of the stenciled areas and when it was all dry, some of the areas of the Paper Glitz highlighted the Enhancer and some of it seemed to melt into the kraft background with a mirror effect! The photo can't quite capture it but believe me this looks so cool in real life! I just applied a thin coat of each product using the Slim Line "Changes" Stencil and set it aside to dry. It was trimmed down to 3.75" x 5" and adhered to a top-folding A2 card base.

The leaf and berry cluster from the "Holly Jolly Christmas" Stamp Set was stamped/heat embossed with clear powder, watercolored and die cut. The wonderful sentiment from the "Winter Has Come To Town" Stamp Set was heat embossed and die cut. 


I looped some silver thread into a bunch, taped it together and adhered it to the stenciled panel. The holly image was popped up with foam tape and the sentiment strip was glued into place. I added pink and matte gold sequins (from The Pink Lady Sequins Mix) to finish up the card. I hope you'll give this look a try and I'd love to see you share what you come up with over on the Picket Fence Studios' Community Facebook Page! 

Thanks so much for stopping by today and take care!

Hugs - Rachelle

Wednesday, November 24, 2021

Christmas Card | Pink & Main - "Homespun" Christmas Card Kit


Hello everyone! 

I know we’re all geared up for Thanksgiving here in the US but I’ve got a CAS Christmas card to share with you today that focuses on the beautiful poinsettia image from the “Homespun Christmas Card Kit”. If you haven’t picked this up yet, there’s still time to grab this awesome kit, which is a fantastic value for all of the goodies included! I stamped and watercolored the floral image and then die cut the panel using a NEW “Notched Corner Die.”


I attached a red stitched rectangle (Stitched Rectangles Set 1) onto an A2 card base and glued the floral panel on top. The “J” and “Y” (from the “Thin Alpha Die Set”) were die cut from the Red “Winter Glitter Paper Pack” and glued next to poinsettia to spell out the word “Joy”. I added a few sequins to finish up this clean design!


You could also spell out the word “Noel” with this same poinsettia image and “Snow” using one of the snow people from this month’s “Snow Sweet” Set as the “O”! There are lots of possibilities you could come up with using this same concept! Thanks so much for joining me today and happy crafting!

CHALLENGES:


Have a wonderful Thanksgiving!
Hugs - Rachelle

Wednesday, November 17, 2021

Christmas Card | Pink & Main - "Snow Sweet" Stamp Set


By now, you probably know that I’m a shaker card fanatic but this is my very first attempt at a full-front version! It was so easy to do with these wonderful P&M Products that I’m going to be able to mass produce about a dozen of these in one day! I used the “Snow Sweet” Stamp of the Month Set and chose this handsome guy with the top hat! I stamped, colored and die cut the image, adding an extra blank die cut to the back.


I randomly ink blended “Salty Ocean”, “Worn Lipstick”, “Dusty Concord” and “Wilted Violet” Distress Oxides on 130# white card stock. The panel was sprayed with shimmer mist and spattered with diluted inks. When it was dry, I used white pigment ink and blended the snowflakes using the NEW “Blizzard” Stencil.


I used a clear acetate envelope to create my shaker and simply cut a partial slit on the backside, added 1/8″ EZ Tear Tape to the back of the stenciled panel, slipped it into the acetate and carefully removed the EZ Tape with my Pink and Main “Reverse” Tweezers! These tweezers are incredible and can reach tiny nooks and crannies with ease! I added lots of shaker bits, micro beads, sequins and confetti onto the front side, folded the envelope opening over the top and taped it to the backside. 1/2″ EZ Tear Tape was added to the backside of the shaker pocket and it was adhered to a top-folding A2 card base.


Using the NEW “Christmas Greetings Dies”, I die cut the shadow image from light blue vellum and the scripty “Merry Christmas” from a piece of the small checked paper from the “Holographic Paper Pack Set 1”. “This sparkly reflective holographic paper really pops off the front of the shaker and picks up all the colors in this snowy palette! I attached the scripty die cut to the vellum with “EZ Squeeze Craft Glue” and used tiny pieces of the 1/8″ EZ Tear Tape to attach the entire die cut sentiment (and the snowman) to the acetate to finish up the card! 

CHALLENGES:


Thanks so much for stopping by today and happy crafting!
Hugs - Rachelle

Wednesday, November 10, 2021

Christmas Card | Pink & Main - "Winter Snow Globe Scenes" Stamp Set


Hello!

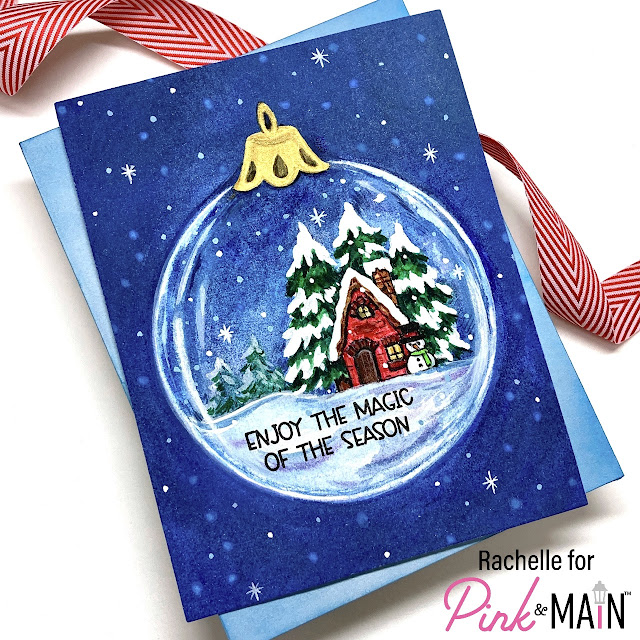
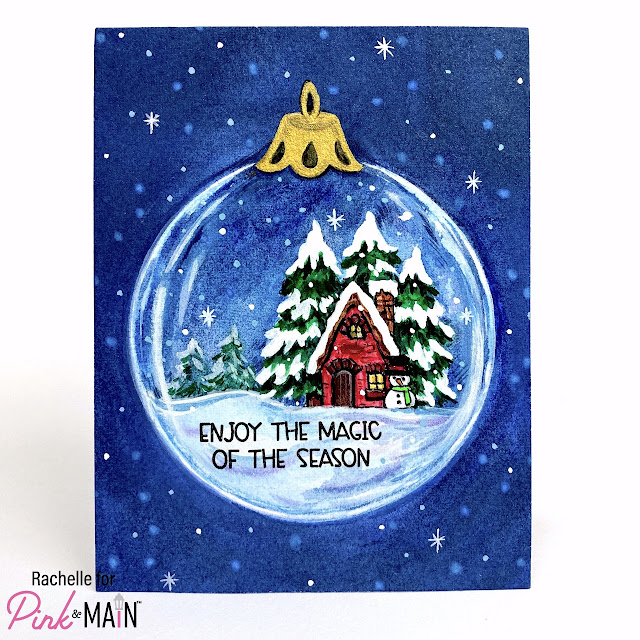
I would like to make a major announcement - I MADE A ONE-LAYER CARD! This is a huge accomplishment for me because I normally add layers and bling to every project but this no-line watercolor technique didn’t really need anything else so I stopped myself while I was ahead!

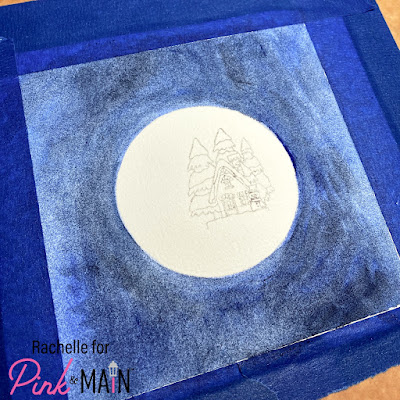
I started by taping a piece of watercolor paper to my heat-resistant cutting board with painter’s tape. I drew around a circle die cut in the center, watercolored a base layer around the circle and then stamped the woodland cottage image from the NEW “Winter Snow Globe Scenes” with “Hickory Smoke” Distress Oxide Ink.


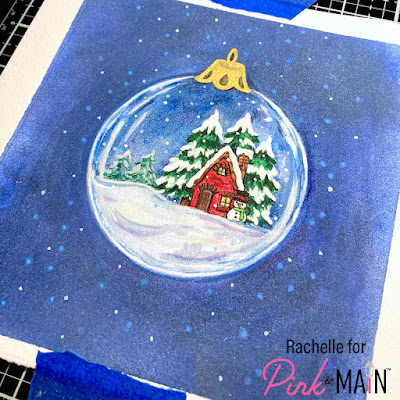
Then the cottage scene was watercolored inside the glass ornament. When it was finished, I used the circle die cut to mask the painted area and ink-blended “Chipped Sapphire” and “Prize Ribbon” Distress Oxide Inks to intensify the background blue; the entire panel was spritzed with shimmer mist.


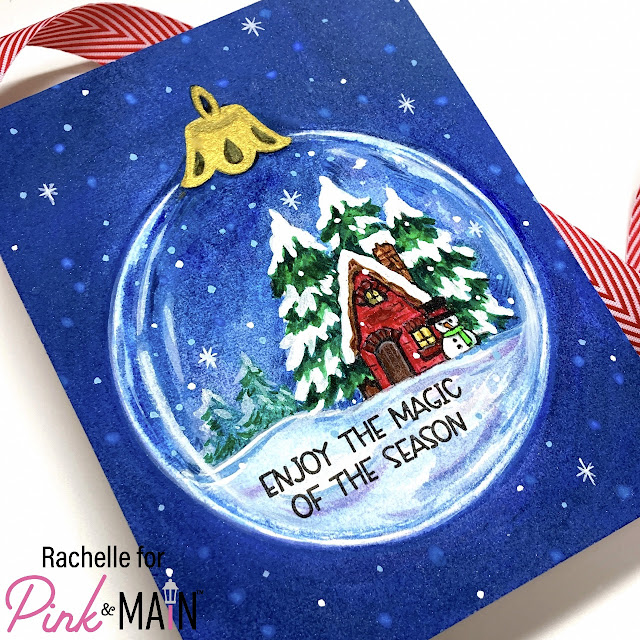
The ornament hanger was quickly sketched with pencil and painted with gold metallic paint. I added light blue/white snowflakes to the panel, removed the tape, trimmed the panel down and attached it to a top-folding A2 card base. The sentiment from this same set was stamped using the MISTI to finish up this card.


I was really happy with the way this turned out and so glad I restrained myself from adding any bling! This card won't be mass produced but it's nice to take on a watercoloring challenge every now and then!


Thanks so much for stopping by today and for taking the time to comment! It's greatly appreciated!

CHALLENGES:


Take care and happy crafting!
Hugs - Rachelle

Thursday, November 4, 2021

Christmas Card | Pink & Main - "Snow Sweet" Stamp Set


Hello!

I’m sharing a shaker card today featuring the NEW Stamp of the Month Set, “Snow Sweet!” I am a huge snowman fan and these little snow people are so cute! I mixed together a ton of new products and tried a dark red background for my snowy scene, instead of the traditional blues/purples!


I ink blended the background with Distress Oxide Inks: “Barn Door”, “Ripe Persimmon”, “Aged Mahogany” and “Black Soot”. The panel was spritzed with shimmer mist, spattered with gold watercolor and trimmed down to fit a top-folding A2 card base. I inked another panel with “Worn Lipstick” and “Barn Door” DOI’s, die cut it with one of the “Stacked Snowflake” Images and glued it to the red background panel.


I stamped, colored and die cut several of the snowman images from the “Snow Sweet” Set because I wasn’t quite sure which one I was going to use and it’s always good to have a few ‘extras’ on hand! I die cut two frames using the “Notched Corners” Die Set, glued them together and attached the frame to the back of a sloped, die cut snow bank. I stamped the sentiment onto the snow bank using my MISTI, added a piece of acetate to the backside of the frame and covered the skinny frame/snow bank with foam tape.


I added lots of shaker bits to the center of the card front, carefully peeled away all of the release paper and pressed the shaker window panel in place on the card front. The little snowman in the knitted hat was popped up with foam tape to finish up the card design! Now that I have this design created, I’m going to use the other two snow people to crank out a couple more cards exactly like this! Head over to the Pink & Main Shop to check out the NEW Stamp of the Month options for this adorable set!

Thanks for stopping by and take care!
Hugs - Rachelle

Sunday, October 31, 2021

Christmas Card | Pink & Main - "Holiday Mugs"


Hey there!

I've got a fun project for you today! It's my first foray into Pink & Main's brand new release of flocking products! And let me tell you - it was so easy to use that I may start adding this great product to every card! I created my peppermint-inspired panel by simply laying down small strips of the 1/4'' EZ Tear Tape on a piece of white card stock measuring 6" x 2". After peeling off the release paper, I coated the adhesive with the "Sparkling Santa's Hat Flock" over a piece of paper (just like you would when applying glitter.) The flock really sticks to the tape and all I did to ensure adhesion was to cover it with my thin craft mat and gently rub it with my hand. The flocking adds so much texture/dimension and there was minimal flake off when I trimmed the panel down to attach to the left side of an A2 card base. Here's what the sparkling flock looks like - soft, fuzzy fibers with lots of glitter. Each color also comes without glitter so you can mix and match the products together for different looks!


I applied a thin coat of glitter paste through the "Random Dots" Stencil on a panel of white card stock and set it aside to dry. I then stamped, colored and die cut the travel cup from the "Holiday Mugs" Stamp Set. The sentiment from this same set was heat embossed on black card stock and die cut with the accompanying die. The detailed snowflake from the "Stacked Snowflake" Dies Set was cut from a silver piece of glitter paper from the "Winter Glitter Paper Pack" (Pink & Main is my favorite glitter paper of all time!) and I backed it with a blank white die cut for added strength.


I trimmed the dotted panel down to 3.25" x 5.5", backed it with a piece of cereal box chipboard and glued it to the right side of the card front. The sentiment and snowflake were glued directly to the front and the travel cup was popped up with foam tape; a few red sequins finished up the card! I can't wait to give this card to a coffee-loving friend this Christmas!

Thanks for stopping by and have a wonderful Sunday!
Hugs - Rachelle
Monday, October 25, 2021

Christmas Card | Picket Fence Studios - "Slim Line Double Tree Line" Stencil Scene


Happy Monday!

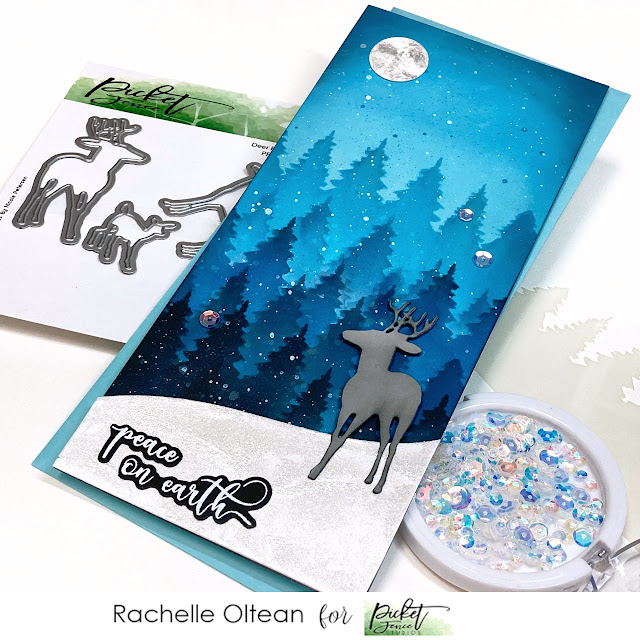
I've got a peaceful, winter night scape to share with you today featuring lots of ink blending with the "Slim Line Double Tree Line" Stencil set. This is a great scene-building tool because you get both the positive and negative tree line! I also used the "Deer Family" Die Set, which has really well-drawn deer silhouettes - I hate it when animal die cuts don't really look like they are supposed to but the stance and action of these three deer are perfect!  


I began by ink blending the sky portion of a white card stock panel measuring 5" x 11" with Distress Oxide Inks - Tumbled Glass, Salty Ocean, Broken China, Chipped Sapphire and Black Soot. This palette leans toward the warm blue side of the spectrum - I didn't want it to look too 'cold'. Using the stencil I began to blend these same inks in a gentle, downward motion to create the forest scene, keeping the lighter value trees in the background and the darker trees toward the front. The images were also staggered  to give it a more realistic look and I slightly darkened the tops to highlight the atmospheric perspective.  The panel was spritzed with shimmer mist, spattered with white/pearlized paints and set aside to dry.

I applied a thick layer of "Sparkle" Paper Glitz to a heavy white card stock panel and die cut it when dry to create the foreground snowbank. The male deer was die cut from mid-toned grey card stock and accented with a bit of ink blending.


I die cut a 1" circle from white card stock, carefully coated it with the "Sparkle" Paper Glitz and added just a bit of "Silver Bells" Paper Glitz to give the full moon its classic shadows. The sentiment was heat embossed onto black card stock with white powder and cut apart so that it could be stacked in the lower left corner.


The background panel was trimmed to 9" x 4" and attached to a slimline card base. The moon, snow bank, deer and sentiment were all glued into place and I added a few of the Iridescent "Moonshine" Sequins to finish up this scene. 

Thanks so much for stopping by today and I hope you have a great week!

CHALLENGES:


Happy crafting!
Hugs - Rachelle