Showing posts with label Slimline. Show all posts

Thursday, October 26, 2023

Halloween Card | Whimsy Stamps - "UFO" & "Boo" Die Sets


Hello!

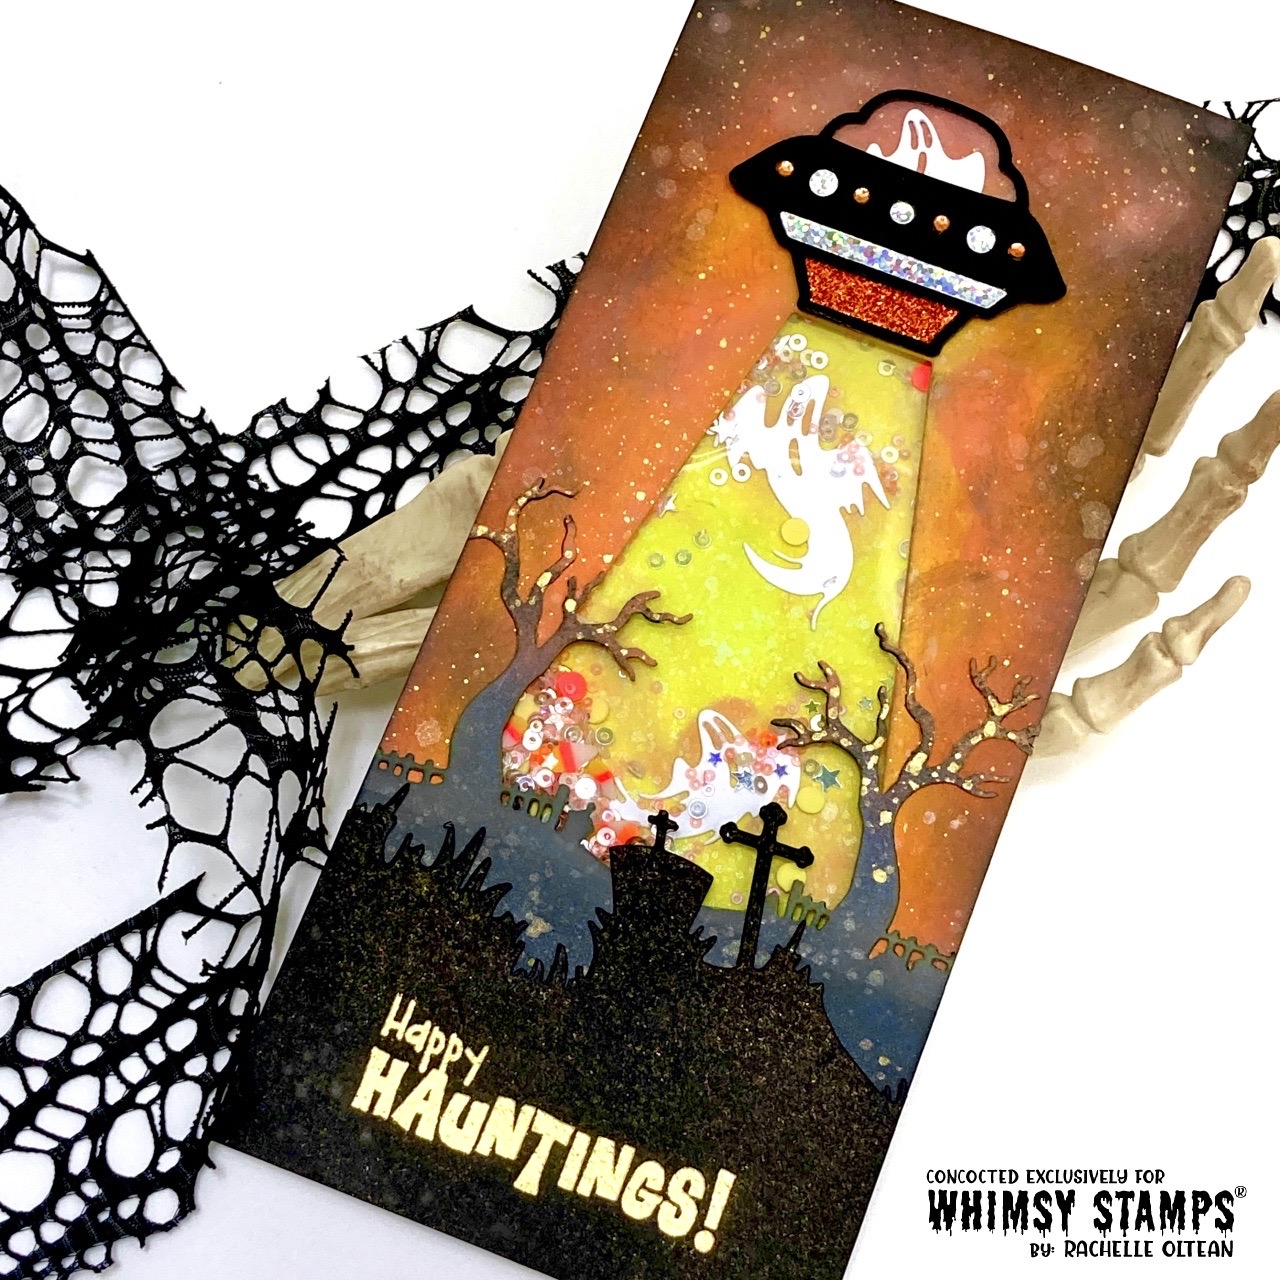
Here's a spooky shaker card that's out of this world featuring a UFO beaming up all of the ghosts in the graveyard! This design started with four distress oxide ink-blended backgrounds - 1) the lemony green full background panel 2) the orange sky with a beam die cut omit from the "UFO Die Set" 3) the spooky trees w/gravestones "Haunted Graveyard Border Die" and 4) the larger gravestone foreground panel using the "Howling Night Die Set".

Each piece was ink blended, spritzed with a shimmer mist, spattered with pearlized paints and trimmed to fit a 4 x 9" shaker card base.
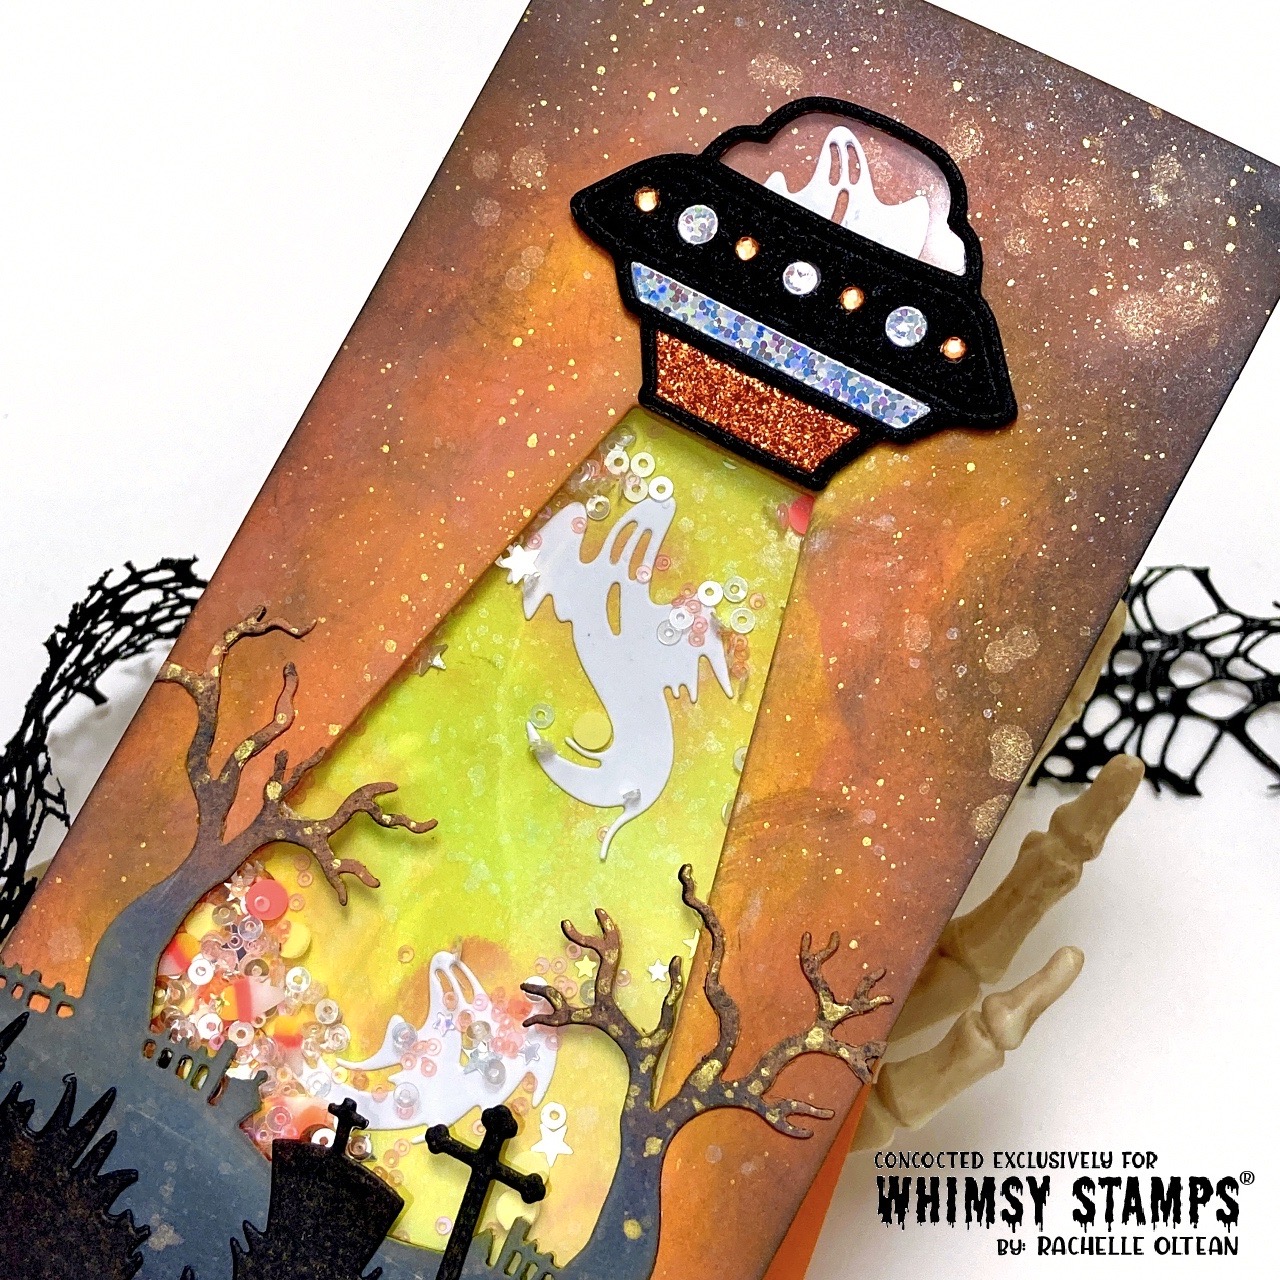

The UFO was cut from heavy weight black card stock glitter, special holographic papers and assembled. Another UFO outline was cut from acetate and attached to the back of the piece. Three of the ghosts from the "BOO Die Set" were cut from heavy weight white card stock and one was attached behind the acetate "glass" window of the UFO.

The lemon panel was glued onto a slimline card base. The orange sky panel was backed with a piece of acetate to create the shaker window and popped up with foam tape. I used the window to determine where my ghosts should be positioned and glued them to the lemon panel. 

The spooky tree panel was positioned to cover the bottom of the light beam and adhered on top. Once I determined where the dark foreground panel should go, I heat embossed the sentiment ("Spirited Sentiments Clear Stamps") with Ranger's "Princess Gold" Embossing Powder and glued it into place on the card front. The final item to be adhered was the UFO die cut at the top of the light beam.


With the entire front window panel complete, I piled my shaker bits (This Calls For Confetti - Candy Corn Mix 2.0)  onto the ghosts, peeled off all of the release paper from the foam tape and very carefully pressed the top panel into place! I just love those mini candy corn pieces in this confetti mix! They are perfect for Halloween shaker cards!

Thanks so much for stopping by - I really appreciate it! Take care and happy crafting!
Rachelle

CHALLENGES:


Wednesday, September 27, 2023

Halloween Card | Whimsy Stamps - "Enchanted" Die Set

Hello!

I've got a magical card for you today featuring this "Marching Gnome" Digital Stamp! He's taking a stroll through the enchanted forest with a  pumpkin lantern lighting his way! Whimsy Stamps has a giant digital stamp catalog and this image is from the "Some Odd Girl" Collection

I began by downloading, sizing and printing the image onto white card stock. The original drawing had a leaf hanging down from the carrying stick and I simply edited that out before printing. I watercolored the image, carefully fussy cut him out and painted all of the edges black. I die cut one of the mini pumpkins from the NEW "Pumpkin & Mini Jacks Die Set", watercolored and attached it to the gnome's carrying stick. 

The background was created with a combination of Brushos Colour Crystals, watercolors and Distress Oxides - I wanted it to have a foggy bokeh feel to it with areas of light and shadow. This panel was trimmed to 8.5" x 3.5".

I die cut lots of the tree silhouettes from the "Tree Assortment Die Set" from heavy black card stock and determined their placement on the design. Then the trees were colored to fit into the landscape - darker trees in front and lighter trees in the distance. (see below) The NEW word die "Enchanted" was cut twice, glued together and inked in a light green with white highlights. The dry fit layout is below - right before I started gluing things down. I always take a photo on my phone when I get to this point so I have it as my reference!


I began gluing back to front and wanted the pumpkin lantern to be giving off a glow so I gave that area of the background (and the tree in the foreground) a small spritz of "Flickering Candle" Distress Mica Stain. I love how that spot is glowing in the shadowy forest! 


I continued to glue all of the pieces down and when finished, this panel was attached to a black slimline card base measuring 4" x 9". Here's a closeup of the NEW "Enchanted Word Die Set" - it's such a great set because you begin with the base word, "Enchant", and then you can add the different word endings to create: Enchanted, Enchanting or Enchantment!


This card was so much fun to make and I was really happy with the way all of the pieces came together! I hope you like it, too!

Thanks so much for stopping by and happy crafting!
Rachelle

CHALLENGES:


SUPPLIES
If you would like to do a little crafty shopping for some of the Whimsy Stamps' products I used in this card, I have them listed below. These are affiliate links which means that I receive a small commission if you use them through their website to make a purchase. These affiliate product sales are at NO ADDITIONAL cost to you but keeps my crafty supply drawer filled with card stock, glue, and Peanut M & M's! I truly appreciate your support

Sunday, September 17, 2023

Halloween Card | Whimsy Stamps - "Halloween Scarecrow Die"


Hello!

I've got a mini-slimline card for you today that features the awesome "Halloween Scarecrow Die" from Whimsy Stamps. I created my own bokeh background using a combination of Brushos Colour Crystals, watercolors and pearlized paint. I added some additional "foggy" color patches using Faber-Castel Gelatos watercolour chalk in a lime green - you can spot these areas around the hands and behind the center "O". I drew directly onto the panel and softened it down with just a bit of water. The color seems to melt into the background!


I die cut the scarecrow twice from a lime green card stock, glued the pieces together and ink blended "Twisted Citron" and "Black Soot" at the bottom. I die cut the image again from black card stock and a neon green glitter paper and started to assemble. The black image was offset just to the bottom of the inked version and the glitter paper to the top. This really gave it a glow above and strong shadow below the main image. There was just a bit of an opening in the face for me to add a little orange glitter paper, which makes you believe his face is glowing!

The bokeh background was trimmed and glued to a lime green panel and the entire piece was attached to a black card base; the final card measured 3.75" x 7.25". The scarecrow piece was popped up with black foam tape and some coordinating sequins finished the card. I love how he is just hovering out in the foggy background - so creepy!


Thanks so much for stopping by today and happy crafting!
Rachelle 


 SUPPLIES 
If you would like to do a little crafty shopping for the Whimsy Stamps' product I used in this card, I have it listed below. These are affiliate links which means that I receive a small commission if you use them through their website to make a purchase. These affiliate product sales are at NO ADDITIONAL cost to you but keeps my crafty supply drawer filled with card stock, glue, and Peanut M & M's! I truly appreciate your support


Friday, September 15, 2023

Halloween Card | Whimsy Stamps - Ranger Ink Halloween Instagram Hop


Hello and welcome!

I'm so excited to be participating in a collaboration hop between Whimsy Stamps & Ranger Ink! Be sure to head over to Whimsy Stamps' IG Page to start the hop! 
Top prize is $100 - a $50 Ranger and a $50 Whimsy Stamps Gift Card!


 In honor of this special collaboration, I've got a project for you featuring lots of Tim Holtz products including: Distress Oxide Inks, Grit Paste and Halloween Edition Distress Mica Stains! I used colors that would make the grit paste look old and decaying.

Here's the palette for this project: (see in photo below)
DISTRESS OXIDE INKS
- Iced Spruce
- Hickory Smoke
- Speckled Egg
- Pumice Stone
- Weathered Wood
- Frayed Burlap
- Peeled Paint
- Unchartered Mariner
- Black Soot

GRIT PASTE
- Crypt

DISTRESS MICA STAINS
- Empty Tomb
- Wicked Elixir


I began by spreading an uneven coat of Grit Paste onto a full sheet of heavy-weight white card stock with my craft spatula - you can see that I left some open areas of card stock. Using the same plastic spatula, I made some random lines/marks to replicate the cracks in stone and let this panel dry for about 30 minutes. Once it was dry, I ink blended the Distress Oxides directly onto the grit paste and sprayed it with my Perfect Pearls Mist (I mix 1/2 tsp. of Perfect Pearls with water in my spray bottle to make my own shimmer spray!) The tall tombstone base (from the Slimline Decrepit Grave Set) was die cut, spritzed with Empty Tomb Mica Stain (wiping away the excess) and Black Soot was blended around the outside to give it dimension. 


I die cut three of the rectangular "Forever Cameo Frames" from white card stock and glued them together. The frame was inked with several Distress Oxides and then randomly coated with blobs of the Grit Paste. When dry, it was covered in Black Soot, Empty Tomb Mica Spray and silver paint - I was thrilled with the final result!


I die cut the remaining pieces I needed from the main panel and added color/stain where it was necessary to create value contrasts. The tombstone really required some lighter/darker areas in order to showcase all the great die cut details! 


Once all of the pieces were cut and dry-fit, the project started to come to life and you can really see the value contrast working in the photo below!


Grit Paste was added to a piece of black card stock and when dry, I die cut the skeleton heads from the "Forever Cameos" Die Set out of the panel, adding a bit of Empty Tomb Mica Stain. I also cut the black background panel from this piece. The same coloring process was used for the 3-plank stone base (the three strips off to the right in the photo below). I ink blended the center background panel with mostly "Speckled Egg & Iced Spruce: Distress Oxides, spritzed it with my Perfect Pearls Shimmer Mist and spattered it with pearl watercolors. 


The foliage (from the Wild Weeds Die Set) was all die cut from this panel, which was a combination of "Peeled Paint & Black Soot" Distress Oxide Inks, and "Wicked Elixir/Empty Tomb" Mica Stains. 


Here's a quick view of my scrap pile! I love it when it's almost as cool as my finished project!


The final assembly was simply adhering all of the die cut pieces into place on the Speckled Egg panel, glueing it to the black background and attaching the whole thing to a slimline card base! Whew! 

I hope this photo tutorial was helpful in detailing the process for making this card! 


Thanks so much for joining me today!
Happy Crafting!
Rachelle


SUPPLIES
If you would like to do a little crafty shopping for the Whimsy Stamps' product I used in this card, I have it listed below. These are affiliate links which means that I receive a small commission if you use them through their website to make a purchase. These affiliate product sales are at NO ADDITIONAL cost to you but keeps my crafty supply drawer filled with card stock, glue, and Peanut M & M's! I truly appreciate your support


Thursday, September 14, 2023

Halloween Card | Whimsy Stamps - "Halloween Bawoon" Red Rubber Stamp


TA DA! I made a one-layer card!

I have never been a horror movie fan - no Friday the 13th or Jason for me! And while I watch nearly every action/spy/murder mystery/adventure flick, I just can't get into the "blood 'n guts" fright night films. So you might be surprised when I tell you that when I was given a choice to pick out my favorite new Whimsy Stamps' release product to use, this "Halloween Bawoon" Stamp Set was at the top of my wish list! As soon as I saw this great image, this card instantly designed itself and the contrast between the sweet little girl holding her horrifying balloon is SO CREEPY!

Halloween Bawoon Red Rubber Stamp Set

This card size is a shortened slimline - 7.5 x 4" and I stamped the image both on a white card stock panel and masking paper. After fussy cutting, the mask image was placed on top of the card panel. I washed the area above the balloon with water, trailing down a few drips along the sides and sprinkled just a very small amount of gray Brushos Colour Crystals onto the wet paper. The area was spritzed with shimmer mist and rotated so the colors could blend and run together. I added more water droplets in certain places and used my heat gun to dry the area. Some water color was added on top and I added one spritz of Tim Holtz "Empty Tomb" Mica Stain on top to give it that eerie metallic shine! 


The masking paper was removed, the image was colored and the sentiment was stamped using the MISTI. I trimmed my panel down a bit and attached it to a base to finish up this card! I just LOVE the ominous cloud hanging over the bawoon!

Head on over to the Whimsy Stamps "New Release" Section to check out all of the other fantastic  Halloween products in the shop!

Thanks so much for stopping by today and happy crafting!

Rachelle

Wednesday, August 23, 2023

Halloween Shaker Card | Whimsy Stamps - "Slimline Hill House Die"


 So SPOOOOKY!

I've got a CAS corner shaker card for you today that was designed with the great Halloween dies from Whimsy Stamps! My idea for this card came from the scene in "Sleeping Beauty" where the good fairies are waving their wands at Beauty's dress to change the color and rainbow smoke magically pours from the chimney! I decided to create a clean layout with the white background and let the ink blending in the shaker window do the work!


I blended "Twisted Citron", "Mermaid Lagoon", "Wilted Violet" and "Villainous Poison" together on a slimline panel measuring 4" x 9"; it was spritzed with shimmer mist and spattered with pearlized watercolors. I inked another panel with these same colors, adding a bit of "Black Soot" for additional depth, and cut it with the  "Slimline Hill House Die". I selectively trimmed the die cut so that I had a cropped version of the "house only" to use in the bottom corner. Once I had the position marked, I put the large curly-q die from the "Revealers 3 Die Set" in place on the white card front panel and cut the image - then the house die cut was glued into place on the front and I stamped the sentiment.


I wrapped some recycled acetate craft packaging around the top 3/4 of the background panel, filled it with the shaker bits and taped it closed. The front house panel (and the small smoke shaped omit) were attached with foam tape onto the shaker panel and this entire unit was adhered to a shaker card base.  
 

I added one of the bat die images from the NEW "Batty Die Set" and some of the Glazed Grape and Glazed Lime Confetti I used in the shaker pouch to embellish the smoke column. I was really happy with the clean feel of this design and it's always fun to try different versions of shaker cards!


Thanks so much for stopping by today and happy crafting!

Rachelle

CHALLENGES:

_____________________________________________________________________________________________________________________________________________________________

If you would like to do a little crafty shopping for some of the Whimsy Stamps' products I used in this card, I have them listed below. These are affiliate links which means that I receive a small commission if you use them through their website to make a purchase. These affiliate product sales are at NO ADDITIONAL cost to you but keeps my crafty supply drawer filled with card stock, glue, and Peanut M & M's! I truly appreciate your support

♥ SUPPLIES 

Wednesday, August 17, 2022

Halloween Card | Whimsy Stamps - "Zombie Party" Stamp Set


Hello!

Here's a super fun card featuring lots of dancing zombies partying it up under that sparkly disco ball - courtesy of Whimsy Stamps' "Zombie Party" Stamp Set! This slimline card measures 4" x 9" and started with an ink-blended panel that was attached to the card front. Two panels were cut from black card stock, (using the "Wobbly Windows" Slim Line Die)  glued together and spattered with paint & watercolors.


Single zombie images were stamped onto card stock and they were adhered behind the top & bottom window openings. Sparkly holographic paper was adhered behind the middle window to provide the disco-ball feel and the trio of zombies were stamped/die cut and popped up with foam tape. The sentiment words were stamped, die cut and adhered into place. This entire panel was glued onto the front panel and I some pearlescent bubbles were added to finish up the card! This card just makes me smile!

CHALLENGES:


Thanks so much for joining me today and happy crafting! - Rachelle

Tuesday, October 26, 2021

All Occasion Card | Picket Fence Studios - "Watercolor Roses" & "I Love You" Word Die


Hello!

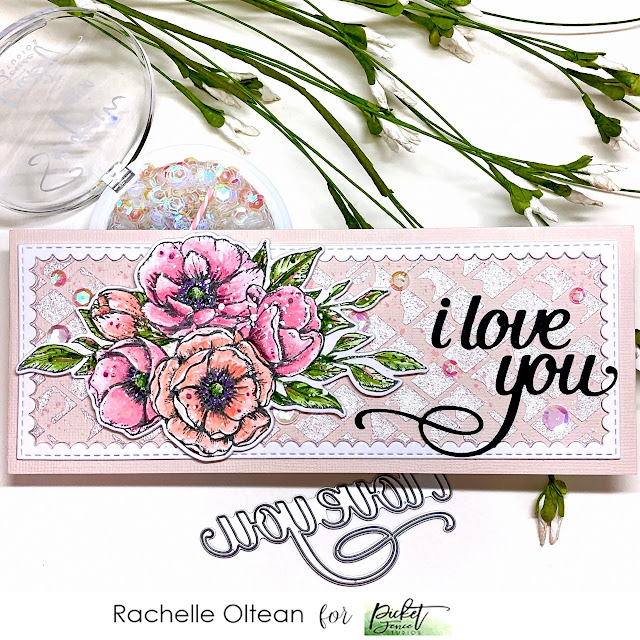
I've got a soft floral card to share with you today featuring this lovely new stamp set, "Watercolor Roses" from Picket Fence Studios! I wanted to try a pale blush background and top it with coral/pink roses - this is not a go-to color palette for me but I'm trying to stretch myself a bit to try some different color combos!

Here are some of the products I used:


Slim Line Stitched & Scalloped Rectangles and Alpha Die Cutting System

The watercolor roses were stamped, water colored and die cut. I die cut the stitched scalloped rectangle from a pale blush card stock and applied a light coat of Paper Glaze Lux Color "A" from the Nutcracker Ballet Ombre Set through the Slim Line Plaid One Stencil onto the center panel and I spattered it with a bit of watercolor; this added a wonderful pearly texture to my background!

Once this panel was dry, I reassembled the scalloped rectangle onto the front of a slim line card base, adding a white die cut frame on top for a bit of dimension. The scripty word sentiment was die cut twice and glued/stacked together. The floral bouquet was popped on top with foam tape and the words were glued into place. I finished the card with an assortment of sequins from the "Birthday Candles Sequins Mix Plus" - this is an amazing mix of pastel candies, pink-ish iridescent sequins and striped birthday candles!


Thank you for taking the time to stop by today and please take care!
Happy crafting!
Hugs - Rachelle