Showing posts with label One Word Wednesday. Show all posts

Wednesday, November 25, 2020

One Word Wednesday - "Peace" | MFT Stamps - "Little Town of Bethlehem" Dienamics


Hello!

Thanks so much for stopping by today - I haven't done a "One Word Wednesday" for a while and decided to share this die cut Christmas card featuring the "Little Town of Bethlehem" Die-namics Set from MFT! I created the scripty "Peace" frame in the Cricut Design Space to highlight the die cut layers and that image is shown below for you to copy and paste for your own use!

I began by doing some very basic ink blending on a piece of medium gray cardstock using Salty Ocean and Blueprint Sketch Distress Oxide Inks. The A2 panel was spritzed with shimmer mist and flecked with white pearlized paint in the upper right corner. The Bethlehem layers were cut from three values of brown card stock and glued to the blue panel. 


The white script frame was attached on top of the scene and a pearlized die cut was added to accent the star. This panel was adhered to a top-folding A2 card base and a few sequins finished up the card. This night sky really sparkles down onto the city below! Here is the frame image:


Thanks so much for stopping by today and for sharing your comments - they truly brighten my day! : )

Challenge Submissions:


Rachelle

Wednesday, July 1, 2020

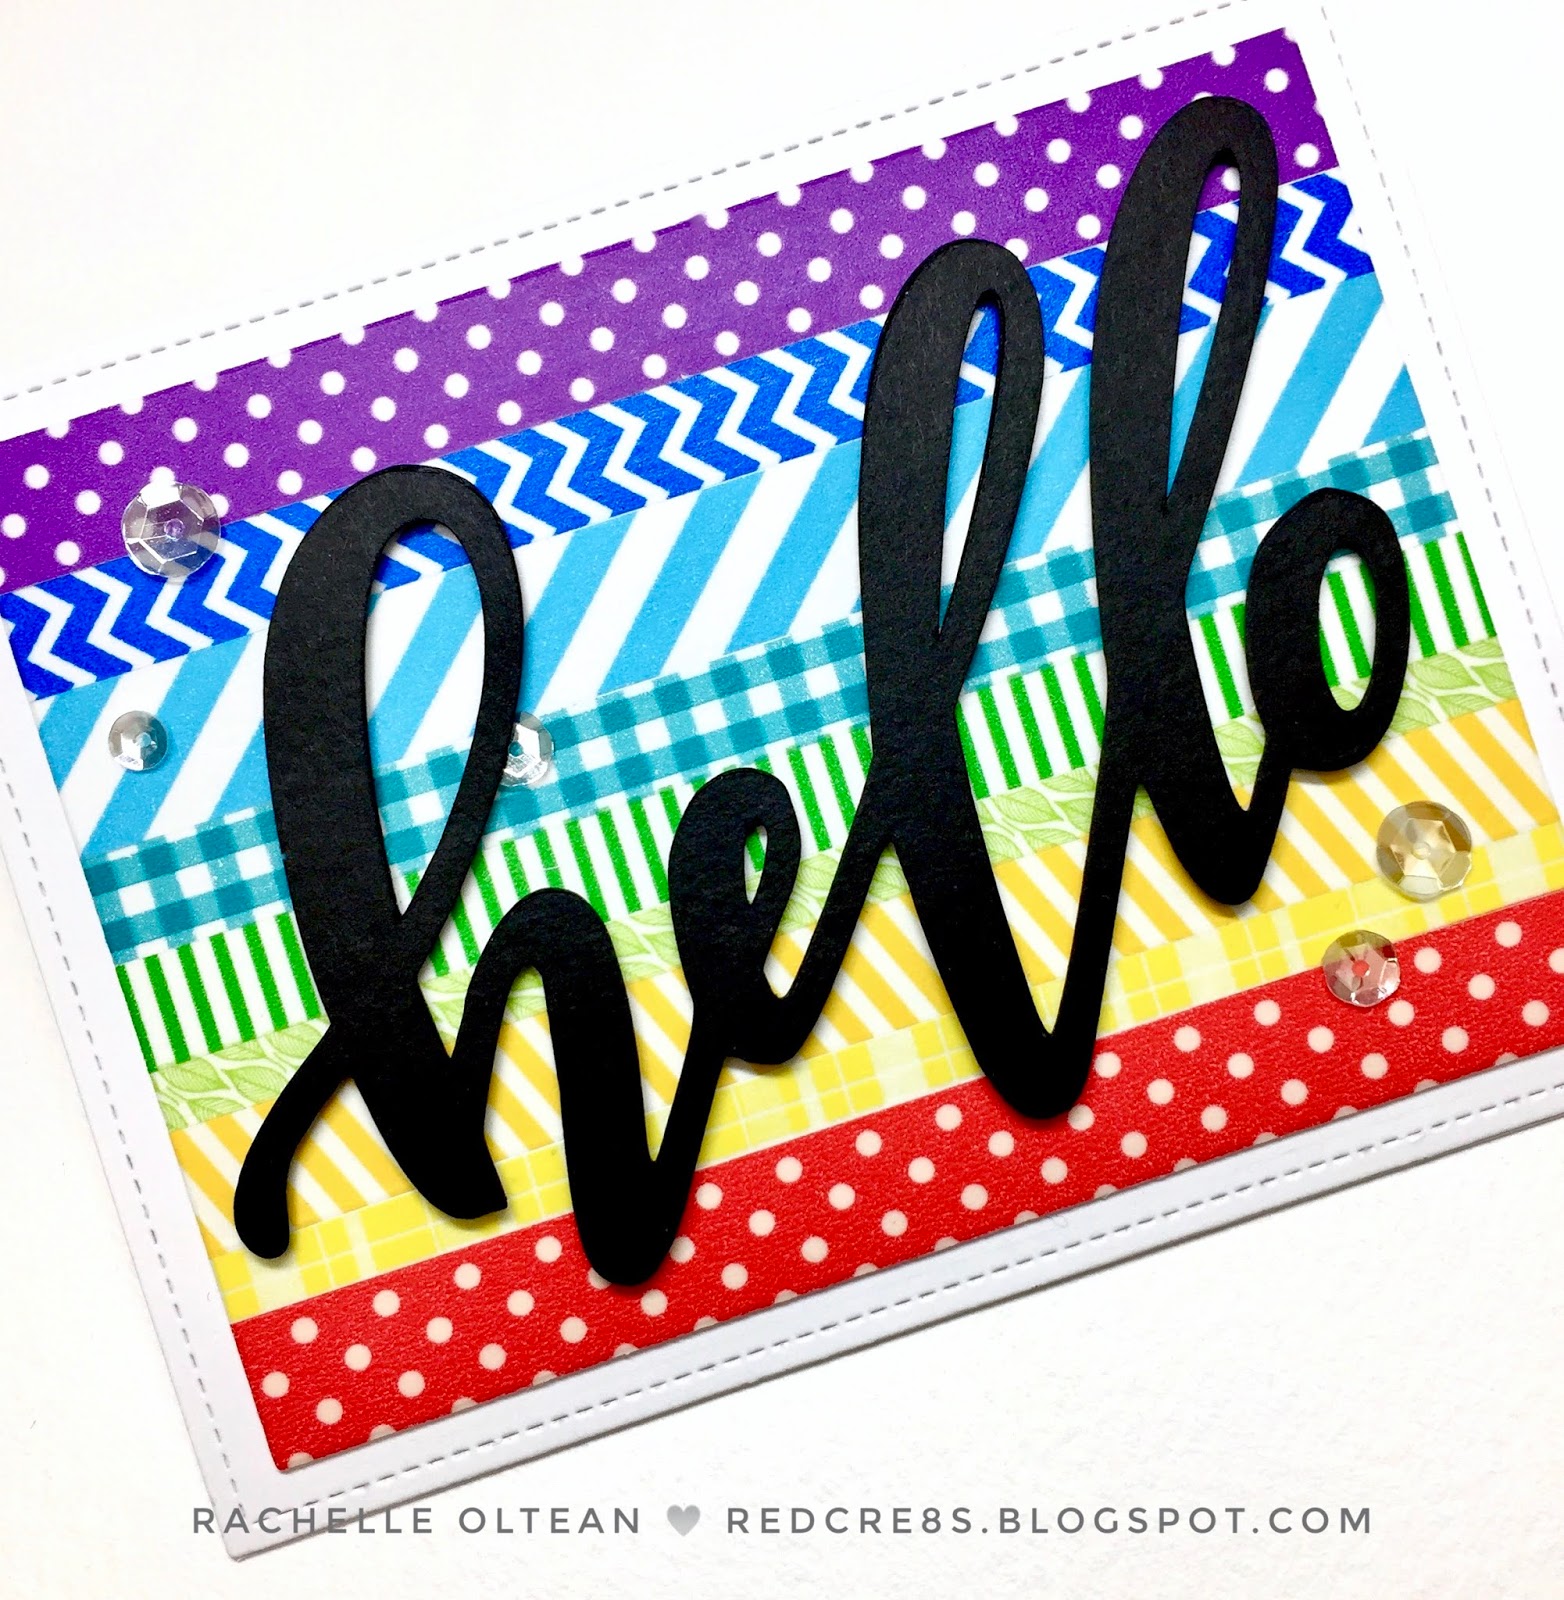
One Word Wednesday - "HELLO" | MFT Stamps Die-Namics - Pop Up Card


It's time for another "One Word Wednesday" project!

This card features a giant "Hello" die cut, a simple washi tape background panel and a pop up surprise on the inside! I decided to pull out my giant box of washi tape (that rarely gets used : ) and came up with a quick 'n easy card front design...so here we go!

I picked a handful of washi tape rolls in rainbow of colors and quickly adhered strips right next to each other on an A2-sized panel. After all the tape was down, I lightly burnished the everything with my Teflon bone folder to ensure the washi was adhering evenly. The panel was die cut with a plain rectangle die measuring 3.75"x5" - this gave the tape a really nice rounded, finished edge! 

Then it was rainbow pop-up time! I cut all of the MFT Stamps Die-namics, adhered a piece of stamped (using CAS-sual Fridays' "Shenanigans" Stamp Set from 2017) blue card stock to the interior and created two mini boxes that would hold the image layers - see below:


Using the same blue card stock, the first box measured 4 7/8"x1 3/4"x1/2", held the cloud bank and fit directly into the card crease. The second box measured 2 1/2"x2 1/2"x3/4", rested on the lower box and supported the rainbow above the clouds. I trimmed a few of the rays from the sun die cut and glued it into place. Cloud die cuts and small sparkling sequins were added to the background panel. An IMPORTANT NOTE: you have to leave a small gap between the lower die cut and the card base in order for the card to fold correctly - if there is no gap, the pop-up will bind and not close! Trust me  on this - I learned the hard way! ; )


Finishing the card front was easy-peasy compared to the pop-up! I die cut an A2 panel with a stitched rectangle die and glued it to the front; the washi panel was then adhered with strong two-sided tape. The large hello die cut was popped off the card front with foam tape and a few clear sparkling sequins were added to finish things up! Whew! 

If you didn't include the pop-up, this card would be so simple to mass produce and you could use tons of different color palettes and word dies on the front for all kinds of occasions! Thanks for stopping by and hope to see you again soon!

Challenges:


Thanks so much for taking the time to comment!
Rachelle

Wednesday, May 20, 2020

One Word Wednesday - "HAPPY" | Hello Bluebird - "Bee Happy" Stamp Set

Hey There!

I'm starting a new Wednesday Series that will feature a large one-word focus and today's word is "HAPPY!" I have paired this large die cut (free image to download below) with Hello Bluebird's adorable images and I hope this card will remind the recipient to BEE HAPPY on their birthday!

I used washi tape to create the pattern border stripes at the bottom of an A2 horizontal fold card base. A piece of 3.25" x 5.5" white card stock was embossed with a honey comb pattern, and glued to the card front. I created the word image in the Cricut DS and glued/stacked together three die cuts to give me dimension/stability. 

I stamped, colored and die cut the bee/dandelion images and then adhered them into place. The "happy" die cut was popped into place with foam tape and iridescent enamel dots finished off the card. I just love the cute expression on this bee's face as he lounges on the dandelion! The inside reads: "Happy Bee-Day - Wishing You a Wonderful Birthday!"


Challenge Submissions:


Thanks so much for joining me today and for taking the time to comment!
Rachelle