Showing posts with label Encouragement Card. Show all posts

Sunday, March 14, 2021

Encouragement Card | Graciellie Design - "Thrive"


Hello!

Gracie's got a wonderful new digital set entitled, "Thrive" and it's filled with inspirational sentiments and succulents!


I decided to go for a slimline design, which would allow me to color the plants in all of my favorite combinations and printed multiples of the succulents, which were watercolored and fussy cut. I spattered a 4"x9" panel of white card stock with pearlized watercolor and attached it to a slimline card base.


I used Pink & Main's "Plaid Slimline Die" to cut a pearlized aqua panel and glued that to the base. This is such a nice background layer for slimline designs! I pulled Gracie's handwritten word 'Thrive' into the Cricut Design Space and created a die cut. Three cuts were glued together for dimension and stability and adhered to a fishtail banner die cut from the same aqua paper. 


The succulent groups were positioned/glued into place and the word banner was attached on top. I added some gems/pearls in coordinating colors to finish up the card! 


After this past year, I hope that soon we will all be on our way to thriving again and that this card will give a bit of much-needed encouragement to the recipient! Thanks so much for joining me today and for taking the time to comment!

Challenges:


Rachelle

Tuesday, January 26, 2021

Sushi Party 4-Pack | Pink and Main - "Roll With It"


Hello Everyone!

I’ve got a Sushi Party to share today! I am totally in LOVE with the new “Roll With It” Stamp and Die Set! So much so that I had to stop myself after I made the four cards that I’m going to show you today (and I’ve still got ideas for about half dozen more cards in my sketchbook!) 

I thought I would start by showing you some of my reference photos and the resulting sketches I used to create these designs. This time I Googled "Sushi Menu" graphics and there was enough on-line inspiration for a thousand different cards! These are the four graphics that inspired my projects...and as you can see, they aren't ever copied directly but instead used as a guide for my final design. Sometimes it's the angles of the shapes, the color palette, or even the way the separate pieces fit together. It can also be an overall style or the way a background pattern works with the foreground - I believe you can always find something to inspire! : )


I then transfer these ideas to a notebook by drawing quick sketches which help me scale the ideas down to my card size. Here are the corresponding drawings...sometimes they start as a slimline card and then switch to an A2 or change from a horizontal to vertical layout! When I start with a sketch, the time it takes me to complete a card is usually cut in half and this allows me to make more cards!!!

Now on to my sushi party - I started by stamping all of the images multiple times with VersaFine Onyx Black Ink onto 100# white card stock. The images were then water colored and/or fussy – die cut.

For the first card, I stenciled the Petite Petals Pattern with Black Soot DOI onto red card stock and spattered the panel with gold paint. I used the largest of the Nested Hexagon Dies to cut an omit into the stenciled panel. I lightly ink blended the outer edges of a top-folding A2 card base with Scattered Straw DOI and added strips of black and gold metallic papers at the bottom. The stenciled panel was backed with craft foam and adhered to the card front. I attached the die cut images and the heat embossed sentiment strip into place with glue and/or foam tape. 


I just love this red/black/gold color palette and those cute Kawaii images!!!


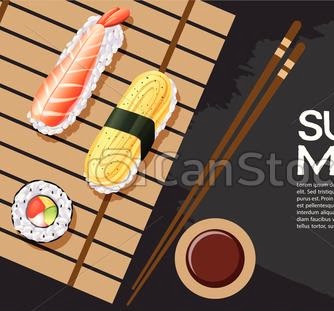
The second card is based on a photo I saw of sushi being served on a woven bamboo mat. I used the Sunburst Slimline Die and die cut kraft card stock multiple times. This gave me lots of 1/8” strips, which I used to create the mat. Once it was assembled, I glued it onto a white card stock panel measuring 4” x 5.25” and trimmed the overhang with scissors. This panel was adhered to a top-folding black A2 card base, the die cuts were attached with foam tape and I carefully stamped the sentiment using the MISTI; a few gems were added for a bit of bling!


Card #3 is a bright all-occasion design and I once again used the Petite Petals Stencil with Twisted Citron DOI to create a vertical band along the right side of the layout. This panel (3.75” x 5”) was heavily sprayed with shimmer mist and spattered with lime green pearlized paint. Some of the die cuts were glued directly onto the panel and the rest were popped up with foam tape. I used a partial sentiment from the Spring Sentiments Stamp Set and stamped it using the MISTI. I added some of the new All Occasion Glitter Enamel Dots and glued the top panel onto a top-folding A2 card base. 


The last card is a small appetizer plate filled with sushi goodness! I spattered a piece of red card stock with gold paint/Candy Apple DOI and fussy cut the triangular shape to use as my plate. A piece of black card stock was glued onto a top-folding horizontal A2 card base and striped paper was added onto both sides. After spattering a white card stock panel (3.75” x 5”) with gold paint, it was glued to the card front. The plate was attached with foam tape first and the sushi die cuts were added on top. The chop sticks were glued directly to the panel and the sentiment was stamped using the MISTI. A few matte gold sequins finished up my final card!


Thanks so much for sticking with me for this longer-than-usual post! This new release has so many wonderful images and I hope you will be inspired by all of the creative Design Team projects found on Pink and Main’s Facebook and Instagram Pages!

Challenges:


Have a great day and stay safe!

Rachelle

Friday, July 24, 2020

Encouragement Card | Cut It Up! Challenge #205 - "Ice Cream You Scream!" | Lori Whitlock - Food Truck Box Card

Hey!

We have a great new challenge for you on the Cut It Up! Blog featuring a much-needed summertime treat - ICE CREAM - and we would love to see your projects showcasing frozen treats! Our sponsor, Wendy from Digital Delights by Louby Lou, is offering a $5 gift code to her online store. The Design Team has outdone themselves for this sweet challenge so go check out the inspiration! 

I recently picked up a great SVG Bundle (Food Truck Box Card Assortment) on Lori Whitlock's site and this ice cream mobile was included! Here's a quick peek at the other versions of this same box card - I just love the taco truck!


Lori has a great YouTube video on how to put this card together and once all the die cutting was finished, the actual construction took less than 30 minutes to complete. I added a couple of extra details of my own to the design and used one of Louby Lou's Digital sentiments on the back of the card. This encouragement card is for an ice cream lover in my family who is also fighting cancer...I wrote my personal greeting on the back of the giant cone!


We can't wait to see your frozen/ice cream projects in our Cut It Up! Gallery - and don't forget the die cut! : )

Additional Challenges:


Thank you so much for your comments!
Rachelle

Friday, May 22, 2020

Encouragement Card | Picket Fence Studios - "Sunshine Friends" | Alphabet Challenge "D" is for Dry Embossing


Sending paper hugs out today!

We have a great new challenge beginning today over on the Alphabet Blog - "D" is for Dry Embossing! There are so many different ways to use this technique and the one I chose was to use a stencil as my embossing/printing tool!

I recently bought several of the older "Sunshine Friends" Stamp Sets from Picket Fence Studios and the one I used is called "You Are My Sunshine!", which was released in 2018. This was my first order with Picket Fence and I was so surprised to find a free gift included in my package - the "Triangle Collage Stencil". This is such a nice image and it reminded me of sun rays and so I decided to use it as my sunny background behind the main image! Thanks to the Picket Fence Folks for this lovely gift!

I ink blended my main panel with Fossilized Amber and Wild Honey Distress Oxides, spattered it with pearlized ink and die cut it with an A2 stitched rectangle die; this panel was glued onto a top-folding A2 card base. 


The stencil was lightly inked with the same inks, carefully placed onto a piece of white card stock and run through my die cutting machine - this created an embossed/inked image that has a letter press feel. I spattered this panel, die cut it with MFT's Elegant Rectangle Die and glued it onto the card front. The sunshine girl was stamped, colored and fussy cut. I heat embossed the sentiment with white powder on black card stock and trimmed it to size. I popped both of these images into place with foam tape and added light yellow sequins to the circular points on the embossed stencil. I love that this looks like happiness is radiating around her!


I used the stencil in the traditional way to ink blend a positive background to the inside and it was a cool effect when you opened the card...I love it when a plan comes together! Yippee!


Thanks so much for joining me today and head over to the Alphabet Challenge Blog to see the great projects and inspiration from the Design Team!

Additional Challenges:


I truly appreciate your comments!
Rachelle

Friday, April 24, 2020

Encouragement Card | MFT Stamps - "Doctor's Orders" Free Digital Download | Alphabet Challenge "B" is for Boy


Hello

I would like to share a very special card with you today that I made for my nephew. He is a new doctor (in practice for less than a year) who joined the Army Reserves while in medical school and was deployed last week for a 6-month tour here in the US to help patients with the Covid 19 virus. He is now stationed in New York City and is working in one of the hardest-hit hospitals in the Bronx. He is a very special person who just wants to serve others and I pray that he will stay healthy.


MFT Stamps was generous enough to offer four of their Birdie Brown Stamp Sets as free digital downloads during this pandemic, which feature medical professionals. If you haven't had a chance to pick them up, here is the link - MFT Stamps FREE GIFT.

I printed the doctor on 100# white card stock, colored/fussy cut the image. I designed a hinged open-window card base in the Cricut Design Studio (see A2-sized template below for you to download). The window card base was cut from heavy #130 white card stock and the single red frame, which was then glued onto the front.


I stenciled the MFT "Radiating Rays" with Fossilized Amber Distress Oxide Ink on the inside panel and spattered it with shimmer mist. The black die cut letters were glued onto a piece of trimmed kraft paper and adhered to the interior panel. The Birdie Brown Sentiment was die cut with a thin banner die and glued to the card front. The doctor was adhered in place and a few matte gold stars were added to the stenciled panel.


Thanks for joining me and we hope to see your "BOY" projects in our Alphabet Challenge Gallery!

Additional Challenges:


I truly appreciate your comments!
Rachelle