Showing posts with label Picket Fence Studios. Show all posts

Saturday, November 27, 2021

Christmas Card | Picket Fence Studios - "Holly Jolly" Stamp Set


Hello and welcome to Picket Fence Studios' "25 Days of Christmas"! It's Rachelle here today with some crafting inspiration and I'd like to share a new technique with you that mimics the look of mercury glass! I was experimenting with the Paper Glaze Enhancer in combination with some of the Paper Glitz colors and while you should NOT mix Glitz & Enhancer together into a single blended product, I did try using them separately on top of each other and came up with something that really resembles one of my favorite finishes - antique mercury glass.


The Paper Glaze Enhancer is a soft, matte lightweight paste (resembling spackling compound in texture) and dries to a semi-transparent dull finish when used on its own. I thought that I might be able to accent some areas by applying "Sparkle" Paper Glitz on top of the stenciled areas and when it was all dry, some of the areas of the Paper Glitz highlighted the Enhancer and some of it seemed to melt into the kraft background with a mirror effect! The photo can't quite capture it but believe me this looks so cool in real life! I just applied a thin coat of each product using the Slim Line "Changes" Stencil and set it aside to dry. It was trimmed down to 3.75" x 5" and adhered to a top-folding A2 card base.

The leaf and berry cluster from the "Holly Jolly Christmas" Stamp Set was stamped/heat embossed with clear powder, watercolored and die cut. The wonderful sentiment from the "Winter Has Come To Town" Stamp Set was heat embossed and die cut. 


I looped some silver thread into a bunch, taped it together and adhered it to the stenciled panel. The holly image was popped up with foam tape and the sentiment strip was glued into place. I added pink and matte gold sequins (from The Pink Lady Sequins Mix) to finish up the card. I hope you'll give this look a try and I'd love to see you share what you come up with over on the Picket Fence Studios' Community Facebook Page! 

Thanks so much for stopping by today and take care!

Hugs - Rachelle

Tuesday, November 16, 2021

All Occasion Card | Picket Fence Studios - "Slim Line Blending Roses" Stencil

Hello!

Today's project uses a great stencil from the new release, "Slim Line Blending Roses" Stencil. The roses in this stencil can be colored so many different ways and it literally took me 10 minutes to ink this image up! This card was born out of necessity because the pressure pins on my 15-year old die cutting machine cracked off while I was working on another design and so without a way to die cut, I had to come up with another approach! : )


I ink blended the rose diagonally across an A2 panel with Distress Oxides, selectively cut through the image with my craft knife and fussy cut around the left side of the rose. The panel was backed with craft foam and the sentiment (from the "Songbirds" Stamp Set)  was stamped using the MISTI.


I ink blended the pattern from the "Slim Line Basket Petals" Stencil onto an A2 card front with some of the same Distress Oxides, sprayed it with water and dabbed it dry. After laying the rose panel on top, I determined the area of the stencil pattern that would be visible and then added gems (from the NEW "Celebration" Gem Mix) into the petal centers; the rose panel was adhered into place with liquid adhesive to finish the card. This gem mix is so pretty will go with a lot of my floral cards - here's a close up of the colors!

CHALLENGES:

The Creative Crafters Challenge #46 - AG

Daisy Chain Challenge - #58 - Add Sparkle

Crafter's Castle - November #47 - AG

Time Out Challenges #200 - Precious

Thanks so much for stopping by today and happy crafting!

Hugs - Rachelle

Sunday, November 14, 2021

All Occasion Card | Picket Fence Studios - "Aquarius Girl"


Hello!

It's the 14th and that means it's release day at Picket Fence Studios! I'm sharing a card created with the NEW Horoscope Girl: "Aquarius." Even though she's a child of the air, she reminded me of a mermaid so I went with an ocean color palette! Here's what the stamp set looks like - isn't she beautiful?

The background panel was ink blended with Distress Oxides (Salvage Patina, Salty Ocean and Prize Ribbon), sprayed with water, and spattered with gold metallic paint and diluted inks. This panel was die cut and adhered to a top-folding A2 card base. The sentiment (Word Die Topper Subtitles) was heat embossed with gold powder.


The Aquarius Girl was stamped with Picket Fence Studios' Black Hybrid Ink, watercolored and fussy cut. I die cut a circular frame and coated it with a mix of "Snow Drifts" and "Lime Christmas Green" Paper Glitz. When the frame was dry, it was glued/stacked onto two additional frames for strength and dimension. The Aquarius Girl was slipped into the circle and attached on the back side with adhesive.


The main image/frame was attached to the card front with liquid adhesive to finish the design! I was really happy with the bright coloration and the way she is framed in that sparkling circle! There are so many great new products in this month's release and I hope you'll head over to the PFS Shop to check them out!

Thanks so much for stopping by today and enjoy the rest of your weekend!
Hugs - Rachelle

Wednesday, November 3, 2021

All Occasion Card | Picket Fence Studios - "Watercolor Roses"


Happy Wednesday!

I've got a rich floral card to share featuring the NEW "Watercolor Roses" Stamp Set! This set has already become a favorite and can be used for so many different occasions!

I began by heat embossing the rose bouquet image with gold powder onto heavy (130#) white card stock and I watercolored/die cut the floral with the matching die. 


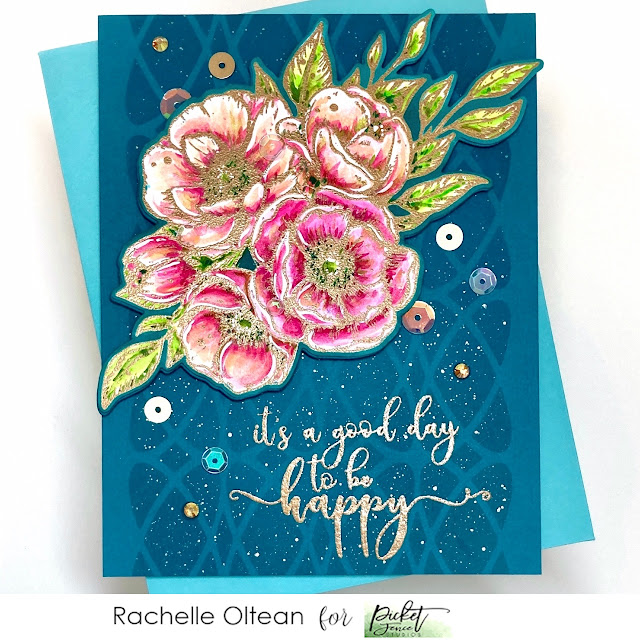
I LOVE Art Nouveau design and was so excited to see the NEW Slim Line Changes Stencil! The curved line work on this design is absolutely beautiful and is a special addition to my Picket Fence Studios' stencil collection! I placed the slim line stencil down the middle of an A2 card base and applied "Peacock Feathers" Distress Ink onto the teal card stock with my "Life Changing Blender Brush." I really like the framing effect this slim line pattern gives to this A2-sized panel! I left the stencil in place and flecked gold watercolor paint on top so that the speckle would only be visible within the stenciled pattern. Once the panel was dry, I glued it to a top-folding A2 card base and heat embossed one of the wonderful sentiments from this stamp set with the same gold powder onto the teal finished background.


I added a couple of drops of my "Peacock Feathers" Reinker to a plastic palette and carefully painted around the edge of the white die cut margin so that the floral would blend into the teal background. This keeps the color on the roses bright and clean (with white highlights) but removes the harsh contrast of the white edge against the dark card stock. I popped the roses up with foam tape for a bit of dimension and added a mixture of embellishments in coordinating colors: "Iridescent Moonshine" Sequins"Sands Of Time" Gem Mix, and the matte gold circle sequins from the "Pumpkin Cookies Sequin Mix Plus."

Thanks so much for stopping by today! Take care and happy crafting!
Hugs - Rachelle

Saturday, October 30, 2021

All Occasion Card | Picket Fence Studios - "Iconic Beauty Sara" Stamp Set

Hello!

I created a mixed media piece featuring this beautiful new image from the "Iconic Beauty Sara" Stamp Set. Sara is somewhat abstract and so I thought she would fit right into a heavily textured background. I began by applying ink washes directly onto a page from an old French book and spattering it with pearlized paints. I stamped Sara onto the bottom right corner allowing the image to bleed off the page.  

Iconic Beauty Sara


I then went back into the page with additional ink blending using the NEW Slim Line Changes Stencil to add pattern around the image. Several areas were highlighted with white color washes and details added to her hair/face. I also painted lots of small highlights/patterns with gold paint and went back into the black ink with a fine-tipped permanent marker to add hashmark textures to soften the edges.


I added just a bit of the "Black Rainbow" Paper Glitz to her hair for a bit of depth and shine and stamped the sentiment (from this same set) on top using my MISTI. The panel was trimmed down to 4" x 5.25" and attached to a top-folding A2 black card base. I added some of the iridescent sequins from the "Midnight Tales Sequin Mix Plus" to finish up the card. I love these sequins because they look blue from one angle and gold from another - a perfect match for this palette!


Thanks so much for stopping by today and I hope you enjoy the rest of your weekend!

Happy crafting!
Hugs - Rachelle

Friday, October 29, 2021

Picket Fence Studios - MFT Stamps Collaboration


Happy Friday! 

Picket Fence Studios has joined forces with MFT Stamps today for a creative collaboration! The PFS Design Team received ink pads/pattern paper to use and I had so much fun ink blending on both of my projects! I have been an MFT customer for many years and love their stamps/dies/pattern paper but I had never purchased any of their inks - now I can't wait to add more to my collection! The colors are so intense (with really juicy ink pads) and they blend beautifully with Picket Fence's "Life Changing Blender Brushes".

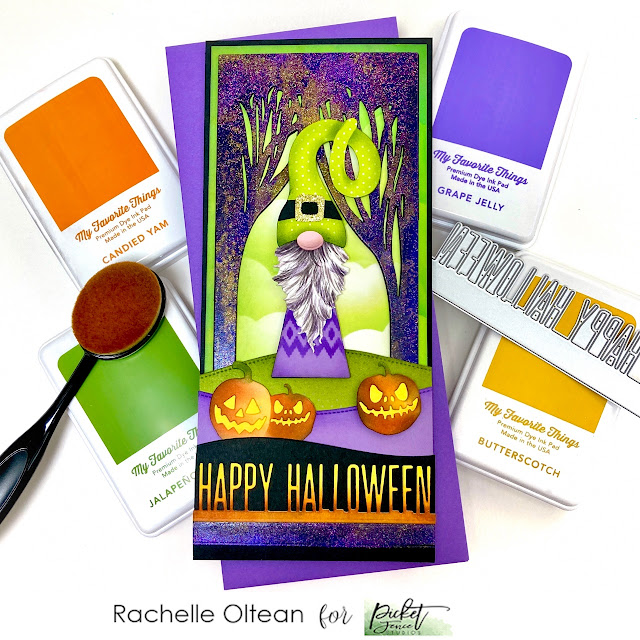
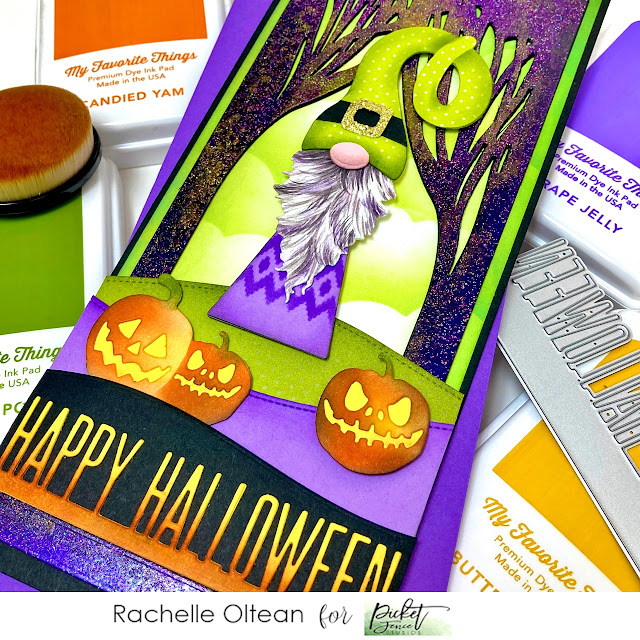
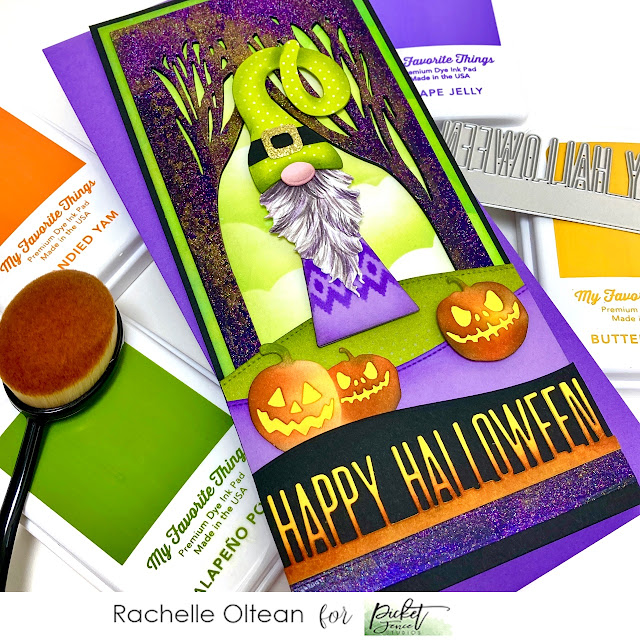
I have had this idea for a spooky forest scene ever since I saw the "Billy The Gnome" Die Set and this was the perfect opportunity to add some great detailing with MFT's "Premium Dye Inks! This ink quartet - "Candied Yam", "Jalapeño Popper", "Butterscotch", and "Grape Jelly" - created the perfect Halloween palette!  


I began by die cutting "Billy" from several different card stocks and his hat from MFT's lime green pattern paper from the "Poppin' Polka Dots" Paper Pad. I added ink shading/pattern to the various pieces and painted the beard details with watercolors; all the pieces were assembled together with liquid adhesive. Using the "Scarecrow Cover Plate Die", I die cut just the row of pumpkins from the image and fussy cut them apart. The pumpkins were blended with the MFT Inks and backed with yellow card stock pieces to cover the omits. Sloped pieces of black, purple and green card stock were die cut; ink blended shading was added. I also ink blended the green sky background, trimmed this finished panel down to 3.75" x 8.75" and attached it to a black slim line card base. My final ink blending was on the "Happy Halloween" Word Topper Die.


To create the sparkly purple forest, I randomly blended two Paper Glitz colors (Purple Prism & Fall Gold) around the edges of a piece of black card stock measuring 10" x 6" and set it aside to dry. After about 30 minutes, it was ready to cut using the "Slim Line Trees Silhouette Cover Plate Die". The purple tree silhouette was glued onto the green sky panel.


Then it was time to assemble all of the remaining die cuts in the scene from the back to the front ending with the "Word Topper" on the black sloped piece at the bottom! I just love Billy as a bewitched Halloween gnome!


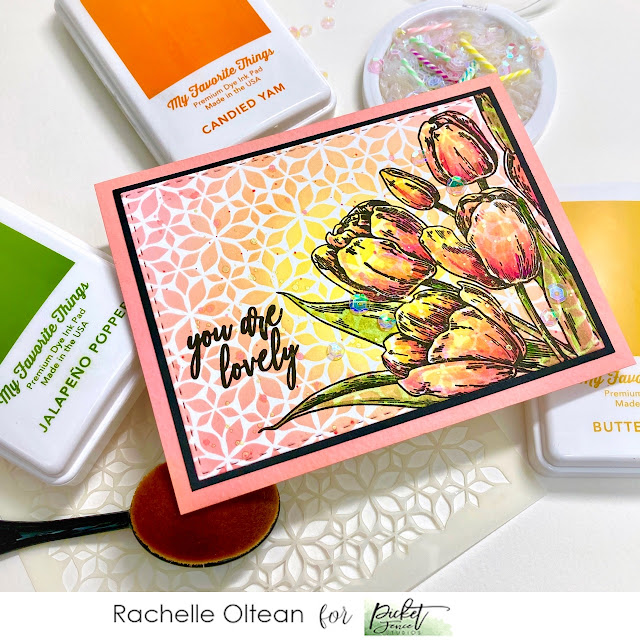
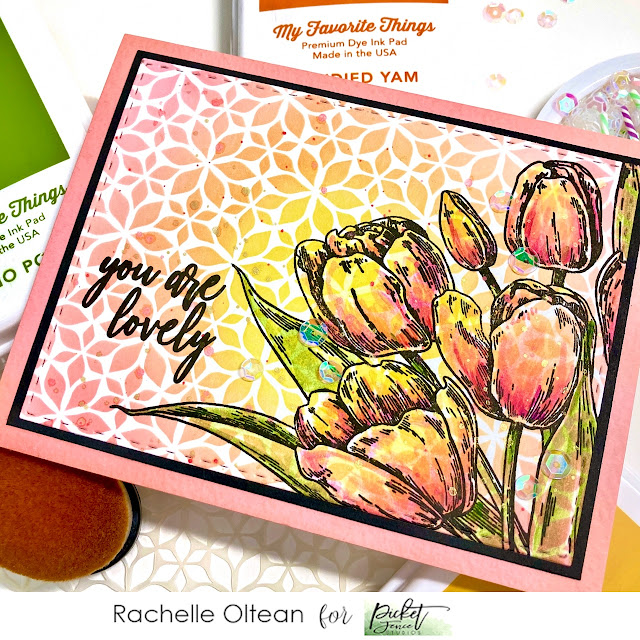
For my second project, I used the MFT Inks to stencil a soft background ("Flowers Stencil") with a warm glow in the center. I then stamped the large floral image from the "Early Tulip Bouquet" Stamp Set on top of the background and added touches of transparent watercolor so that the pattern would come through. The finished panel was die cut and attached to a skinny black mat, which was glued onto a pale peach card base. The sentiment was stamped using my MISTI and a sprinkling of sequins from the NEW "Birthday Candles" Sequin Mix Plus finished up this card.


Thanks so much for stopping by today and be sure to check out all of the great projects created by both Design Teams! There's also a great giveaway - each company is giving away a $50 gift certificate to use in their respective stores so be sure to leave a comment or two for a chance to win! Here are the links:


Have a great weekend and happy crafting!
Hugs - Rachelle

Tuesday, October 26, 2021

All Occasion Card | Picket Fence Studios - "Watercolor Roses" & "I Love You" Word Die


Hello!

I've got a soft floral card to share with you today featuring this lovely new stamp set, "Watercolor Roses" from Picket Fence Studios! I wanted to try a pale blush background and top it with coral/pink roses - this is not a go-to color palette for me but I'm trying to stretch myself a bit to try some different color combos!

Here are some of the products I used:


Slim Line Stitched & Scalloped Rectangles and Alpha Die Cutting System

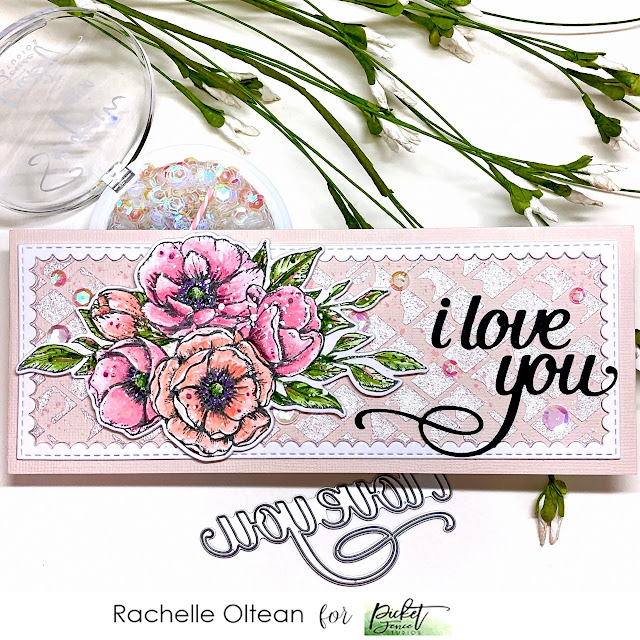
The watercolor roses were stamped, water colored and die cut. I die cut the stitched scalloped rectangle from a pale blush card stock and applied a light coat of Paper Glaze Lux Color "A" from the Nutcracker Ballet Ombre Set through the Slim Line Plaid One Stencil onto the center panel and I spattered it with a bit of watercolor; this added a wonderful pearly texture to my background!

Once this panel was dry, I reassembled the scalloped rectangle onto the front of a slim line card base, adding a white die cut frame on top for a bit of dimension. The scripty word sentiment was die cut twice and glued/stacked together. The floral bouquet was popped on top with foam tape and the words were glued into place. I finished the card with an assortment of sequins from the "Birthday Candles Sequins Mix Plus" - this is an amazing mix of pastel candies, pink-ish iridescent sequins and striped birthday candles!


Thank you for taking the time to stop by today and please take care!
Happy crafting!
Hugs - Rachelle

Monday, October 25, 2021

Christmas Card | Picket Fence Studios - "Slim Line Double Tree Line" Stencil Scene


Happy Monday!

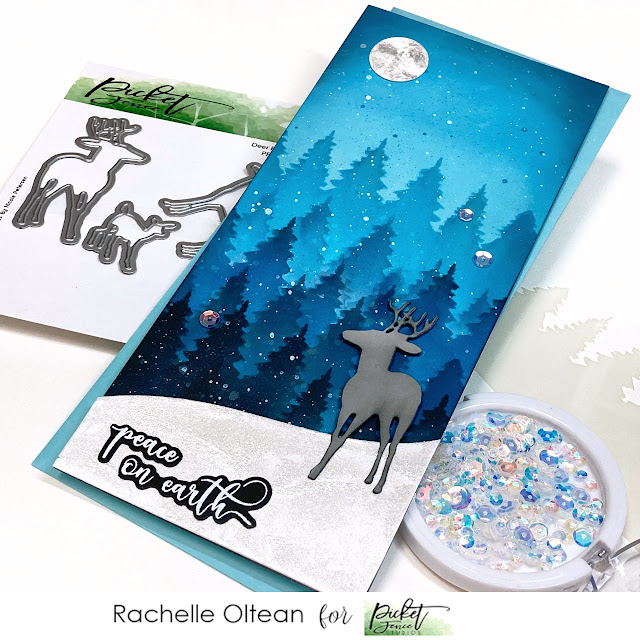
I've got a peaceful, winter night scape to share with you today featuring lots of ink blending with the "Slim Line Double Tree Line" Stencil set. This is a great scene-building tool because you get both the positive and negative tree line! I also used the "Deer Family" Die Set, which has really well-drawn deer silhouettes - I hate it when animal die cuts don't really look like they are supposed to but the stance and action of these three deer are perfect!  


I began by ink blending the sky portion of a white card stock panel measuring 5" x 11" with Distress Oxide Inks - Tumbled Glass, Salty Ocean, Broken China, Chipped Sapphire and Black Soot. This palette leans toward the warm blue side of the spectrum - I didn't want it to look too 'cold'. Using the stencil I began to blend these same inks in a gentle, downward motion to create the forest scene, keeping the lighter value trees in the background and the darker trees toward the front. The images were also staggered  to give it a more realistic look and I slightly darkened the tops to highlight the atmospheric perspective.  The panel was spritzed with shimmer mist, spattered with white/pearlized paints and set aside to dry.

I applied a thick layer of "Sparkle" Paper Glitz to a heavy white card stock panel and die cut it when dry to create the foreground snowbank. The male deer was die cut from mid-toned grey card stock and accented with a bit of ink blending.


I die cut a 1" circle from white card stock, carefully coated it with the "Sparkle" Paper Glitz and added just a bit of "Silver Bells" Paper Glitz to give the full moon its classic shadows. The sentiment was heat embossed onto black card stock with white powder and cut apart so that it could be stacked in the lower left corner.


The background panel was trimmed to 9" x 4" and attached to a slimline card base. The moon, snow bank, deer and sentiment were all glued into place and I added a few of the Iridescent "Moonshine" Sequins to finish up this scene. 

Thanks so much for stopping by today and I hope you have a great week!

CHALLENGES:


Happy crafting!
Hugs - Rachelle

Wednesday, October 20, 2021

Christmas Card | Picket Fence Studios - "For The Holidays" Stamp Set

Happy Wednesday!

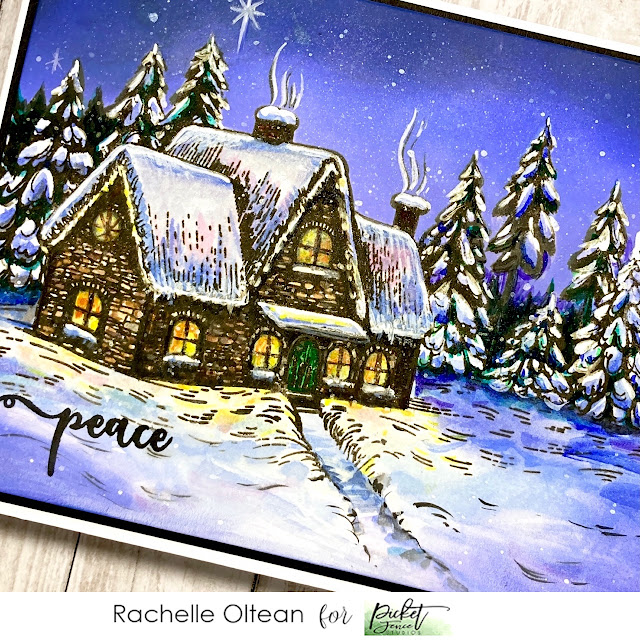
I've got a simple card design for you today and it's a one-layer creation! I had to resist adding some bling but this peaceful image is so pretty, I didn't think it needed it! This stone cottage in the woods is from the NEW Picket Fence Studios' "For the Holidays" Stamp Set.  This set includes this large A2-sized image and lots of great sentiments!


Using my MISTI, I stamped the cottage onto two pieces of 110# white card stock with a combination of black and dark brown inks. I used gouache to paint the image only, leaving the sky without color; this  took about two hours to complete. I fussy cut the second stamped image along the tree line, creating a mask and used it to ink blend the winter night sky with Distress Oxides - Shaded Lilac, Blueprint Sketch and Black Soot. I spritzed the entire piece with shimmer mist, spattered it with diluted opaque white paint and added the Christmas Star in the sky.

I trimmed the piece down to 4" x 5.25", added a black mat and attached it to a white A2 card base. This feeling of peace is what I feel when I go home to my parent's house for Christmas - I hope we can all feel this way during the upcoming holidays! Take care!

CHALLENGES:


Happy Crafting and have a great day!
Hugs - Rachelle

Tuesday, October 19, 2021

Christmas Card | Picket Fence Studios - "Gingerbread Betty and Bob" Dies

Hello!

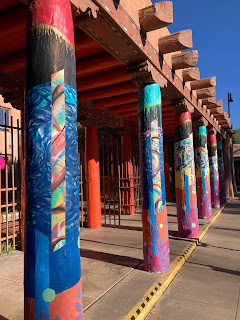
It's good to be back in the creative saddle so to speak after taking our first vacation in over two years. My hubby and I went out to New Mexico, the "Land of Enchantment", and spent a lot of time hiking in some National Parks & Monuments, revisiting the Georgia O'Keefe Museum, and attending the Albuquerque Balloon Fiesta - the largest hot air balloon event in the world! We got to see over 500 hot air balloons take off as the sun crested the mountains - AMAZING! Oh - and let's not forget the trip to Roswell, the location of the International UFO Museum!
 
I don't usually share a lot of personal photos but here are just a few vacation pics!

Sierra Blanca Trail 

White Sands National Park

Roswell NM - UFO Museum

Santa Fe NM

Albuquerque Balloon Fiesta

Thanks for indulging me...now it's back to card making!


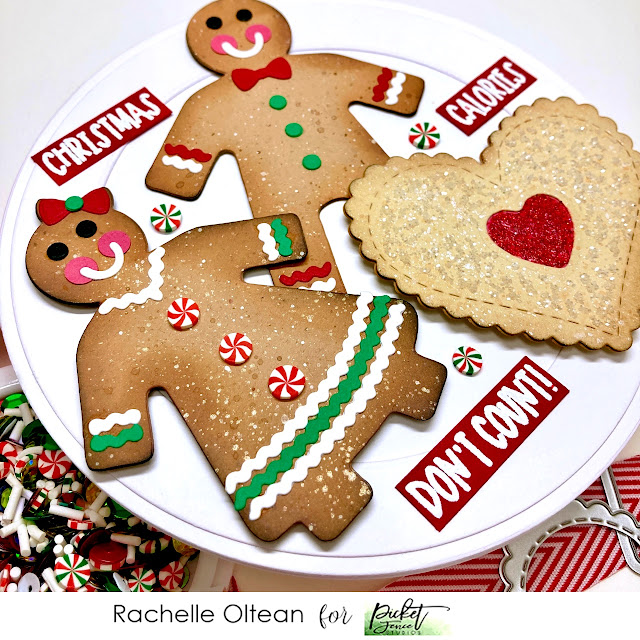
Here's a sweet treat - a plate full of Christmas cookies and the calories don't count! I used the NEW "Gingerbread Betty & Bob" Die Sets to create these holiday cookies, that almost look good enough to eat! I die cut multiple bodies from kraft card stock and glued/stacked them together for dimension. The gingerbread people were inked around the edges to show a little oven browning, and spattered with paints. I die cut multiples of the icing accents from black/white/red/green card stock and glued all of the bits and pieces into place to decorated them. 

I LOVE Linzer Cookies and decided to add one to the plate by using the scalloped heart die from the NEW Slim Line Stitched and Scalloped Rectangles and Alpha Die Cutting System. Once again, I die cut several hearts from light tan card stock and one from dark pink. I glued two tan pieces together, inked around the edges, spattered it with paints and die cut the smaller heart from the center. I cut the scalloped edge off the dark pink heart and glued it to the back of the front piece. I carefully painted a thick layer of True Christmas Red Paper Glitz onto the pink heart omit and set it aside to dry. Once the Paper Glitz was dry to the touch, the remaining tan hearts were glued to the back and coarse iridescent glitter was added to the front to mimic sugar.

Here are all of the new products I used on this card!


To create the plate, I die cut a 5.5" circle from 130# white card stock and added a slightly smaller ring to accent the rim; this was attached to a circular card base. I heat embossed the sentiment from the NEW Gingerbread People Stamp Set  and trimmed it into three pieces. 


I arranged and marked the placement for all of my pieces and glued the sentiment down first and then the cookies followed. A few of the tiny peppermint candy embellishments from the NEW Christmas Twist Sequin Mix Plus were added to finish up the card.


Thanks so much for hanging with me through the vacation portion of this post and I hope you like this project...I sure had fun making it! Take care and stay safe!

CHALLENGES:


Happy crafting and have a great week!
Hugs - Rachelle