Showing posts with label Shaker Card. Show all posts

Thursday, October 26, 2023

Halloween Card | Whimsy Stamps - "UFO" & "Boo" Die Sets


Hello!

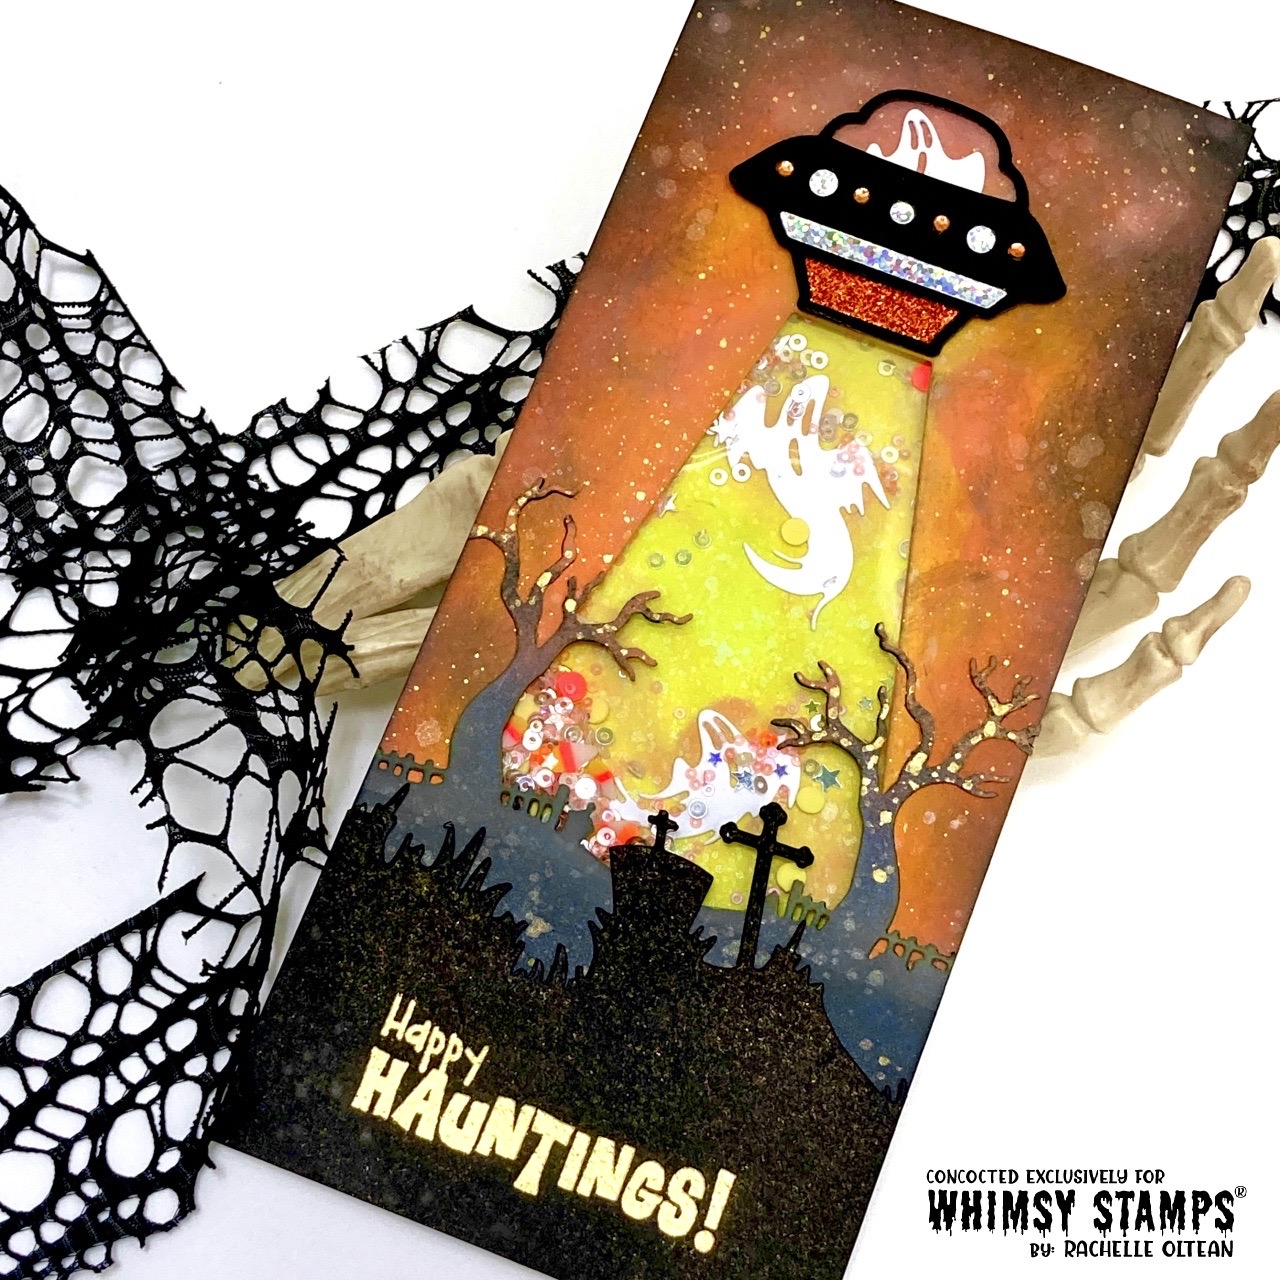
Here's a spooky shaker card that's out of this world featuring a UFO beaming up all of the ghosts in the graveyard! This design started with four distress oxide ink-blended backgrounds - 1) the lemony green full background panel 2) the orange sky with a beam die cut omit from the "UFO Die Set" 3) the spooky trees w/gravestones "Haunted Graveyard Border Die" and 4) the larger gravestone foreground panel using the "Howling Night Die Set".

Each piece was ink blended, spritzed with a shimmer mist, spattered with pearlized paints and trimmed to fit a 4 x 9" shaker card base.
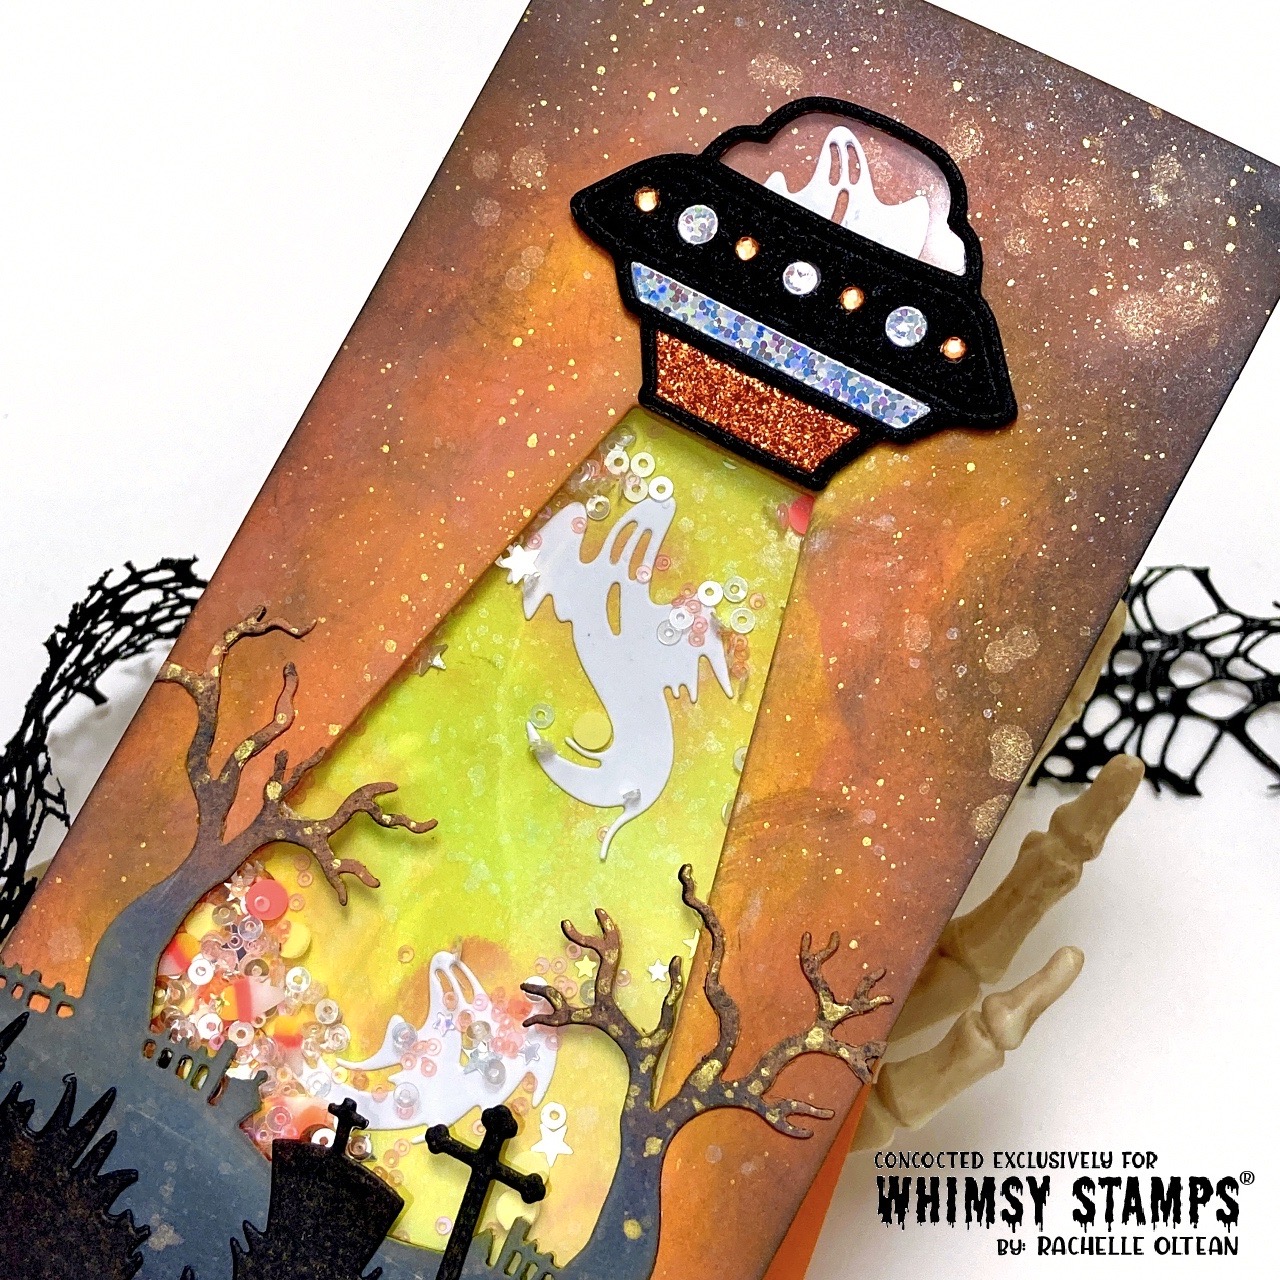

The UFO was cut from heavy weight black card stock glitter, special holographic papers and assembled. Another UFO outline was cut from acetate and attached to the back of the piece. Three of the ghosts from the "BOO Die Set" were cut from heavy weight white card stock and one was attached behind the acetate "glass" window of the UFO.

The lemon panel was glued onto a slimline card base. The orange sky panel was backed with a piece of acetate to create the shaker window and popped up with foam tape. I used the window to determine where my ghosts should be positioned and glued them to the lemon panel. 

The spooky tree panel was positioned to cover the bottom of the light beam and adhered on top. Once I determined where the dark foreground panel should go, I heat embossed the sentiment ("Spirited Sentiments Clear Stamps") with Ranger's "Princess Gold" Embossing Powder and glued it into place on the card front. The final item to be adhered was the UFO die cut at the top of the light beam.


With the entire front window panel complete, I piled my shaker bits (This Calls For Confetti - Candy Corn Mix 2.0)  onto the ghosts, peeled off all of the release paper from the foam tape and very carefully pressed the top panel into place! I just love those mini candy corn pieces in this confetti mix! They are perfect for Halloween shaker cards!

Thanks so much for stopping by - I really appreciate it! Take care and happy crafting!
Rachelle

CHALLENGES:


Wednesday, August 23, 2023

Halloween Shaker Card | Whimsy Stamps - "Slimline Hill House Die"


 So SPOOOOKY!

I've got a CAS corner shaker card for you today that was designed with the great Halloween dies from Whimsy Stamps! My idea for this card came from the scene in "Sleeping Beauty" where the good fairies are waving their wands at Beauty's dress to change the color and rainbow smoke magically pours from the chimney! I decided to create a clean layout with the white background and let the ink blending in the shaker window do the work!


I blended "Twisted Citron", "Mermaid Lagoon", "Wilted Violet" and "Villainous Poison" together on a slimline panel measuring 4" x 9"; it was spritzed with shimmer mist and spattered with pearlized watercolors. I inked another panel with these same colors, adding a bit of "Black Soot" for additional depth, and cut it with the  "Slimline Hill House Die". I selectively trimmed the die cut so that I had a cropped version of the "house only" to use in the bottom corner. Once I had the position marked, I put the large curly-q die from the "Revealers 3 Die Set" in place on the white card front panel and cut the image - then the house die cut was glued into place on the front and I stamped the sentiment.


I wrapped some recycled acetate craft packaging around the top 3/4 of the background panel, filled it with the shaker bits and taped it closed. The front house panel (and the small smoke shaped omit) were attached with foam tape onto the shaker panel and this entire unit was adhered to a shaker card base.  
 

I added one of the bat die images from the NEW "Batty Die Set" and some of the Glazed Grape and Glazed Lime Confetti I used in the shaker pouch to embellish the smoke column. I was really happy with the clean feel of this design and it's always fun to try different versions of shaker cards!


Thanks so much for stopping by today and happy crafting!

Rachelle

CHALLENGES:

_____________________________________________________________________________________________________________________________________________________________

If you would like to do a little crafty shopping for some of the Whimsy Stamps' products I used in this card, I have them listed below. These are affiliate links which means that I receive a small commission if you use them through their website to make a purchase. These affiliate product sales are at NO ADDITIONAL cost to you but keeps my crafty supply drawer filled with card stock, glue, and Peanut M & M's! I truly appreciate your support

♥ SUPPLIES 

Sunday, August 20, 2023

Halloween Card | Whimsy Stamps - "Halloween Night" Clear Stamp Set


EEK!

YAY! It's Whimsy Stamps' Halloween Release Day and here's a very scary shaker card with bats that are simply too cute to spook! These wonderful images are from the NEW "Halloween Night" Clear Stamp Set and coordinating "Halloween Night" Die Set. 


I created the background panel by mixing Brushos Color Crystals, pearlized paint and Distress Oxide Inks together; it ended up looking like aged metal! This panel was cut to 5" x 7" and attached to an A7 card base. The images were stamped, watercolored and die cut/fussy cut. I added one extra die cut to the back of each to provide some extra stability. 


Using the "Drippy Frame" Die, I die cut three frames from heavy-weight black cardstock, glued them together and embossed the top with black powder to give them some shiny texture! It really did look like black goo dripping down! YAY! An acetate window was cut to size and attached to the back of the frame with Scor-Tape and double-thick black craft foam was added to the back of the acetate under the frame to create the shaker window. I piled up all the shaker bits into the center of the card front, peeled off the release paper from the window and pressed it into place.


I blended an ombre panel using "Wilted Violet" Distress Oxide Ink and die cut the main letters from the "EEK! Word Shadow and Die Set. The shadow was die cut from heavy weight vellum and the letters were glued on top. All that was left to do was to adhere everything in place onto the frame to finish up the design! 

Rachelle 

CHALLENGES:


_______________________________________________________________________________________________________________________________________________________________

♥  SUPPLIES  ♥ 
If you would like to do a little crafty shopping for some of the Whimsy Stamps' products I used in this card, I have them listed below. These are affiliate links which means that I receive a small commission if you use them through their website to make a purchase. These affiliate product sales are at NO ADDITIONAL cost to you but keeps my crafty supply drawer filled with card stock, glue, and Peanut M & M's! I truly appreciate your support


Saturday, July 22, 2023

All Occasion Card | Graciellie Design - "Vintage Peony 2" Digital Stamp Set | Guest Designer


Hello!

Here's a "Pretty In Peach" Shaker Card featuring Gracie's NEW Vintage Peony 2 Stamp Set! I really love this amazing release full of these well-drawn images! 


I loosely watercolored the background image and spattered it with pearlized paint. The panel was trimmed and mounted to a black card base - but I didn't stop there! I die cut three decorative frames, glued them together and adhered an acetate panel to the back. Skinny strips of foam tape were adhered behind the frame, shaker bits were piled onto the center of the card front and the acetate window was pressed into place on top. 


The word sentiment is from an older Graciellie set which was printed, die cut and adhered into place with strong two-sided tape. I think there are at least fifty ways to color these beautiful images and I'm just getting started! 

Thanks so much for joining me today and happy crafting!
Rachelle

Wednesday, November 17, 2021

Christmas Card | Pink & Main - "Snow Sweet" Stamp Set


By now, you probably know that I’m a shaker card fanatic but this is my very first attempt at a full-front version! It was so easy to do with these wonderful P&M Products that I’m going to be able to mass produce about a dozen of these in one day! I used the “Snow Sweet” Stamp of the Month Set and chose this handsome guy with the top hat! I stamped, colored and die cut the image, adding an extra blank die cut to the back.


I randomly ink blended “Salty Ocean”, “Worn Lipstick”, “Dusty Concord” and “Wilted Violet” Distress Oxides on 130# white card stock. The panel was sprayed with shimmer mist and spattered with diluted inks. When it was dry, I used white pigment ink and blended the snowflakes using the NEW “Blizzard” Stencil.


I used a clear acetate envelope to create my shaker and simply cut a partial slit on the backside, added 1/8″ EZ Tear Tape to the back of the stenciled panel, slipped it into the acetate and carefully removed the EZ Tape with my Pink and Main “Reverse” Tweezers! These tweezers are incredible and can reach tiny nooks and crannies with ease! I added lots of shaker bits, micro beads, sequins and confetti onto the front side, folded the envelope opening over the top and taped it to the backside. 1/2″ EZ Tear Tape was added to the backside of the shaker pocket and it was adhered to a top-folding A2 card base.


Using the NEW “Christmas Greetings Dies”, I die cut the shadow image from light blue vellum and the scripty “Merry Christmas” from a piece of the small checked paper from the “Holographic Paper Pack Set 1”. “This sparkly reflective holographic paper really pops off the front of the shaker and picks up all the colors in this snowy palette! I attached the scripty die cut to the vellum with “EZ Squeeze Craft Glue” and used tiny pieces of the 1/8″ EZ Tear Tape to attach the entire die cut sentiment (and the snowman) to the acetate to finish up the card! 

CHALLENGES:


Thanks so much for stopping by today and happy crafting!
Hugs - Rachelle

Thursday, November 4, 2021

Christmas Card | Pink & Main - "Snow Sweet" Stamp Set


Hello!

I’m sharing a shaker card today featuring the NEW Stamp of the Month Set, “Snow Sweet!” I am a huge snowman fan and these little snow people are so cute! I mixed together a ton of new products and tried a dark red background for my snowy scene, instead of the traditional blues/purples!


I ink blended the background with Distress Oxide Inks: “Barn Door”, “Ripe Persimmon”, “Aged Mahogany” and “Black Soot”. The panel was spritzed with shimmer mist, spattered with gold watercolor and trimmed down to fit a top-folding A2 card base. I inked another panel with “Worn Lipstick” and “Barn Door” DOI’s, die cut it with one of the “Stacked Snowflake” Images and glued it to the red background panel.


I stamped, colored and die cut several of the snowman images from the “Snow Sweet” Set because I wasn’t quite sure which one I was going to use and it’s always good to have a few ‘extras’ on hand! I die cut two frames using the “Notched Corners” Die Set, glued them together and attached the frame to the back of a sloped, die cut snow bank. I stamped the sentiment onto the snow bank using my MISTI, added a piece of acetate to the backside of the frame and covered the skinny frame/snow bank with foam tape.


I added lots of shaker bits to the center of the card front, carefully peeled away all of the release paper and pressed the shaker window panel in place on the card front. The little snowman in the knitted hat was popped up with foam tape to finish up the card design! Now that I have this design created, I’m going to use the other two snow people to crank out a couple more cards exactly like this! Head over to the Pink & Main Shop to check out the NEW Stamp of the Month options for this adorable set!

Thanks for stopping by and take care!
Hugs - Rachelle

Wednesday, September 1, 2021

Halloween Shaker Card | Pink & Main - "Hello Bootiful"


Hello!

I've got a terrific trio of happy spirits shaking it up for you! These little ghosts from the NEW "Hello Bootiful" Stamp Set are sure to put you in the Halloween spirit and I've loaded them into this shaker card for the perfect treat!

I began by ink blending a panel with "Wilted Violet", "Chipped Sapphire", "Prize Ribbon" and "Black Soot" Distress Oxide inks. I added the "Deco" Stencil design in a random pattern with just the "Black Soot", sprayed it with a couple of pearl mist colors and spattered it with purple paint. The panel was set aside to dry in a heavy book and afterwards die cut with the largest "Layered Slim Line Rectangle Die" (8.5" x 3.5"). I stamped, colored and die cut the three single ghosts from the "Hello Bootiful" Set.


The background panel was attached to a slimline card base, my frame was cut three times from heavy weight black card stock using dies from the same "Layered Slim Line Rectangle" Die Set and I glued/stacked them together. A piece of acetate was attached to the back of the frame and thin strips of double-thick foam tape were added just under the frame. The three ghosts were glued onto the ink-blended panel, I added all of my shaker bits into the center and carefully peeled the release paper on the foam tape halfway on each side. The acetate frame was gently placed on top until I aligned everything correctly and pressed it into the final position, peeling off the release paper pieces.


Using the "Thin Alpha Dies", I cut the word "BOO!" from dark purple glitter paper and attached it to the front of the acetate window with small bits of dotted tape runner. I just love that little ghost at the bottom, sitting in that beautiful sequin pile! This is such a cute stamp set and I can't wait to use it again! Head over to the Pink & Main Shop to see all of the other fantastic fall & Halloween products!

Challenges:


Thanks for stopping by and happy crafting!
Rachelle

Wednesday, August 25, 2021

Christmas Vellum Shaker Card | Picket Fence Studios - "Slim Line Cut Flower Stencil"


Happy Wednesday!

This is the first time I've ever tried a vellum-front shaker card and I paired it with the "Slim Line Cut Flower Stencil". This beautiful half-poinsettia/half-snowflake-looking stencil pattern is so symmetrical and pretty! I ink blended the pattern with Distress Oxide Inks starting with "Mustard Seed/Mowed Lawn/Evergreen Bough" in the detailed center and worked out with "Candied Apple/Barn Door" for the leaf area. I thought these colors really brought out a poinsettia look in the stencil!

I applied a thin coat of "True Christmas Red" Paper Glitz to a piece (2.5" x 10") of red card stock with my off-set spatula, set it aside to dry for 15 minutes and then cut it using the "Slim Line Oversized Joy to the World Die".

I ink blended a panel measuring 3.75" x 8.75" with the Mowed Lawn/Evergreen Bough, die cut it with the largest scallop die from the PFS' Slim Line Die Cutting System - "Scallop Frames" and attached it to a slim line card base. I cut a 1/4" slimline frame (3.25" x 8.25") three times from heavy white card stock, glued the pieces together. and backed the frame with thin vellum. Thin strips of craft foam were added to the entire perimeter of the frame on the backside and I attached just the word "Joy" from the die cut on the bottom right corner. 


The stenciled panel was trimmed to the same size as the frame and attached to the inked panel card front. I piled the shaker pieces (from the Sequin Mix Plus - A Snowy Season) onto the middle of the front panel, removed the foam tape release paper from the frame and carefully pressed it into place on top. The rest of the sentiment, "to the world", was glued to the inside to finish up the card!

Challenges:


Thanks so much for stopping by today!
Rachelle

Thursday, August 5, 2021

Halloween Shaker Card | Picket Fence Studios - July 2021 Release


Hey there!

This may be one of my favorite cards to date and I had so much fun making it! And surprisingly enough, it wasn't really that difficult (or time consuming) to make! Just some ink blending and die cutting and presto...it all came together!

All of the inked panels were spritzed with water and spattered with gold metallic watercolors. 
Here is the list of the panels I ink blended:

1) Slimline card base with an arched die cut top - Squeezed Lemonade Distress Oxide Ink blended at the top
2) Slimline card front with arched die cut top and the NEW "Witch - Slim Line Die Cutting System Insert" die cut from the center - Wilted Violet, Chipped Sapphire and Black Soot DOI's
3) NEW "Halloween Graveyard Cover Plate Die" Panel - Squeezed Lemonade and Peeled Paint DOI's
4) Pumpkin row panel from the NEW "Scarecrow Cover Plate Die" - Squeezed Lemonade, Carved Pumpkin and Black Soot DOI's
5) NEW "Happy Fall Y'all" Word Topper Die - Black Soot


After all of the inked panels were die cut, I assembled the card front by gluing the graveyard scene to the purple background. The pumpkin row was attached on top with foam tape for a bit of dimension and the die cut sentiment was glued on last. The witch was die cut one more time from black card stock, fussy cut around the broom/hat, spattered with gold paint and glued onto the window image.

The front panel window was backed with a piece of acetate and foam tape was added to the entire piece to create the shaker element. I piled the shaker pieces from the NEW "Trick or Treaters" Sequins Mix Plus onto the card base and CAREFULLY attached the front on top! Whew! Attaching the front onto the card base was the hardest part of making this card!


Thanks so much for joining me and for taking the time to comment!

Happy crafting and have a great day!

Challenges:


Rachelle

Thursday, July 15, 2021

Christmas Shaker Card | Picket Fence Studios - "Merry Christmas" Word Topper Die

    
Happy Friday Eve!

I've got more great products to share with you from Picket Fence Studios' July Release including the two dies I used to make this shaker card! This card was super easy to create but could be made even easier by using the full front shaker method! 

I started by ink blending an A2 cardstock panel with my largest "Life Changing Blender Brushes" using "Salty Ocean" & "Chipped Sapphire" Distress Oxide Inks. After I spritzed the panel with shimmer mist, I set it aside to dry in a heavy book! Both the NEW "Santa's Snowy Hills" and "Merry Christmas" Word Topper Dies were used to cut panels from white card stock; the word topper die was lightly blended with the "Salty Ocean" Ink at the bottom.


The blue panel was attached to an A2 card front and the die cuts were glued down on top. Several white die cut frames were glued together and backed with a piece of acetate and a double layer of skinny foam tape strips were added behind the framing.

I glued a handful of snowflakes from the NEW "Icicles" Sequins Mix onto the inky sky (just so they would remain suspended when the card was upright) and then added a scoop of the sequin mix to the middle of the card front. The release paper was removed from the foam tape and the acetate window was pressed onto the card. I absolutely love shakers and these two silhouette dies are perfect for this card style!

Here are the products I used: