Showing posts with label A Place To Start Challenge Blog. Show all posts

Sunday, November 3, 2019

Pop-Up Window Gift Card | Ellen Hutson - Voices In My Head/A Breve Note | A Place To Start Challenge "Caffeinated Tones"


Hello!
I can't wait to share this fun pop-up window gift card with you! I've mixed 'n matched a ton of products for this project, which focuses on the colors of coffee for A Place To Start's current November Color Challenge - "Caffeinated Tones". This beautiful, neutral palette is shown below:


I decided that I wanted to use some new-to-me stamp sets from Ellen Hutson and the creative designer, Julie Ebersole, for this pop-up gift card - "Voices In My Head" and "A Breve Note". I also wanted to create something that would hold a Starbuck's Gift Card and decided to use a pop-up window for the design. 

I cut a 4.25" x 5.5" panel of chocolate brown textured card stock and adhered it to the front of an A-2 top-folding white card base. I created a coffee-stained background by stamping a pattern with VersaMark Ink onto a piece of kraft card stock measuring 4" x 5.25". I partially die cut a rectangle in the middle of the panel (on three sides only) and scored the flap in three places to create the slider panel. A small half circle was cut from the top with a 3/4" punch.


The face and coffee cup were stamped in chocolate brown dye ink onto cream card stock, colored and fussy cut; a light application of Wink of Stella was added. I wanted the coffee cup to float above her head and so I attached the two with a thin piece of acetate. I die cut 2 vellum speech bubbles from Julie Ebersole's "High Five" Set and lightly blended Antique Linen Distress Oxide Ink onto the back of one die cut. I prepped the other with my anti-static powder tool, stamped part of a sentiment with VersaMark Ink and heat embossed it with white powder. I then carefully glued the two vellum die cuts together, placing glue only behind the embossed letters. This gave my vellum some structure while retaining a bit of transparency.

I cut a small panel from the same cream card stock (3.125" x 4.75") and stamped the sentiment "This One's On Me" at the top along with a few coffee beans. I added a small circular "Pull" tab at the top of the cream panel to finish and adhered it behind the kraft window panel (only at the bottom) with strong double-sided tape.


The face/coffee cup group was glued onto the bottom only of the kraft window panel and the speech bubble was slipped in behind. You want to be sure not to adhere anything to the area above the center scored fold line or else it will not pop-up when the reveal tab is pulled! Small strips of foam tape (double thickness) were adhered to the back of the kraft panel on three sides and this entire panel was pressed into place on top of the card base. I put the Starbuck's Gift Card under the slider and finished off the front with an assortment of coffee-colored sequins.

I really like the simple graphic style of this card and the 3-D pop-up effect works very well here!


Thanks so much for stopping by today and I appreciate your comments!

This card is also entered into the following challenges:


Also submitting this card over on the wonderful Coffee Lovers Blog Hop - thanks to all of the great sponsors for this season's event! (And a big thanks to Amy Tsuruta and Chaitali Narla as the co-hosts and organizers of this amazing hop!)


Rachelle ♥

Sunday, October 6, 2019

Birthday Card | Pinkfresh Studio - A Place To Start Challenge Blog - "Create Your Own Challenge"


Hey There!

We've got a great challenge for you this month over on A Place To Start's Blog - Create Your Own! Head on over to the APTS Blog to see the great inspiration the design team has created!
Here are the challenge instructions: 


I chose the following items from each column in order to fit the challenge:
#1 - Image  |  #2 - Die  |  #3 - Embossing Powder  |  #4 - Sequins  |  #5 - Faux Stitching

Using the MISTI, I lightly sponged Blueprint Sketch, Chipped Sapphire and Black Soot Distress Oxide Inks onto the large round universe background stamp from Pinkfresh Studio's Constellation Set on the upper middle area of a 4.25" x 5.5" panel of white card stock. I spritzed the panel with clear shimmer mist and blotted it with a paper towel. I die cut the large Constellation Sketch Star Die from shiny matte silver card stock and glued/stacked 2 additional die cuts behind it to add dimension. I stamped the sentiment using black pigment ink on the card front and heat embossed it with clear powder.

The silver star die cut was glued into place and I added a handful of itty bitty silver star sequins to the sky. I trimmed 1/4" from the bottom of the card front and backed the entire panel with craft foam. A line of faux stitching was embossed onto a 1/2" strip of the same matte silver card stock using MFT's "Basic Stitch Line Die-Namics" and glued to the bottom of an A-2 top-folding card base. The front panel was then adhered into place on top of the stitching. I stamped the sentiment/stars on the inside of the card and added a silver constellation die cut to complete the card.


Additional challenge submissions:


Thanks so much for stopping by and I really appreciate all of your comments!
Rachelle ♥

Sunday, September 1, 2019

All Occasion Card | Hero Arts MMH Kit December 2018 | A Place To Start Challenge Blog - "Show Us Your Masking"


Hi!

Thanks so much for stopping by to join me for another great challenge over at A Place To Start! This month's twist on the Anything Goes Challenge is "The Lone Crafter: Show Us Your Masking" - featuring masking techniques. Please head over to check out the other great ideas the Design Team has to share for this challenge!

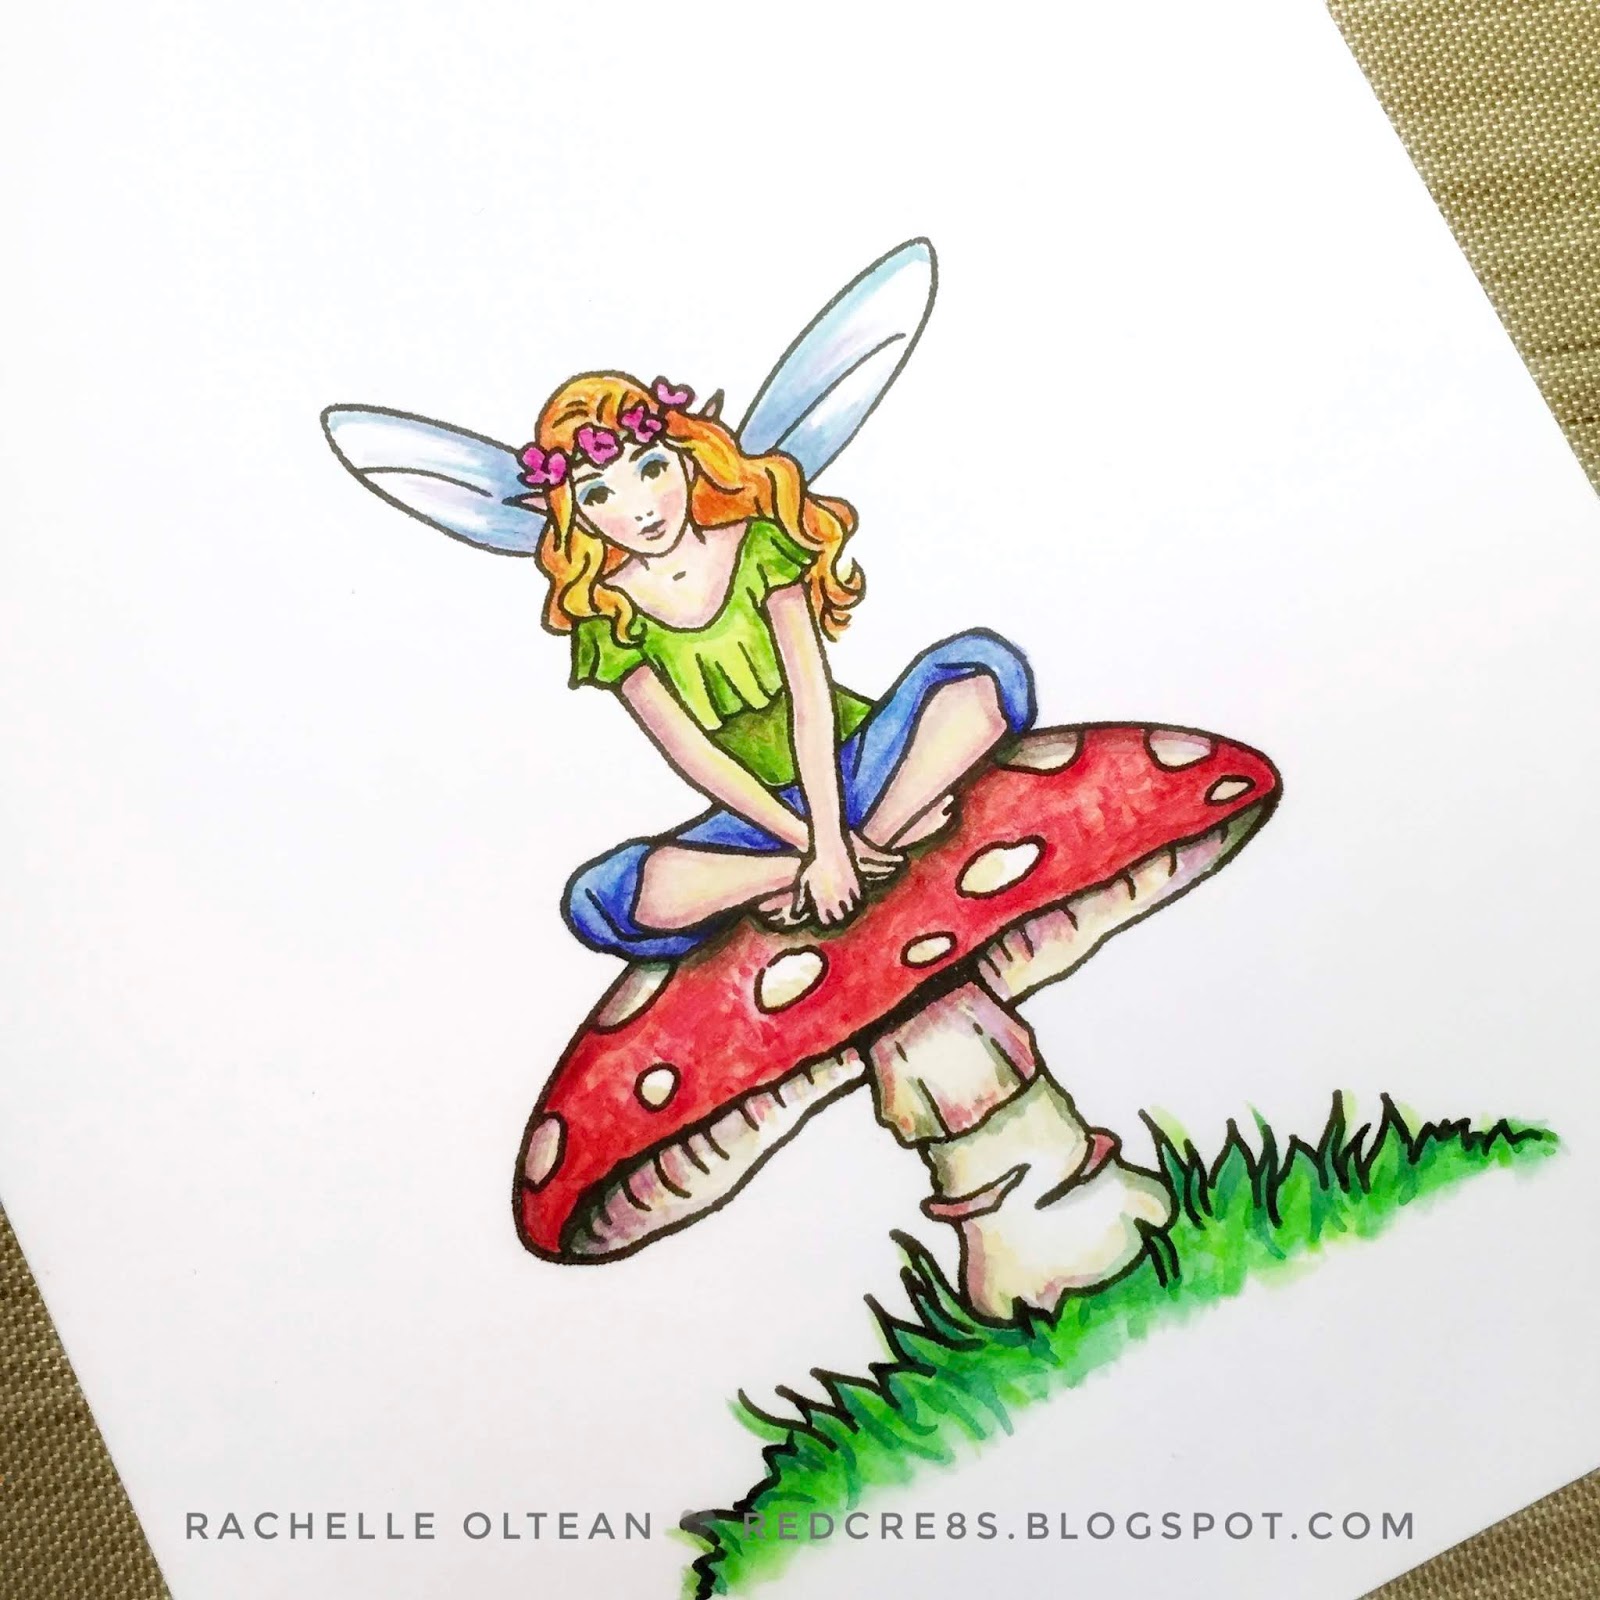
I haven't used this Hero Arts' MMH Kit (December 2018) for a while and pulled it out to create a vignette card with this beautiful fairy. 

First, I did a quick sketch of the basic layout/coloration.


The fairy was stamped on a piece of white card stock and also onto a 
large Post-It Note, which was then fussy cut and stuck over the card stock image.


I then determined the toad stool placement and used the MISTI to stamp it 
on top of the masked fairy image.


I removed the mask and the image was water colored and trimmed with a combination of partial die and fussy cutting. I left enough space at the bottom to add some additional grassy area since I wanted it to fill up the negative space in the scallop die cut.


I trimmed a 1" strip of gingham pattern paper, adhered it to the left edge of an A-2 top-folding card base and set it aside. Using the Pink Fresh "Inverted Scallop Circle Dies", a circle was cut off the right edge towards the bottom of a 3 5/8" x 5.5" panel of the same white card stock. I adhered the fairy image to the back of the scallop opening and backed it with craft foam to give the opening added dimension. 

I ink blended the gradated blue background (using Salty Ocean Distress Oxide Ink) onto white card stock and spattered it heavily with white pearlized paint. This really made the background shimmer behind the fairy. I adhered it to the card front right next to the gingham paper and then glued the die cut panel on top. I added a couple of additional pieces of foam tape behind the fairly itself to really pop the image off the card and lightly curled the wing tips up for even more depth.

After I prepped a piece of black card stock with my anti-static powder tool, the sentiment was heat embossed with white powder and die cut. I lightly blended the same blue ink onto a piece of vellum, die cut it and adhered it behind the sentiment strip as an accent shadow. I felt that the black strip on its own was a bit too harsh and that it needed just a bit of softening - the vellum really worked here. The sentiment was glued into place and trimmed to be flush with the right edge. I gave stamped images a light application with my Wink of Stella brush for a bit of shimmer to finish up the card.

Thanks for joining me today and I really appreciate all of your comments! : ) 

Additional challenge submissions:


Rachelle ♥

Sunday, August 4, 2019

All Occasion Card | MFT Stamps - Pure Innocence Love You A Bunch | A Place To Start Challenge


Hey There!

I would like to share my design team project for A Place To Start's current challenge - "A Crafty Piece of Mine: Paper Piecing." This sweet little gal is Pure Innocence "Love You A Bunch" from MFT Stamps. 

I stamped her with VersaFine Onyx Black ink two times - once on 110# white card stock and again on a small piece of lavender polka dot pattern paper. I colored and die cut the image on the white stock and fussy cut just her dress from the pattern paper. After I went round the edge of her dress with a black marker, it was glued into place on the colored image; another plain die cut was glued behind it to add some stability.

I prepped a piece of black card stock with my anti-static powder tool, stamped the sentiment using VersaMark Ink and heat embossed it with white powder. The sentiment was die cut and I added two additional cuts (glued/stacked together) to give it dimension.

A strip of MFT's "Party Patterns" stripe paper was adhered to the bottom of a top-folding A-2 card base, the sentiment strip was glued on top and the cutie patootie was popped off the card using foam tape. A sprinkling of assorted lavender sequins finished up this simple card. I really like this sentiment/image combination because it can be used for a birthday, as a thank you or just to brighten someone's day.


I have entered this cutie patootie in the following challenges:


Thanks so much for stopping by and thanks so much for your comments! They make my day!
Rachelle ♥

Sunday, June 2, 2019

Birthday Card | Concord & 9th - Stuck On You | A Place to Start Challenge "Stencil Me In"


Hi!

Today's post features great products from Concord & 9th, Stuck On You Stamp/Die Set. I combined my design team entry for A Place to Start's June "Stencil Me In" Challenge with the gorgeous color palette from this week's Color Throwdown #545 - Raspberry, Lavender, Green & Kraft - #CTD545. 


Using my stencil, I blended Distress Oxide Inks - Picked Raspberry, Peacock Feathers & Cracked Pistachio - onto a piece of 110# Neenah Solar White. This panel was spritzed generously with water and spattered with pearlized watercolors in similar colors. Once the panel was dry, it was die cut with a stitched rectangle die. I stamped, watercolored and die cut the main images and finished them off with a generous application of my Tonic Nuvo Aqua Shimmer Pen. The images were then assembled and glued together to the front of the stenciled die cut.

Three rectangular frames were die cut from heavy-weight black card stock and stacked/glued together. This frame was adhered to the front of an A-2 top-folding card base. The stenciled panel was backed with craft foam and glued to the center of the card front. I really liked the simple graphic feel on this card and the bold sketchy image. 

This card is entered into the following challenges:


Thanks for stopping by!
Rachelle ♥

Sunday, May 19, 2019

Birthday Card | Neat and Tangled - A Place To Start Challenge Blog - "Showcase Your Favorite Technique" - Pop-Up Shadow Box Card


Hey There!

Today I am sharing a pop-up shadow box card using the SUPER fun Neat and Tangled Stamp Set, “Jump for Joy!” 

This card measured 5” x 7” and so I started by blending a sky/cloud background on a piece of 110# white card stock of the same size using ‘Salty Ocean’ Distress Oxide Ink. I spritzed it with shimmer spray, blotted it with paper towel and put it under a heavy book to dry.

I cut one piece each of white and light blue card stock, 7” x 7”, and scored them both at .5”, 1”, 6” and 6.5”. A window was die cut from the light blue front panel using the largest size of MFT’s Elegant Rectangle Dies. The next smaller size die was used to cut another window from the center of a piece of medium blue card stock, 4.75” x 7”, and was glued behind the front window. 


To create the scene, the characters were stamped, colored and die cut. In order to give them a bit more stability, 2 additional white die cuts were glued and stacked behind the colored images. I die cut two strips of grass and lightly ink blended them for dimension. The lighter grass strip was glued directly to the back of the front window opening, the second strip to the bottom of the sky panel. A sun die cut was also glued directly to the same panel, which was then adhered to the back scored piece. The jump rope critters were glued to the front along with the embossed sentiment strip.

I wanted the little jumping bunny to be high in the sky so I suspended him using a small strip of acetate, which I taped to the inside scored fold used to create the shadow box. I used a strong liquid adhesive to glue both end tabs together and create the  pop-up mechanism when moved in and out. I just ♥ that cute bunny jumping way over the rope! The card was finished with a few flower sequins from Lucy's Little Things. 


I have entered this card in the following challenges:


Thanks for joining me today!
Rachelle ♥

Sunday, April 14, 2019

Mother's Day | MFT Stamps - A Place to Start Challenge Blog (3 of 5 Challenge)


Hey There!

I'm so excited to join the wonderful design team over at A Place To Start Challenge Blog, which is a great resource for newbies and seasoned crafters alike who may be looking for tips/tricks/tutorials on  all kinds of styles, techniques and design theory. My first DT submission is a "3 of 5" card featuring flowers, die cut, water color & vellum...and yes, I was an overachiever using 4 of the challenge parameters! The only item I did not use was a tag.

Using MFT Stamps' "Geometric Star Stencil", I blended a background using Distress Oxide Inks onto a piece of white card stock. This was spritzed with shimmer spray and die cut with a stitched rectangle die. I stamped MFT's "BG Fresh-Cut Flowers" onto 110# white card stock using VersaFine Onyx Black Ink in my MISTI, then water colored and fussy cut the image. I stamped Lawn Fawn's "Happy" sentiment onto the same card stock and die cut the word three times; these cuts were glued/stacked and finished with an application of Wink of Stella. I blended the same ink onto the back of a piece of vellum, flipped it over and prepped it with my anti-static tool. The sentiment was stamped onto the vellum with VersaMark ink, heat embossed with Lawn Fawn's white powder and die cut with a fishtail banner die. 


I glued the stenciled background onto the front of a side-folding A-2 card front. Using my fingers, I carefully curled the edges of the leaves and flower edges up before gluing the spray onto the background. This really helps add dimension without popping the entire image up with foam tape. Even after it goes through the mail, these areas will still be lifted from the surface. Both parts of the sentiment were adhered into place and the card was finished with iridescent jewels from Lucy's Little Things.

This floral spray is beautifully drawn and I know that I will reach for it again and again because it can be colored in so many different ways.


Thanks so much for joining me today! Head over to the blog and check out the great mid-month designs by the other design team members :)

I have entered this card into the following challenges:


Rachelle ♥