Showing posts with label Cut It Up!. Show all posts

Thursday, August 6, 2020

New Home | Cut It Up! Challenge #206 - Shaped Card | Ellen Hutson - "Backyard Bird Friends"


Happy Fri-YAY!

Our challenge over on the Cut It Up! Blog this time is a "Shaped Card" so we would love to see anything other than a standard rectangle! I needed a card to congratulate my wonderful nephew on the purchase of his first home and I decided to use an arch shape! This card features lots of die cuts (MFT Stamps/Lawn Fawn) and cute stamped images from Ellen Hutson's "Backyard Bird Friends".

I created the folded arch card base and covered the front with Lawn Fawn gingham paper. The birdhouse was die cut multiple times from different cards stocks and glued/stacked together, which gave this image lots of dimension. The wooden post was stenciled with a wood grain pattern and all of the birdhouse pieces were glued to the card front. The green grass strip was die cut, ink-blended along the bottom and adhered to the front of the card with foam tape. I added a heat-embossed sentiment banner, small jute bow and the pretty stamped/colored Cardinal to complete the card front. I used more of great images in this stamp set for the inside greeting!


We can't wait to see your shaped card projects over in our Cut It Up! Challenge Blog Gallery - and remember, don't forget the die cut!

Additional Challenges:


Thanks so much for stopping by and for all of your comments!
Hugs - Rachelle

Friday, July 24, 2020

Encouragement Card | Cut It Up! Challenge #205 - "Ice Cream You Scream!" | Lori Whitlock - Food Truck Box Card

Hey!

We have a great new challenge for you on the Cut It Up! Blog featuring a much-needed summertime treat - ICE CREAM - and we would love to see your projects showcasing frozen treats! Our sponsor, Wendy from Digital Delights by Louby Lou, is offering a $5 gift code to her online store. The Design Team has outdone themselves for this sweet challenge so go check out the inspiration! 

I recently picked up a great SVG Bundle (Food Truck Box Card Assortment) on Lori Whitlock's site and this ice cream mobile was included! Here's a quick peek at the other versions of this same box card - I just love the taco truck!


Lori has a great YouTube video on how to put this card together and once all the die cutting was finished, the actual construction took less than 30 minutes to complete. I added a couple of extra details of my own to the design and used one of Louby Lou's Digital sentiments on the back of the card. This encouragement card is for an ice cream lover in my family who is also fighting cancer...I wrote my personal greeting on the back of the giant cone!


We can't wait to see your frozen/ice cream projects in our Cut It Up! Gallery - and don't forget the die cut! : )

Additional Challenges:


Thank you so much for your comments!
Rachelle

Friday, July 10, 2020

Birthday Card | Cut It Up! Challenge #204 - Create Your Own Background


Hi There!

The new theme over on the Cut It Up! Challenge Blog is "Create Your Own Background" and our wonderful sponsor, Nicolle Kramer of Creative Embellishments, is giving a $50 gift code for her on-line shop! Nicolle has an amazing assortment of chipboard embellishments, fantastic stencils and awesome stamp images - check it out here!

My background is a stenciled sky, which was trimmed to fit onto a black slimline card base; a piece of B&W striped paper was added to the bottom. I attached the shaded balloon die cuts (tied with black twine), pulled the strings under my heat embossed sentiment strip and added clear sequins to finish up the card. 

We can't wait to see your backgrounds in the Cut It Up! Gallery and remember...don't forget the die cut!

Additional Challenges:


Thanks so much!
Rachelle

Friday, June 26, 2020

Summer Gift Box | Cut It Up! Challenge #203 - Celebrate Summer Color Palette


Hi!

We've got a fun new challenge starting on the Cut It Up! Blog today! 
It's a "Celebrate Summer" Color Palette Challenge and we can't wait to see your projects (which include a die cut) featuring these fun summer colors! Our generous sponsor for this challenge is Regina Easter over at The Cutting Cafe, who is giving away three cutting file sets to our winner! 


I used Regina's Gable Treat Box File for my project and added a few bit & pieces of my own to create  a colorful cabana beach house! I cut the two basic gable box pieces from yellow card stock and scored "siding" lines horizontally on each one. I also designed the striped cabana roof, door and window in the Cricut Design Space, die cut those pieces and began to assemble each half of the box separately. The stamped images are from MFT's now-retired "Penguins in Paradise" by Birdie Brown and I thought they would be a nice addition to the front of this tropical treat box! I die cut a few stitched sand dunes from kraft paper, added a heat-embossed sentiment and finished-up the easy box construction with Scor-Tape! The Design Team created some awesome projects for this challenge and we hope you will join us - just remember...don't forget the die cut!


Additional Challenges:


Rachelle

Friday, June 12, 2020

Birthday Card | Cut It Up! Challenge #202 - The Perfect Pet | Avery Elle - "More Furry Friends"


Yappy Birthday!

We've got some adorable critters over on the Cut It Up! Blog as we start our new challenge, "The Perfect Pet!" We would love to see your finned, feathered or furry friends in our gallery - and don't forget the die cut! The Design Team has created some amazing inspiration so be sure to check it out!

Our very generous sponsor for this challenge is Jen Jackson of Newton's Nook Designs who is offering a $20 gift code to the winner. She has a catalog of wonderful pet images!

This fluffy poodle has lost his birthday balloon but is still ready to paw-ty! I began by die cutting a hemstitched panel in kraft card stock and glued it to the front of a top-folding A2 card base. I then die cut 4 colors of card stock using the now-retired Avery Elle "Photo Mat" die. I cut a piece of white card stock just slightly smaller that the white frame and covered it with tape runner. Then I reassembled the scene like a puzzle - easy-peasy! The balloon was die cut 2X on white card stock and 1X on red. I just cut off the top and glued it onto the double-stacked white base.

The images from Avery Elle's "More Furry Friends" Stamp Set were stamped, colored & die cut. I cut a panel of turquoise paper the same size as the photo mat and used it as a shadow and then all of the components were glued into place on the front. The sentiment was stamped then I added a few gems and twine to finish the card!


Additional Challenges:


Thanks so very much for your comments - they make my day!
Rachelle

Friday, May 29, 2020

Birthday Card | Cut It Up! Challenge #201 - "Boys Will Be Boys" Masculine Project


Hello There!

I'm so excited to be sharing this masculine project with you today as we start a new challenge at the Cut It Up! Blog: "Boys Will Be Boys!" Our generous sponsor, Wendy from Digital Delights by Louby Lou, is donating a $5 gift code to her on-line store. She provided the digital papers that the design team used to create an amazing group of steampunk-ish inspired projects! Go check'em out!!!

I created a connected gear cover plate with a 1/4" outside frame (in the Cricut Design Space) to fit onto the front of an A2-sized card. I die cut this image twice from heavy-weight dark gray card stock and glued the cuts together. I ink-blended, spattered and dry brushed the gears to add age and metal accents. I decided that I wanted some additional single gears to be attached to the inside of the shaker so I die cut and colored them in the same way.

I printed the digital oxidized/gradated background paper, cut it to size, adhered it to an A2 card stock panel with tape runner and spattered it with gold, copper and silver inks. I used the cover plate to determine where to place the single gear pieces and glued them into place on the background paper.


I adhered a piece of acetate to the back of the cover plate frame with Scor-Tape and added a 1/8" wide strip of double thickness foam tape around the entire outside frame on top of the acetate. I gently rubbed my anti-static powder tool along the inside edge of the exposed foam tape to remove some of the tackiness, blew out the excess powder and peeled off the release paper. I dumped a mix of metal-colored sequins onto the background and gently placed the acetate cover frame on top. The gold heat embossed sentiments were attached to the front with glue dots to finish up the card.

I have never tried a project quite like this before and was happy with the way my finish turned out on the gear pieces - sometimes you just never know??? This is why I like challenges that push you a bit out of your comfort zone! 

Additional Challenges:


Thanks for spending time with me today and we can't wait to see your masculine projects over on the Cut It Up! Challenge - and don't forget the die cut!

Rachelle

Friday, May 15, 2020

Graduation Card | Cut It Up! Challenge #200 - "Shoot For The Stars"


Hello!

We've got a stellar new theme over on the Cut It Up! Challenge Blog..."Shoot For The Stars!" We would love to see any type of congratulatory projects featuring stars or star motifs! Our wonderful sponsor, Karin Martin from DRS Designs, provided the Design Team with a selection of amazing images (including the large sentiment stamp spotlighted on my graduation card!) Karin is giving a $20 gift code to the winner of this challenge and we can't wait to see your projects in our gallery! And remember,  don't forget the die cut! : )


The background panel was ink-blended with Shaded Lilac, Blueprint Sketch and Chipped Sapphire Distress Oxide Inks, spritzed with shimmer spray and spattered with gold watercolor; this panel was die cut with an A2 stitched rectangle die. I die cut a thin frame to fit just inside of the stitching from heavy white card stock and glued it into place. The silhouettes were created in the Cricut Design Space and die cut from #110 black card stock (see free template below.) The hands were cut to size using the same frame die and glued at the bottom. After prepping the background panel with my anti-static powder tool, I stamped the sentiment with VersaMark Ink and heat embossed it with gold powder. This embossed image shown brightly on this background! I adhered the front panel to a top-folding A2 card base and finished up this project by adding the flying hats and matte gold stars!


This was the inside sentiment (Pinkfresh Studio - now-retired Word Series: Brilliant) I chose for my niece who is graduating from high school - she really is powerful, brilliant and brave!!!


Thanks so much for joining me today and for your inspiring comments...they make my day!

Additional Challenges:


Rachelle

Friday, May 1, 2020

All Occasion Card | Cut It Up! Challenge #199 - "Friends"


Hey Everyone!

Thanks so much for stopping by as we start another Cut It Up! Challenge! We are need some positivity right now and our very timely theme is "Friends"! I'm sure we all have people we are missing in our lives right now and we would love to see any projects celebrating, thanking or representing friends/friendship - and don't forget the die cut! The design team has come up with some great inspiration for you so head on over to the Cut It Up! Blog to check it out! We are lucky to have TWO GENEROUS Sponsors for this challenge: Shery Russ (STAMPlorations/$20 Gift Code) who provided the design team with a wonderful selection of her CUTplorations Dies for us to use on our projects and Michele Gross, who owns CAS-ual Fridays Stamps! She has offered one winner a $20 gift code as well!

I began with a simple distress oxide ink blended background and added extra pattern with a simple mandala stencil that reminds me of fireworks! I spritzed this panel with gold shimmer mist, spattered it with metallic watercolor and cut it with a dotted rectangular die. This panel was glued onto the front of an A2 stitched rectangle die cut and set aside. 


I die cut the "Life Is Good" CUTplorations Phrase sentiment six times - two from black card stock and four from white card stock. These were carefully glued together in pairs. I stamped one set of white card stock dies with VersaMark Ink and heat embossed it with gold powder; this process was repeated two more times and produces a foiled effect. Once cooled/dry, I glued the embossed sentiment die cut just offset from the black version and then added the white cut offset as well. This gave me a really dimensional effect that pops right off the card front!

I stamped the additional sentiment by mixing and matching words from MFT's "Bitty Thanks and Gratitude", which is an awesome set of great small sentiments/words. I cut several words separately and put them back together using the MISTI to create my final thought. This was stamped with VersaMark Ink, heat embossed with the same gold powder and trimmed with a skinny sentiment strip die. This long strip was glued into place on the bottom of the front panel and the stacked die cut was popped just above it with small bits of foam tape. I added a mix of coordinating sequins to finish off the card and the entire panel was adhered onto an A2 top-folding white card base.


This card really sparkles and has a festive, celebratory feel to it...I can't wait to share this one with a very special long-time friend! Hope to see your "Friend" projects in our Cut It Up! Gallery!

Additional Challenges:


Thanks so much for taking the time to comment!
Rachelle

Friday, April 17, 2020

All Occasion Card | Cut It Up! Challenge #198 - "Our Beautiful Earth"

Happy Fri-YAY!

We are starting a new challenge over on the Cut It Up! Blog today: "Our Beautiful Earth!" We would love to see your projects celebrating/respecting nature, trees, flowers, forests, and creatures great and small! The design team has outdone themselves with some amazing inspiration and we hope that you will join us! We have a great sponsor for this challenge, Wendy at Digital Delights by Louby Loo, who has generously donated a $5 gift code to her online shop. 

This 5" x 7" card features images die cut with the Cricut and Big Shot machines and I used many different die sets from MFT Stamps and Lawn Fawn to put this scene together! I've been using a lot of rainbow images lately in my cards and I think it's my subconsious looking for hopeful signs!


Thanks so much for joining me today and please hop on over to the Cut It Up! Challenge to enter your beautiful earth projects!

Additional Challenges:


Thank you for taking the time to comment!
Rachelle

Friday, April 3, 2020

Spring/Easter Card | Cut It Up! Challenge #197 - "Hopping Down The Bunny Trail!"


Thinking Happy Thoughts!

We have a great new challenge over on the Cut It Up! Blog: "Hopping Down The Bunny Trail!" and we hope to see your great Spring/Easter Projects featuring rabbits and die cuts! We have a great prize sponsor, Amy Lassiter, from Taylored Expressions, who is generously offering a $25.00 gift code to our winner! Please stop over on the Cut It Up! Blog to see all of the cute creations the design team has on display for this adorable theme!

This card is a product mix-n-match from several different manufacturers: Ellen Hutson (Backyard Bird Friends), Avery Elle (Peek-A-Boo Pals) and MFT Stamps. I created a dome-shaped card by die cutting a base with a left-hand fold. The base was ink-blended with a cloud stencil and all of the images were stamped, colored and cut. I die cut two dome frames from blue card stock and glued them together; the tree branch was taped in place behind the frame. An acetate window was also die cut and then adhered onto the frame. A thin strip of foam tape was added to the back of the entire frame and the edges were brushed with an anti-static powder tool. The excess powder was tapped out and shaker contents were piled onto the center of the card front; the release paper was removed and the shaker frame was pressed down onto the front. The bunny & nest/eggs were glued together and adhered onto the tree branch with foam tape.

Thanks so much for joining me today and we can't wait to see your spring-y designs in our gallery!

Additional Challenges:


Rachelle

Friday, March 20, 2020

Birthday Card | Cut It Up! Challenge #196 - "Spring Fever: Use at Least 3 Butterflies"


Here Comes Spring!

Hey Everyone! Today we are starting a new challenge over on the Cut It Up! Blog: "Spring Fever - Use at Least 3 Butterflies." I decided to go with a mix-n-match combination of several die cuts as my focus for this challenge! Our prize sponsor, Wendy from Digital Delights by Louby Loo, is offering a $5 gift code to the on-line store. The design team has designed some stunners for this challenge so head over to the Cut It Up! Blog to see their creations. We hope that you will join us and don't forget the die cut! 

Truth be told, I was a bit stumped with this challenge but once I got rolling, everthing just came together and I ended up making THREE Butterfly Cards! ; )

Card#1: 
I ink blended an A-2 sized background panel with Distress Oxides, stamped the sentiment with VersaMark Ink and heat-embossed it with white powder; this was adhered to the front of the card front. I smooshed several Distress Oxides Inks onto my craft mat, sprayed it with water and then tapped my white cardstock into the inks. Once I was happy with the coverage, I flecked it with metallic watercolors and set it aside to dry. 

I die cut the largest butterfly from white card stock several times and glued/stacked the images together. The same butterfly was cut from vellum and using my Scor-Pal, I gently scored along each side of the body - the middle-sized butterfly was cut from Louby-Lou's Digital Checked Paper and scored the same way. The vellum and pattern paper die-cuts were then glued down to the center of the base butterfly.

Using Avery Elle's Wonky Circle Frames Die, I cut/glued/stacked four die-cuts together to create some dimension. I also cut a frame from the ink-smooshed background panel and used the interior circle for the center. The frame pieces were glued into place on the card front and the triple butterfly was popped up with foam tape. A few sequins finished up the card. The mix of vellum and card stock is really effective together and the smooshed background looks like an abstract floral background!


Card #2:
I used the outside ink-smooshed frame die-cut from Card #1 as the base for this next card! I added another detailed circle frame and lightly colored the vellum with Work Lipstick DO Ink. The angled white card stock panel was die-cut with Pinkfresh Studio's "Classic Edger Die". I used the leftover smooshed background for the bottom piece and using my Scor-Pal Board, scored vertical lines on the reverse side every 1/4" to give it some textural interest. This card was assembled much in the same way as the first one and I added a small word die-cut as my sentiment.


CARD #3:
I wanted to enter the "Twofer Card Challenge #25: Spring Animals" and so I designed a totally different butterfly layout for this card! First, I ink-blended a spring-y background panel and spritzed it with shimmer spray. Then I die-cut multiples of all three butterfly dies and glued/stacked two of each size together. After the die-cuts were arranged as you see below, I took a quick picture and then used that as my guide to start adhering them down. After they were all glued into place, I simply cut the overhanging pieces off from the backside, leaving a flush edge. This panel was adhered to the front of an A-2 top-folding card base.


Using Honey Bee Stamps' "Smile" Die Set, the shadow was cut from light blue vellum and the top from a textured gold metallic card stock; the pieces were glued together and into place on the card front. Using the MISTI, the coordinating sentiment was stamped onto the butterfly die-cut and a few matte gold sequins finished up the card.


Thanks so much for sticking with me for this longer-than-usual post! 
Please stop by the Cut It Up! Challenge to check out all of the great projects and we can't wait to see all of your butterflies fluttering into our gallery!

Additional Challenges:


Thanks so much for joining me and for taking the time to comment! 
Rachelle

Friday, March 6, 2020

St. Patrick's Day Card | Cut It Up! Challenge #195 - "Green With Envy" Use Green on your Project


Top O' The Morning!

We've got a great new theme over on the Cut It Up! Challenge Blog..."Green With Envy" all you need to do is use some green on your project (and include a die cut!) We are so very lucky to have TWO AMAZING sponsors for this challenge: Avery Elle ($20 e-Gift Code) and Your Next Stamp ($15 e-Gift Code)! We want to send out a HUGE THANK YOU to these great companies for their ongoing generosity and support of our challenge! Please stop by the CIU Blog to see what fantastic projects my fellow designers have created!

I wanted to create a graphic St. Patty's Day Card and decided to go with a mix-n-match of dies cuts and a simple stamped sentiment. This is a 5" x 7" card and I began by layering the black and green dotted card stock pieces onto the card front. The sentiment was stamped using the MISTI and all of the die cuts were adhered onto this panel. The mustache was popped off with a bit of foam tape in the middle and I curled up the edges to give it a more dimension. This entire panel was glued onto the card front to finish! I will have to hand-deliver this card because it probably won't fare well going through the mail...I don't want to squish that perfect bow tie! : ) We can't wait to see your "greens" for this challenge!

Additional Challenge Submissions:


Thanks so much for stopping by!
Rachelle

Friday, February 21, 2020

All Occasion Card | MFT Stamps - Tweet Friends | Cut It Up! Challenge #194 - Your Favorite Color


Hi!

We've got a great challenge for you over on the Cut It Up! Challenge Blog..."Your Favorite Color!" It's been so much fun to see what my fellow Design Team Members have come up with for this theme! We are so lucky to have TWO wonderful, generous sponsors offering prizes for this challenge: Nicolle Kramer (Creative Embellishments/$50 Gift Code) and Shery Russ (STAMPlorations/$20 Gift Code) who provided the design team a selection of her CUTplorations Dies for us to use on our projects. Head over to the Cut It Up! Blog to see the amazing creations the Design Team has created with these great products! My favorite color is turquoise and so I paired the STAMPlorations' word die with this adorable image from MFT Stamps, "Tweet Friends".  

I die cut the word die three times, ink blended it with Distress Oxide Inks and glued stacked them together. I lightly brushed the top with Wink Of Stella and applied a coat of Ranger Glossy Accents to the top to give it shiny dimension - I allowed this to dry thoroughly overnight. The A2 card base was stenciled using the same inks, spritzed with shimmer mist and spattered with diluted inks. 

I die cut a scalloped panel using the "Classic Edgers Die Set" from Pinkfresh, backed it with a piece of craft foam and adhered it to the top of the card front. I stamped, colored and die cut the bird image - backing it with two additional die cuts to provide dimension. I prepped a piece of black card stock with my anti-static powder tool, stamped the sentiment (from MFT's "Bitty Thanks & Gratitude" Stamp Set)  with VersaMark Ink, heat embossed it with white powder and it was die cut.


I glued all of the elements to the card front and dotted the "I" with an iridescent gem. The little bird was finished with just a bit of WOS to give him a bit of shimmer and I just love how he is perched on top of the word die! Thanks so much for stopping by today and we hope you will join our challenge!

Additional challenges:


Thanks so much for stopping by today and for taking the time to leave a comment! 
Rachelle

Friday, February 7, 2020

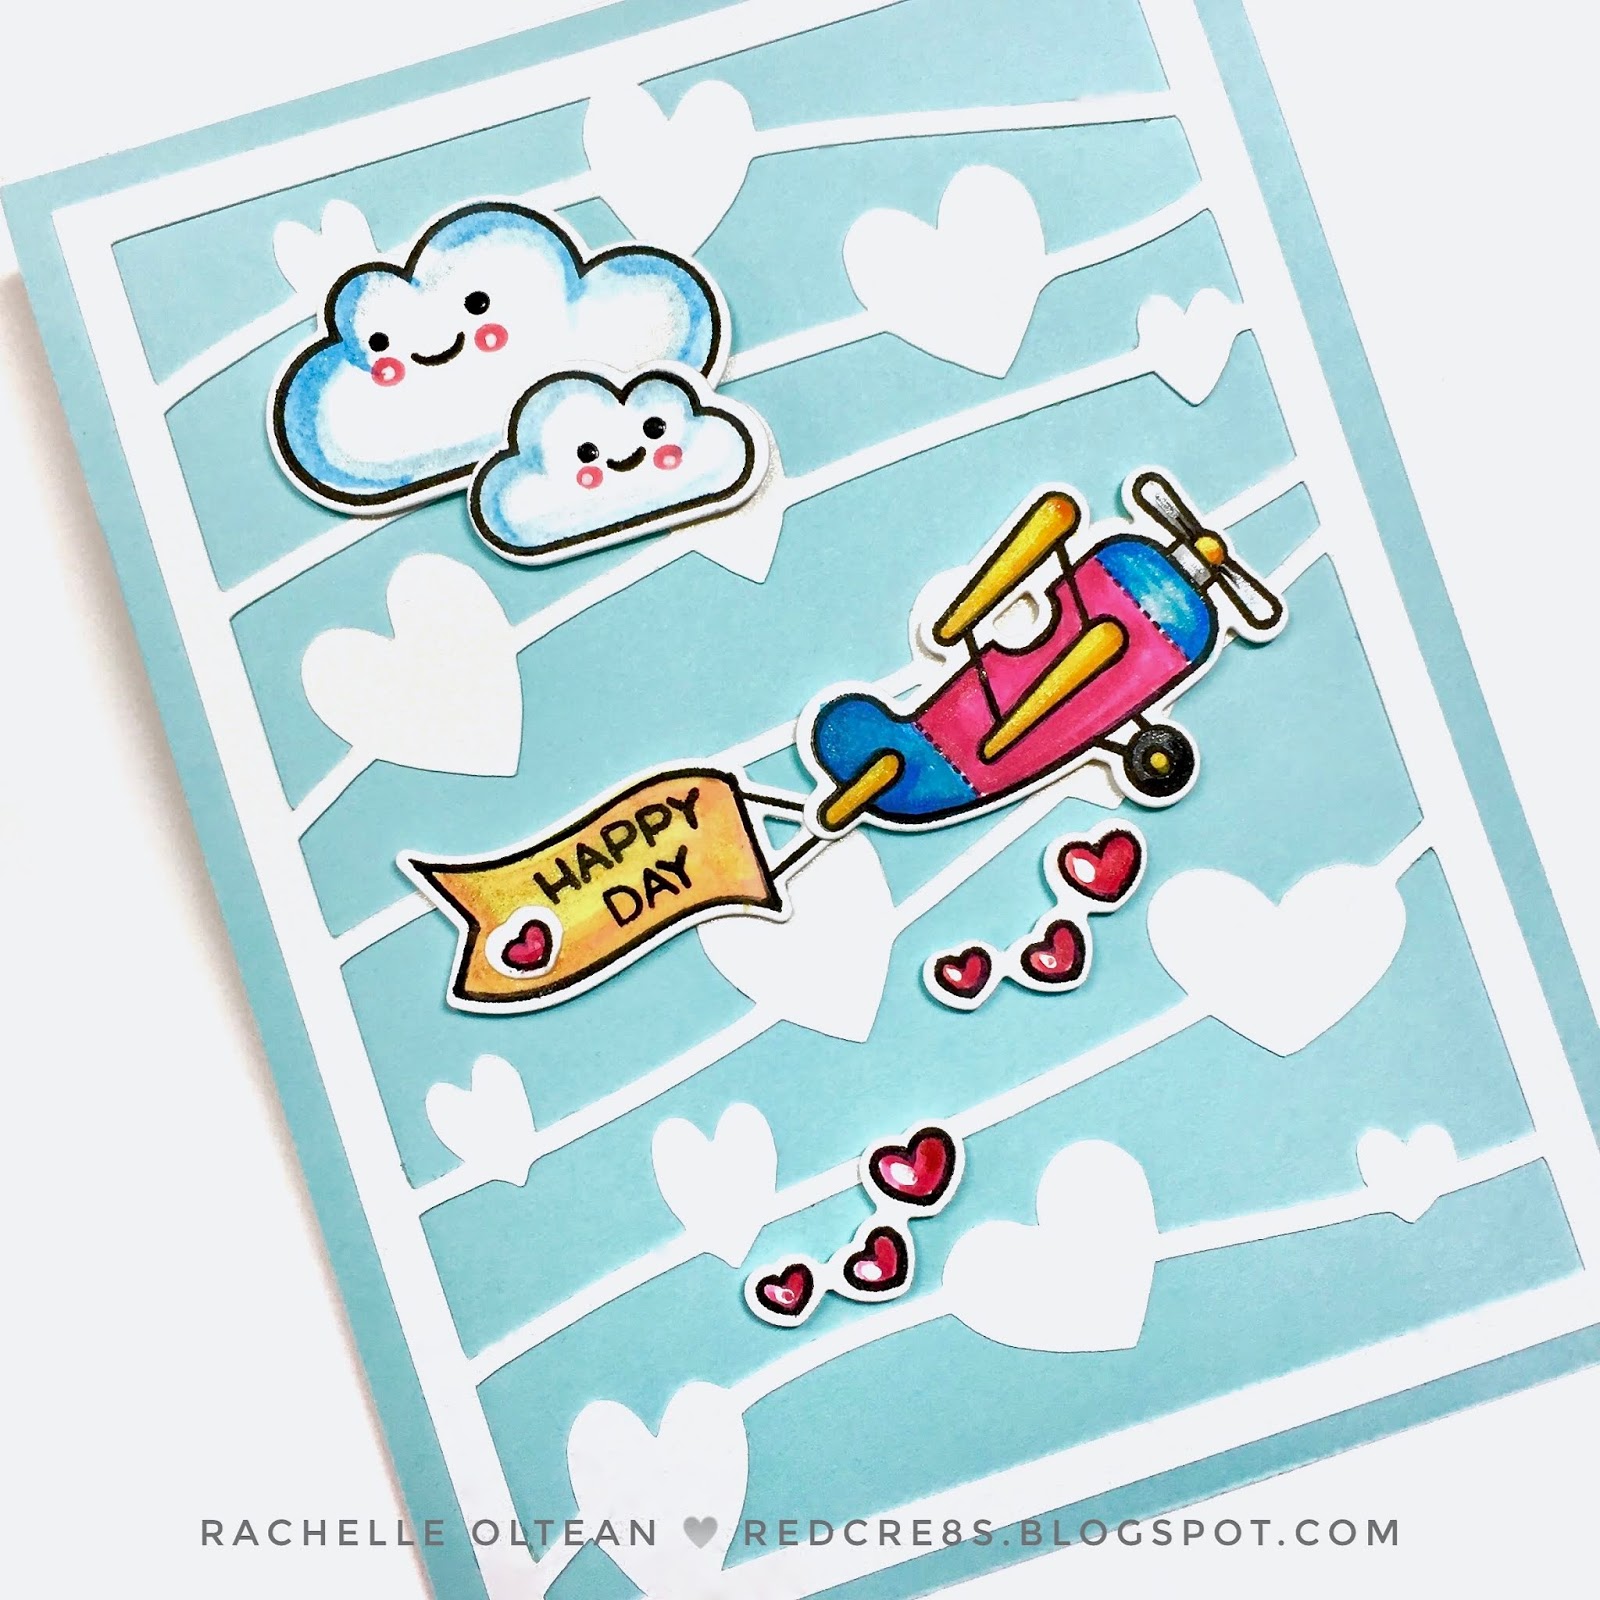
Valentine's Day | Lawn Fawn - Plane and Simple | Cut It Up! Challenge #193 - Love Is In The Air!


Hi!

We've got another great challenge for you over on the Cut It Up! Blog..."Love Is In The Air!" We would love to see your Valentine/Love creations in our gallery and don't forget the die cut! Our wonderful sponsor for this challenge, Michele Gross over at CAS-ual Fridays Stamps, has generously offered a $20 prize code for her on-line store! Her designs are sassy, fun and always on point and we truly appreciate her continued support! We can't wait to view your projects and check out the design team's awesome inspiration!

I adhered a 4.25" x 5.5" panel of sky blue cardstock to the front of a top-folding A2 card base. The floating cloud/hearts background was die cut on the Cricut (from a piece of pearlized white card stock) and carefully glued onto the blue panel. I stamped, watercolored and die cut all the images from the Lawn Fawn Set, "Plane and Simple". I die cut extra 'blanks' and glued them behind the images to provide a bit of dimension and adhered them all into place on the card front. I added a touch of black glaze pen to the eyes on the clouds and WOS to provide a bit of shimmer on all of the images! Hope to see your creations over on the Cut It Up! Challenge Blog!

Additional challenges:


Thanks so very much for stopping by and for taking the time to comment! It's greatly appreciated! : )
Rachelle