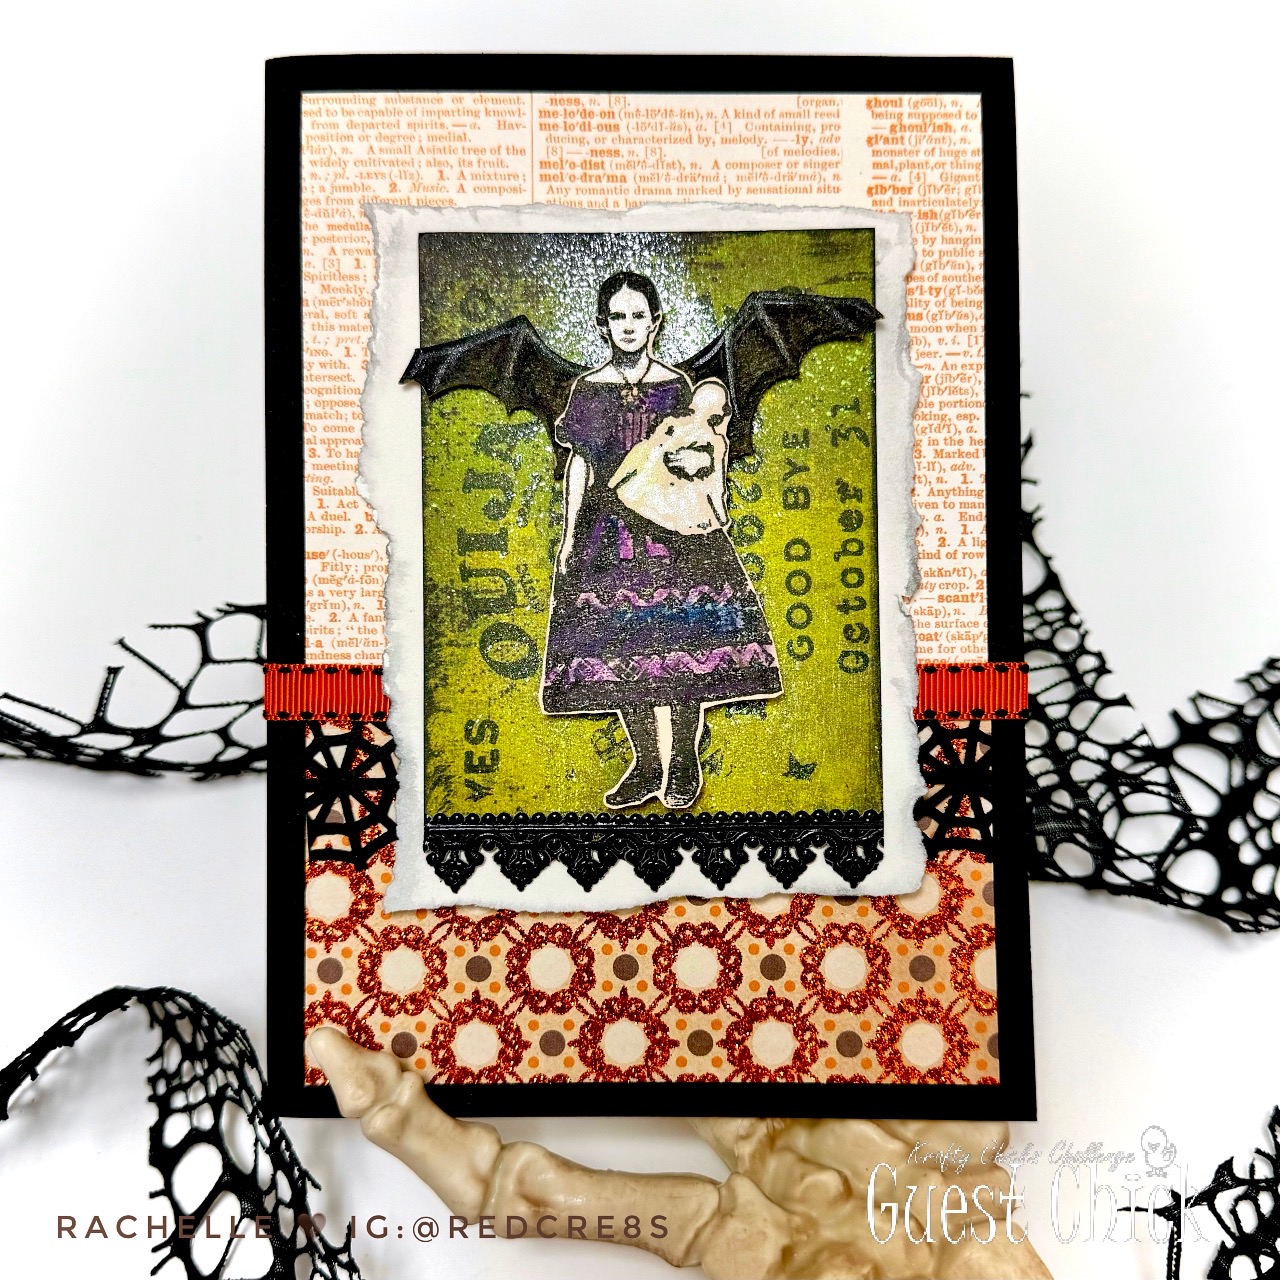
Thursday, April 11, 2024

Christmas Card | Altenew "Poinsettia" Dies | Krafty Chicks Challenge #711 | Week 2 Christmas


Hello!

We are at Week 2 over at the Krafty Chicks Challenge and that means "CHRISTMAS!" I have had these Altenew 3D Poinsettia Dies for a while now and decided it was the perfect time to pull them out for this project! 
 

The snowflake background was stenciled using Distress Oxide Ink: Salvaged Patina, Peacock Feathers and a bit of Twisted Citron. The panel was cut down to fit an A2 card base, spattered with pearl watercolors and a little bit of ink shading was added to the edges. I attached the panel to the card base and stamped the one-word "Peace" sentiment at the bottom.

To create the flower petals, I ink smooshed Distress Oxides onto several panels of white cardstock in different color/value combinations using Spun Sugar, Abandoned Coral, Festive Berries and Candied Apple. I copied this same technique for the leaves using Twisted Citron, Mowed Lawn and Peacock Feathers. Once all the panels were dry, I spattered them with gold watercolor and spritzed them with Shimmer Mist. I allowed them to dry again and then started die cutting.

Once all of the shapes were cut, I began to dry fit the pieces together on the card front. When I liked the layout, I took a photo with my cell phone, removed the top layers and started gluing all of the pieces back together, (using my reference photo) and gently folding each petal along the score line before the final attachment. By using a combination of both mountain & valley folds, there is so much dimension in this design! To finish off the card, I added some gems to the middle of the poinsettia.  


I hope you will join us this week at Krafty Chicks with some Christmas creations!

CHALLENGES:


Thanks for stopping by and happy crafting!
Rachelle

Thursday, April 4, 2024

Birthday Card | Graciellie Design - "Rainbow Birthday Cake" Digital Stamp Set | Krafty Chicks Challenge #710 - Week #1 Stamps


Hello!

I’m so excited to announce that I have been invited to join the Krafty Chicks Challenge as a guest designer for the next few months! I have been following this wonderful weekly challenge for many years and it’s an honor to become a part of this great team for a guest gig! 

We are starting Challenge #710 with Week #1 - Stamps (inked or digital) and I chose a great digi stamp set from Graciellie Designs, “Rainbow Birthday Cake”. The original cake was created as a tall slimline image but with just a few tweaks, I was able to convert it to a 3-layer design that would fit on my A2-sized card front.

After resizing, I printed the image onto 80# white card stock and watercolored both versions. Distress Oxide Ink was blended around the edge of the pink version and both card fronts were spattered with gold metallic paint. I trimmed both painted fronts down to 4” x 5.35” and glued them to coordinating card stock. Baker’s twine was wrapped around and tied to the panel, which was attached to an A2 top-folding card base. 

The sentiment on the pink version was already printed onto the cake layers but I stamped/die cut the sentiment for the primary card and popped it into place with foam tape. This is a classic image and I have made dozens of these cards for my birthday stash!


Thanks so much for joining me today and I hope you will link up your “Stamp” project over at the Krafty Chicks Challenge !

Happy Crafting!
Rachelle

Friday, March 29, 2024

Birthday Card | Angie Blom Digital Designs - "Thanks, Let It Bee" Stamp Set


Happy Good Friday!

Today I've got a couple of card designs using the great digi stamp set, "Thanks, Let It Bee", from Angie Blom Digital Designs! Angie does such a get job mixing and matching her elements and she even lays out a full page of card front designs that you just print directly! Easy peasy! I really recommend heading over to her store and looking around for yourself!


I mass produced over two dozen cards using 5 different designs and they all started by printing the card fronts onto 80# white card stock. Using a honey comb stencil, I ink blended the pattern around the designs using Distress Oxides. The panels were spritzed with shimmer spray and spattered with gold watercolors. I went back in after they were dry and ink blended just a little bit more around the edges with Black Soot, trimmed them down to 4" x 5.25." and attached them to an A2 black cardstock panel.


I painted the images with watercolors in a very loose, gestural way and each panel only took about 10 minutes to complete. The card fronts were adhered onto top-folding A2 card bases and a few golden sequins finished up the designs! I'm so glad that I made a stash of these - they are such bright, happy cards and I can't wait to send them all out to spread a bit of sunshine to the recipients!


Thanks a million for buzzing by today and happy crafting!

Rachelle

Tuesday, March 26, 2024

Anniversary Card | Concord & 9th - "Sweet As Pie" Bundle


Hello!

I've got a cute anniversary card for you today! This creation went out to a very special couple who celebrate their anniversary on Pi Day - 3/14/15! I couldn't resist this punny design which showcases Concord & 9th's adorable bundle, "Sweet As Pie." 

I stamped the gingham background with red die ink onto white card stock and cut it with the fringed tablecloth die. I brushed the small fringe pieces in different directions to give it more dimension and glued it to a kraft card base; the overhanging edge was cut with scissors.

I die cut the pie pieces and inked them with Distress Oxides. I added lots of tiny blueberries with pearlized watercolors on the base circle so they would show up through that detailed latticed pie crust! (see below!) The three pie pieces were glued together and a bit of sparkling glitter was added on top to highlight a sugar dusting! The pie was popped up with foam tape on top of the table cloth and the sentiment was stamped onto the background.

I die cut/assembled/attached the two small pieces for the pie server and added the small heart embellishments to finish up the card! I was so happy with the finished design on this one! YAY!


Thanks for stopping by and happy crafting!
Rachelle