Showing posts with label Pink & Main. Show all posts

Tuesday, July 4, 2023

Birthday Cards | MFT Stamps - "Picture Perfect Party Animals" Stamp Set


Hello!

I've got tons of late summer birthdays and so it's time to start cranking out the cards! I shopped my stash for some fun kids' imagery and landed on the older MFT Stamps' "BB Perfect Party Animals" Stamp Set! I've had this set for a few years and don't know why I waited so long to use it because I had a blast coloring these cuties!! 


I began by inking the background with Pink & Main's "Rainbow Fun" Stencil and four Catherine Pooler Inks. I sprayed the background panels with shimmer mist and spattered them with several colors of metallic watercolors - they really shine in the light! The panels were trimmed to 4" x 5.25" and adhered onto a top-folding A2 card base.


The party animal images were stamped onto 100# white card stock, watercolored and trimmed around the square frame. I die cut the photo frames with an inset window, inserted the colored images into the opening and stamped the sentiment at the bottom. 


I stamped/die cut the words "Happy", glued them each to a black die cut and attached them to the top of the photo frames. A black shadow frame was adhered to the card front, the party animal toppers were popped up with foam tape and a few rainbow sequins finished up this fun card set!

Thanks for stopping by & happy crafting!
Rachelle

CHALLENGES:


Wednesday, December 1, 2021

Christmas Card | Pink & Main - "Homespun Christmas Card Kit"


Happy December 1st! 

For those of you who stop by the blog on a regular basis, I will be taking a bit of a break because of a retinal tear in my right eye that requires some rest, monitoring and surgery. 

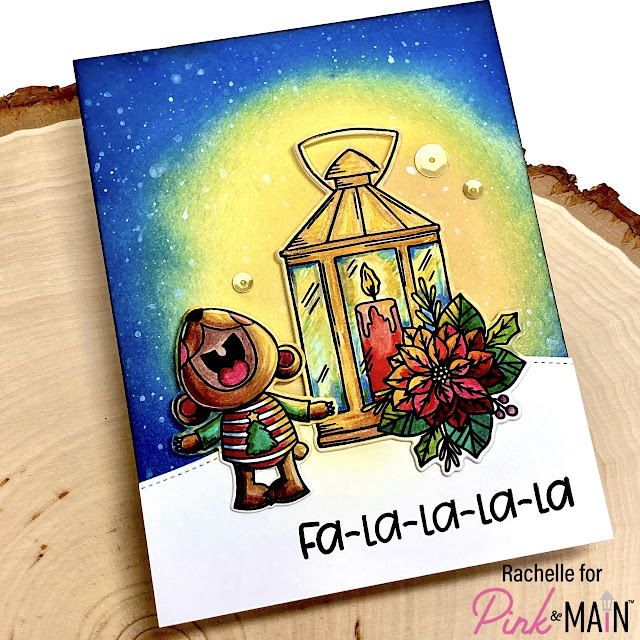
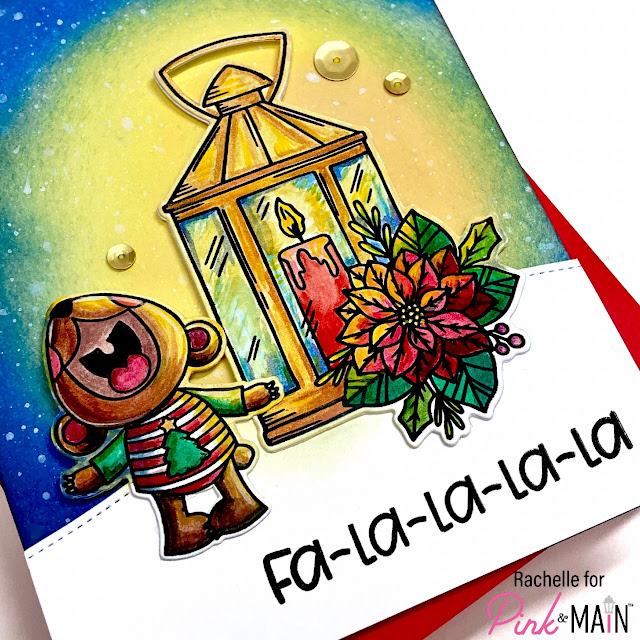
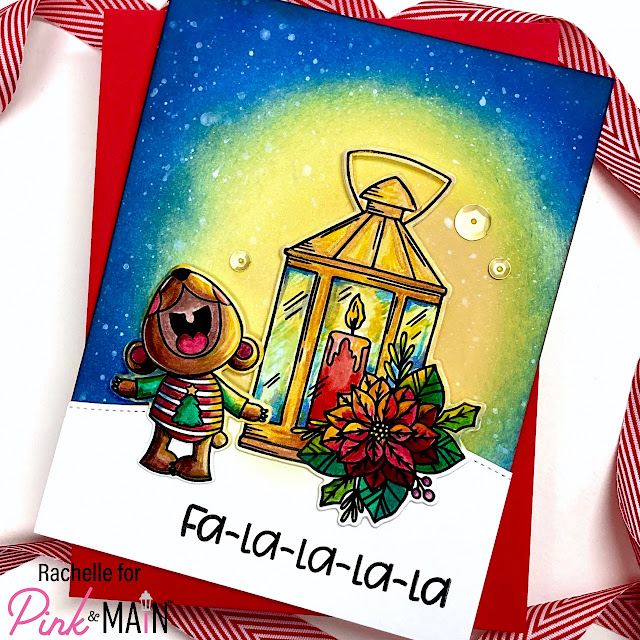
Hopefully I will be back to creating after the first of the year! But this card was already completed and I combined the singing "Pete" image from the NEW "Polly & Pete Carols" Stamp Set with the Christmas Lantern from the "Homespun Christmas Card Kit" to create this winter's night caroling scene!


The A2-background panel was ink blended using Distress Oxides Inks and spattered with diluted white paint and shimmer watercolors. When it was dry, the panel was attached to a top-folding A2 card base. I stamped, watercolored and die cut the two images focusing my coloring on capturing the glow of the single candle in the lantern. I made sure to paint around the white margin of the die cuts so that they would blend into the scene.


I die cut the snow bank from heavy-weight white card stock, stamped the sentiment using my MISTI, backed it with a cereal box chipboard and glued it to the card front. Adding this additional layer of chipboard creates depth and strengthens the panel. The images were adhered into place and a few sequins finished up the card! I just love how he is singing with all of his heart - it's so cute!

Thanks so much for stopping by and have a wonderful holiday season!
Love - Rachelle

Wednesday, November 24, 2021

Christmas Card | Pink & Main - "Homespun" Christmas Card Kit


Hello everyone! 

I know we’re all geared up for Thanksgiving here in the US but I’ve got a CAS Christmas card to share with you today that focuses on the beautiful poinsettia image from the “Homespun Christmas Card Kit”. If you haven’t picked this up yet, there’s still time to grab this awesome kit, which is a fantastic value for all of the goodies included! I stamped and watercolored the floral image and then die cut the panel using a NEW “Notched Corner Die.”


I attached a red stitched rectangle (Stitched Rectangles Set 1) onto an A2 card base and glued the floral panel on top. The “J” and “Y” (from the “Thin Alpha Die Set”) were die cut from the Red “Winter Glitter Paper Pack” and glued next to poinsettia to spell out the word “Joy”. I added a few sequins to finish up this clean design!


You could also spell out the word “Noel” with this same poinsettia image and “Snow” using one of the snow people from this month’s “Snow Sweet” Set as the “O”! There are lots of possibilities you could come up with using this same concept! Thanks so much for joining me today and happy crafting!

CHALLENGES:


Have a wonderful Thanksgiving!
Hugs - Rachelle

Wednesday, November 17, 2021

Christmas Card | Pink & Main - "Snow Sweet" Stamp Set


By now, you probably know that I’m a shaker card fanatic but this is my very first attempt at a full-front version! It was so easy to do with these wonderful P&M Products that I’m going to be able to mass produce about a dozen of these in one day! I used the “Snow Sweet” Stamp of the Month Set and chose this handsome guy with the top hat! I stamped, colored and die cut the image, adding an extra blank die cut to the back.


I randomly ink blended “Salty Ocean”, “Worn Lipstick”, “Dusty Concord” and “Wilted Violet” Distress Oxides on 130# white card stock. The panel was sprayed with shimmer mist and spattered with diluted inks. When it was dry, I used white pigment ink and blended the snowflakes using the NEW “Blizzard” Stencil.


I used a clear acetate envelope to create my shaker and simply cut a partial slit on the backside, added 1/8″ EZ Tear Tape to the back of the stenciled panel, slipped it into the acetate and carefully removed the EZ Tape with my Pink and Main “Reverse” Tweezers! These tweezers are incredible and can reach tiny nooks and crannies with ease! I added lots of shaker bits, micro beads, sequins and confetti onto the front side, folded the envelope opening over the top and taped it to the backside. 1/2″ EZ Tear Tape was added to the backside of the shaker pocket and it was adhered to a top-folding A2 card base.


Using the NEW “Christmas Greetings Dies”, I die cut the shadow image from light blue vellum and the scripty “Merry Christmas” from a piece of the small checked paper from the “Holographic Paper Pack Set 1”. “This sparkly reflective holographic paper really pops off the front of the shaker and picks up all the colors in this snowy palette! I attached the scripty die cut to the vellum with “EZ Squeeze Craft Glue” and used tiny pieces of the 1/8″ EZ Tear Tape to attach the entire die cut sentiment (and the snowman) to the acetate to finish up the card! 

CHALLENGES:


Thanks so much for stopping by today and happy crafting!
Hugs - Rachelle

Wednesday, November 10, 2021

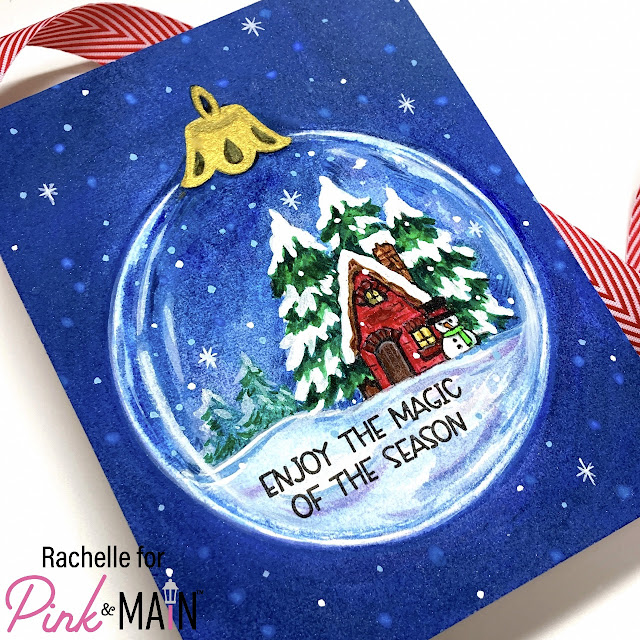
Christmas Card | Pink & Main - "Winter Snow Globe Scenes" Stamp Set


Hello!

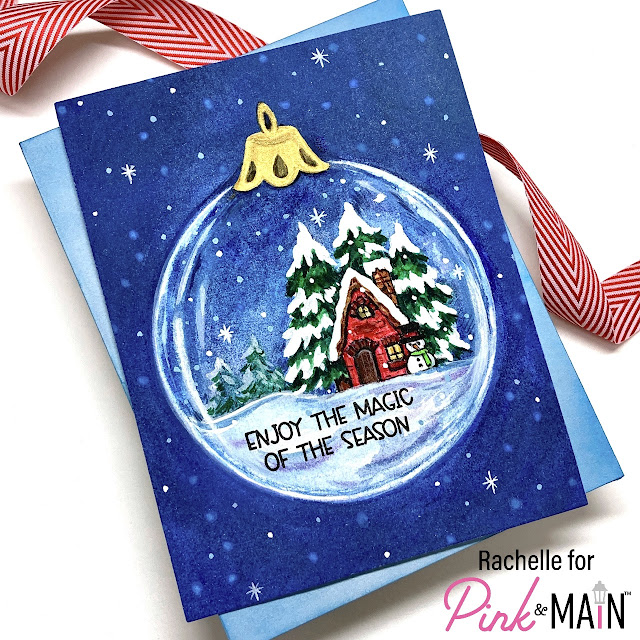
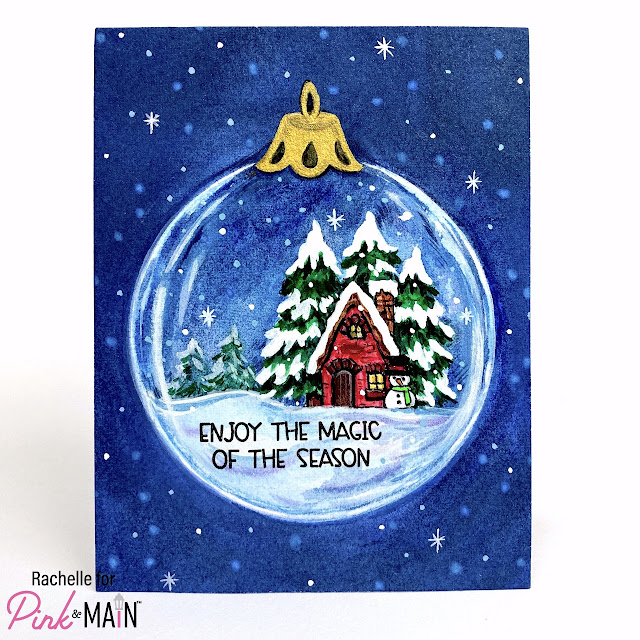
I would like to make a major announcement - I MADE A ONE-LAYER CARD! This is a huge accomplishment for me because I normally add layers and bling to every project but this no-line watercolor technique didn’t really need anything else so I stopped myself while I was ahead!

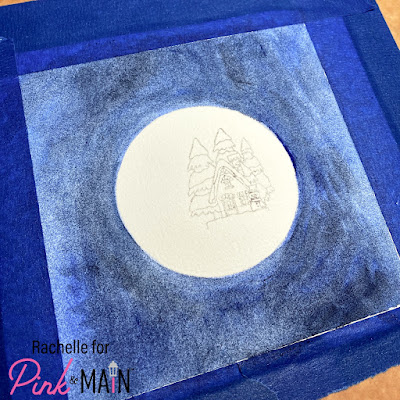
I started by taping a piece of watercolor paper to my heat-resistant cutting board with painter’s tape. I drew around a circle die cut in the center, watercolored a base layer around the circle and then stamped the woodland cottage image from the NEW “Winter Snow Globe Scenes” with “Hickory Smoke” Distress Oxide Ink.


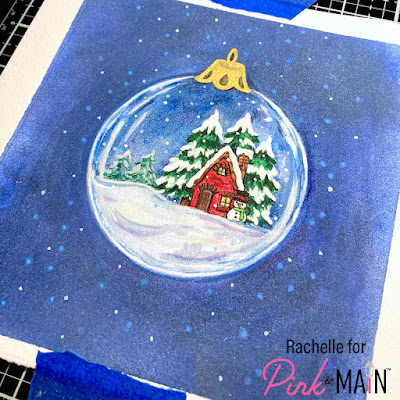
Then the cottage scene was watercolored inside the glass ornament. When it was finished, I used the circle die cut to mask the painted area and ink-blended “Chipped Sapphire” and “Prize Ribbon” Distress Oxide Inks to intensify the background blue; the entire panel was spritzed with shimmer mist.


The ornament hanger was quickly sketched with pencil and painted with gold metallic paint. I added light blue/white snowflakes to the panel, removed the tape, trimmed the panel down and attached it to a top-folding A2 card base. The sentiment from this same set was stamped using the MISTI to finish up this card.


I was really happy with the way this turned out and so glad I restrained myself from adding any bling! This card won't be mass produced but it's nice to take on a watercoloring challenge every now and then!


Thanks so much for stopping by today and for taking the time to comment! It's greatly appreciated!

CHALLENGES:


Take care and happy crafting!
Hugs - Rachelle

Thursday, November 4, 2021

Christmas Card | Pink & Main - "Snow Sweet" Stamp Set


Hello!

I’m sharing a shaker card today featuring the NEW Stamp of the Month Set, “Snow Sweet!” I am a huge snowman fan and these little snow people are so cute! I mixed together a ton of new products and tried a dark red background for my snowy scene, instead of the traditional blues/purples!


I ink blended the background with Distress Oxide Inks: “Barn Door”, “Ripe Persimmon”, “Aged Mahogany” and “Black Soot”. The panel was spritzed with shimmer mist, spattered with gold watercolor and trimmed down to fit a top-folding A2 card base. I inked another panel with “Worn Lipstick” and “Barn Door” DOI’s, die cut it with one of the “Stacked Snowflake” Images and glued it to the red background panel.


I stamped, colored and die cut several of the snowman images from the “Snow Sweet” Set because I wasn’t quite sure which one I was going to use and it’s always good to have a few ‘extras’ on hand! I die cut two frames using the “Notched Corners” Die Set, glued them together and attached the frame to the back of a sloped, die cut snow bank. I stamped the sentiment onto the snow bank using my MISTI, added a piece of acetate to the backside of the frame and covered the skinny frame/snow bank with foam tape.


I added lots of shaker bits to the center of the card front, carefully peeled away all of the release paper and pressed the shaker window panel in place on the card front. The little snowman in the knitted hat was popped up with foam tape to finish up the card design! Now that I have this design created, I’m going to use the other two snow people to crank out a couple more cards exactly like this! Head over to the Pink & Main Shop to check out the NEW Stamp of the Month options for this adorable set!

Thanks for stopping by and take care!
Hugs - Rachelle

Sunday, October 31, 2021

Christmas Card | Pink & Main - "Holiday Mugs"


Hey there!

I've got a fun project for you today! It's my first foray into Pink & Main's brand new release of flocking products! And let me tell you - it was so easy to use that I may start adding this great product to every card! I created my peppermint-inspired panel by simply laying down small strips of the 1/4'' EZ Tear Tape on a piece of white card stock measuring 6" x 2". After peeling off the release paper, I coated the adhesive with the "Sparkling Santa's Hat Flock" over a piece of paper (just like you would when applying glitter.) The flock really sticks to the tape and all I did to ensure adhesion was to cover it with my thin craft mat and gently rub it with my hand. The flocking adds so much texture/dimension and there was minimal flake off when I trimmed the panel down to attach to the left side of an A2 card base. Here's what the sparkling flock looks like - soft, fuzzy fibers with lots of glitter. Each color also comes without glitter so you can mix and match the products together for different looks!


I applied a thin coat of glitter paste through the "Random Dots" Stencil on a panel of white card stock and set it aside to dry. I then stamped, colored and die cut the travel cup from the "Holiday Mugs" Stamp Set. The sentiment from this same set was heat embossed on black card stock and die cut with the accompanying die. The detailed snowflake from the "Stacked Snowflake" Dies Set was cut from a silver piece of glitter paper from the "Winter Glitter Paper Pack" (Pink & Main is my favorite glitter paper of all time!) and I backed it with a blank white die cut for added strength.


I trimmed the dotted panel down to 3.25" x 5.5", backed it with a piece of cereal box chipboard and glued it to the right side of the card front. The sentiment and snowflake were glued directly to the front and the travel cup was popped up with foam tape; a few red sequins finished up the card! I can't wait to give this card to a coffee-loving friend this Christmas!

Thanks for stopping by and have a wonderful Sunday!
Hugs - Rachelle

Thursday, October 21, 2021

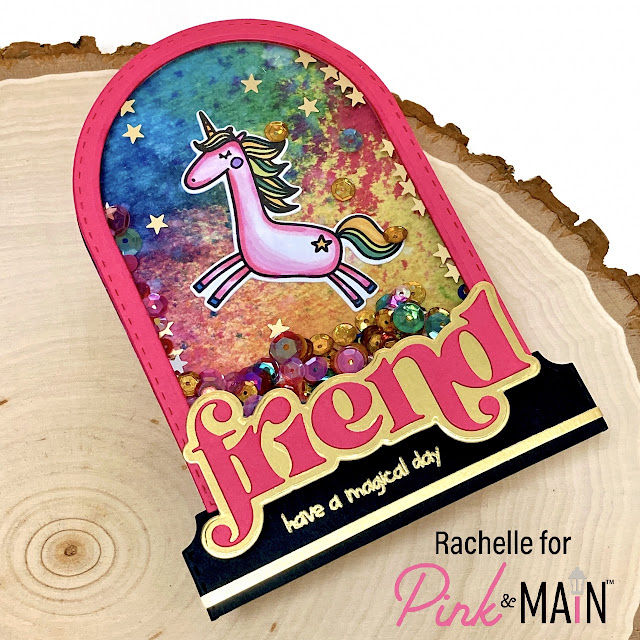
Birthday Card | Pink & Main - "Rainbow Wishes" Stamp/Die Set


I've got a shaped shaker card I put together with some of the great new die sets! I love how Michelle creates her stand-alone dies - you can design so many wonderful projects using these items! I've captured a unicorn in this arched shaker card and it's sending out magical birthday wishes!

I started by creating the elongated arched card base using the "Stitched Arches" Dies. I die cut 4 arched frames from raspberry card stock, glued them together in pairs and sandwiched a piece of acetate between the two frames. The colors in the NEW Watercolor Rainbow Paper Pack are truly amazing and I used one of the overall textures as the base for the shaker, cutting it with the large arch and attached it to the card front. I love these jewel tone rainbow colors!!! 


I stamped, colored and die cut one of the adorable unicorn images from the NEW Unicorn Wishes Stamp/Die Set and glued it to the pattern paper. Gold stars were adhered around the unicorn, the shaker bits were piled onto the middle of the card and the shaker window was attached on top with foam tape. To create the black shaker base, I die cut one of the rectangles from the "Notched Corners Die Set", cut it in half and glued the pieces together. The small sentiment was heat embossed with gold powder and the base was attached to the card front just under the shaker frame. I added the large stacked word die from the NEW "Rainbow Friend Dies" Set, combining the same raspberry card stock and the gold shadow cut from the "Foil Cardstock" Paper Pack. A skinny accent strip of the same gold foil paper was added below the sentiments to finish up the card front! I had so much fun capturing a unicorn on this card!

Thanks so much for joining me and have a wonderful day!
Happy Crafting!
Hugs - Rachelle

Friday, September 17, 2021

Christmas Card | Pink & Main "The Best Gift" Stamp Set


Happy Fri-YAY!

I’ve got a snowy shaker card to share with you today featuring a sneak peek of a NEW “Layered Snowflake Die Set” combined with the stamp of the month subscription set, “The Best Gift.” Here's a pic of the set and these Christmas Bear images will be wonderful for cards and gift tags! But subscribe today because this is only available for the month of September or while supplies last! 


I began by stamping, coloring and die cutting the bear in the box image and I backed it with two additional blank die cuts. I also included a bit of paper piecing by adding pattern paper from the “Be Merry” Paper Pack as the gift wrapping on the package! 


I die cut the large, base snowflake image from two pieces of white card stock and glued the negative panels together. I then die cut this piece with the largest rectangle from the “Stitched Rectangles 2” Die Set (4” x 5.25”). This panel was backed with acetate and two layers of double-thickness foam tape around the perimeter. 


I adhered an A2 piece of red card stock to a white card base and aligned/glued the positive snowflake die cut on top. Shaker pieces were piled on top of the snowflake and the white acetate panel was carefully adhered in place on top. The sentiment from the same stamp set was inked using my MISTI and the bear die cut was popped in place with foam tape to finish up this card! 


There are so many great products in the upcoming release on the 20th and head over to Pink & Main's Instagram Page to check out all of the other great sneak peeks from the Design Team!

Have a wonderful weekend and happy crafting!
Rachelle

Wednesday, September 8, 2021

Halloween Card | Pink & Main - "Batty For You" Stamp/Die Set


Hey there!

Being a huge Halloween fan, I just can’t get enough of the latest Pink & Main release and the NEW “Batty For You” Stamp & Die Set is so much fun! 

I stamped, water colored and die cut the bat image carrying the candy pail and backed it with an extra blank die cut. I die cut a small window opening from a 3.75” x 5” panel of the orange plaid from the NEW  “Pumpkin Season” Paper Pack using one of the NEW  “Zig Zag Circle” Dies. This panel was backed with craft foam and attached to a black A2 card base.


I stamped/die cut the word ‘Batty’ from a piece of orange card stock and the small sentiment was heat embossed and trimmed. The bat was popped up with foam tape in the window opening and both sentiments were adhered into place on top. A few of the yellow/orange “Unicorn Pearls” were added to finish up this Halloween Card - I just love how each one changes color!

Wednesday, September 1, 2021

Halloween Shaker Card | Pink & Main - "Hello Bootiful"


Hello!

I've got a terrific trio of happy spirits shaking it up for you! These little ghosts from the NEW "Hello Bootiful" Stamp Set are sure to put you in the Halloween spirit and I've loaded them into this shaker card for the perfect treat!

I began by ink blending a panel with "Wilted Violet", "Chipped Sapphire", "Prize Ribbon" and "Black Soot" Distress Oxide inks. I added the "Deco" Stencil design in a random pattern with just the "Black Soot", sprayed it with a couple of pearl mist colors and spattered it with purple paint. The panel was set aside to dry in a heavy book and afterwards die cut with the largest "Layered Slim Line Rectangle Die" (8.5" x 3.5"). I stamped, colored and die cut the three single ghosts from the "Hello Bootiful" Set.


The background panel was attached to a slimline card base, my frame was cut three times from heavy weight black card stock using dies from the same "Layered Slim Line Rectangle" Die Set and I glued/stacked them together. A piece of acetate was attached to the back of the frame and thin strips of double-thick foam tape were added just under the frame. The three ghosts were glued onto the ink-blended panel, I added all of my shaker bits into the center and carefully peeled the release paper on the foam tape halfway on each side. The acetate frame was gently placed on top until I aligned everything correctly and pressed it into the final position, peeling off the release paper pieces.


Using the "Thin Alpha Dies", I cut the word "BOO!" from dark purple glitter paper and attached it to the front of the acetate window with small bits of dotted tape runner. I just love that little ghost at the bottom, sitting in that beautiful sequin pile! This is such a cute stamp set and I can't wait to use it again! Head over to the Pink & Main Shop to see all of the other fantastic fall & Halloween products!

Challenges:


Thanks for stopping by and happy crafting!
Rachelle

Tuesday, August 24, 2021

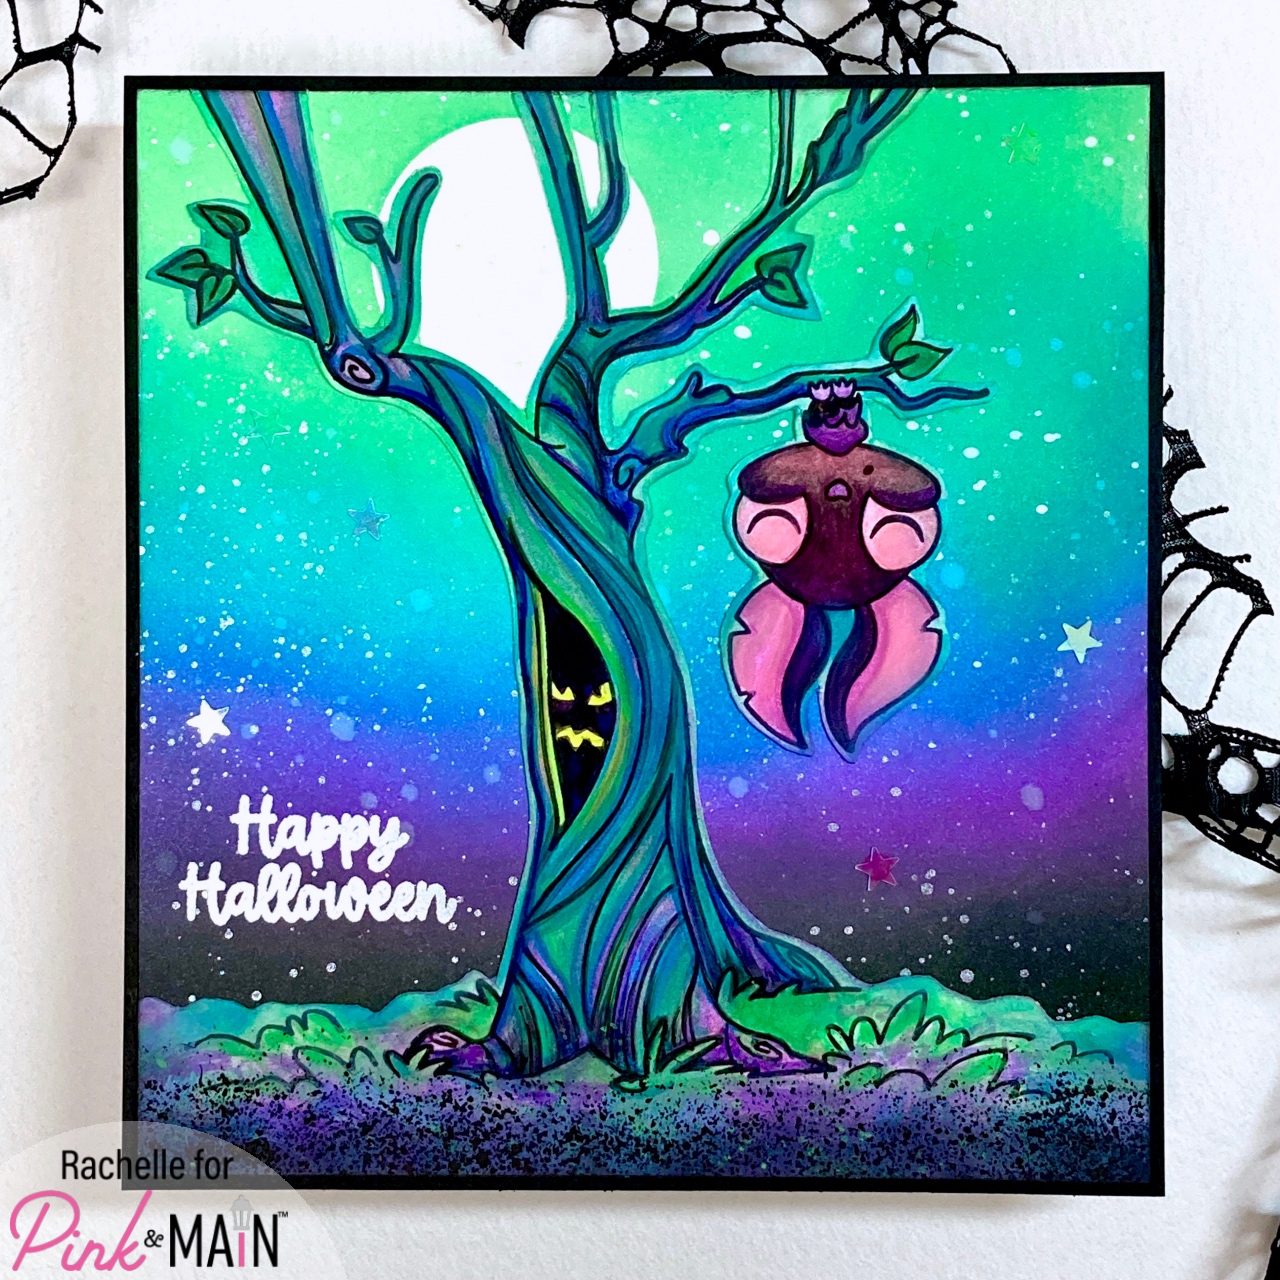
Halloween Card | Pink & Main - "Oh Nuts" and "Batty For You!"


Hello!

I've got a fun Halloween card for you today that combines two of the NEW Stamp Sets from August's Release - "Oh Nuts" and "Batty For You." I did some selective stamping to create this haunted tree with my little batty friend just hanging out taking a nap totally unaware of what lurks inside the tree trunk! This kind of reminds me of the super creepy trees from the Wizard of Oz, which gave me nightmares every time I watched it as a kid!


To join these two images together, I simply covered up the top right portion of the trunk with a piece of a post-it-note and stamped the tree using my MISTI. This left me with an opening in the trunk and I stamped the bat on the branch next to it, covering up the end piece of the stamp in the same way so that I could draw the two together with a fine tipped permanent marker. I also freehanded a bit more grass to the bottom of the scene to ground the tree.


I watercolored the images based on my Distress Ink palette and carried the color to the outside of the stamped lines (to match my sky colors) since I was going to fussy cut the entire piece. I added a spooky yellow face to the opening on the tree to up the scary factor a bit and hand cut the image.


I created a mask for my moon with a circle die cut and ink blended my background panel using these Distress Oxide Ink Colors: Cracked Pistachio, Peacock Feathers, Wilted Violet and Black Soot. The panel was sprayed with pearl mist and spattered with white opaque paint/green metallic watercolor. I heat set the embossed sentiment and glued the fussy cut image on top. The panel was trimmed to 5.25" x 5.5", attached to a black card base and a handful of holographic star sequins finished up the card! 
Those bright yellow eyes really creep me out so I think I was successful in capturing the look I wanted! I hope this project gives you some ideas on how to easily combine stamp sets together with selective stamping and a bit of quick sketching!

Challenges:


Thanks so much for stopping by and I hope you have a great day!
Rachelle