Monday, February 24, 2020

Birthday Card | MFT Stamps - Ewe Are The Best


Hi there!

Sharing a bright happy birthday card with you today featuring the now-retired "Ewe Are The Best" Stamp Set from MFT Stamps. This set has such great images and is full of scene building pieces that can be used in so many ways!

The background was ink-blended with Distress Oxides (Broken China & Cracked Pistachio), spritzed with shimmer mist and spattered with pearl watercolor on the front of an A2 top-folding card base. I die cut the reverse scallop circle from a 4.25" x 5.5" piece of 130# white card stock and backed it with craft foam. The sheep image was stamped, colored and die cut and I glued/stacked one additional blank die cut to the back to give it some dimension. 

The red card stock was prepped with the anti-static powder tool, stamped with VersaMark Ink, heat embossed and die cut with a fish tail banner. I adhered a 5/8" strip of MFT's Black & White Stripes Paper  to the bottom of the circle scallop panel and added the sentiment strip on top. This panel was glued onto the card front. The sheep was glued into place and some foam tape was added behind the balloon to give it some support. A few sparkling sequins and a little Wink of Stella finished up this project. I really like the fact that this is a gender-neutral card, which would be appropriate for almost everyone and I made a couple of extras just to have on-hand!


Challenge submissions:


Thanks so much for joining me and for taking the time to comment! : )
Rachelle

Friday, February 21, 2020

All Occasion Card | MFT Stamps - Tweet Friends | Cut It Up! Challenge #194 - Your Favorite Color


Hi!

We've got a great challenge for you over on the Cut It Up! Challenge Blog..."Your Favorite Color!" It's been so much fun to see what my fellow Design Team Members have come up with for this theme! We are so lucky to have TWO wonderful, generous sponsors offering prizes for this challenge: Nicolle Kramer (Creative Embellishments/$50 Gift Code) and Shery Russ (STAMPlorations/$20 Gift Code) who provided the design team a selection of her CUTplorations Dies for us to use on our projects. Head over to the Cut It Up! Blog to see the amazing creations the Design Team has created with these great products! My favorite color is turquoise and so I paired the STAMPlorations' word die with this adorable image from MFT Stamps, "Tweet Friends".  

I die cut the word die three times, ink blended it with Distress Oxide Inks and glued stacked them together. I lightly brushed the top with Wink Of Stella and applied a coat of Ranger Glossy Accents to the top to give it shiny dimension - I allowed this to dry thoroughly overnight. The A2 card base was stenciled using the same inks, spritzed with shimmer mist and spattered with diluted inks. 

I die cut a scalloped panel using the "Classic Edgers Die Set" from Pinkfresh, backed it with a piece of craft foam and adhered it to the top of the card front. I stamped, colored and die cut the bird image - backing it with two additional die cuts to provide dimension. I prepped a piece of black card stock with my anti-static powder tool, stamped the sentiment (from MFT's "Bitty Thanks & Gratitude" Stamp Set)  with VersaMark Ink, heat embossed it with white powder and it was die cut.


I glued all of the elements to the card front and dotted the "I" with an iridescent gem. The little bird was finished with just a bit of WOS to give him a bit of shimmer and I just love how he is perched on top of the word die! Thanks so much for stopping by today and we hope you will join our challenge!

Additional challenges:


Thanks so much for stopping by today and for taking the time to leave a comment! 
Rachelle

Thursday, February 20, 2020

Sympathy Card | Artsystamper Digitals - Aster Garden


Hello!

Recently I was lucky enough to win a digital image set from Beverly Cole of Artsystamper Digitals and I chose "Aster Garden", which features this gorgeous floral design and sentiment. I used this set to create a CAS sympathy card.

I designed my layout in PowerPoint and printed it on 110# Neenah Solar White Card Stock. After I painted the floral with plain/pearlized watercolors, I cut the panel with a stitched rectangle die and adhered it onto the front of an A2 top-folding card base. The card was then finished with assorted gems to add a bit of dimension. I had so much fun coloring this image and I look forward to coming up with many different color combos in the future!


Bev's images are so well-drawn and I can't wait to add more sets to my digital collection! You can find her work on Etsy - Artsystamper.


Thanks so much for joining me and for taking the time to comment!

Challenges:


Rachelle

Thursday, February 13, 2020

Valentine's Day | Hero Arts - You Are Loved


Happy Heart Day!

I'm sharing a set of Valentine's Day Cards today featuring Hello Bluebird's Gallery Frame #2 Die and Hero Arts' Stamp Set, You Are Loved, from January of 2019. I wanted to make each card just a bit unique so I emphasized the individual colors and values of this Distress Oxide palette: Worn Lipstick, Abandoned Coral, Candied Apple and Picked Raspberry. 

I lightly blended Worn Lipstick around the edges of a top-folding A2 card base. I die cut the Gallery Frame multiple times from heavy 110# card stock. The inner frame was blended with oxides, spritzed with shimmer mist and flecked with pearlized watercolors. Each frame was colored a bit differently and I focused on variations of color/values. I stenciled a sunray pattern onto the inner frame and spattered this section as well. 

I die cut the hearts using  Lawn Fawn's Stitched Heart Stackables after ink blending, The script was stamped using the MISTI with VersaFine Onyx Black Ink. The sentiment banner was die cut, lightly ink blended on the edges and stamped with the same ink. 


To assemble, I started by gluing the outer white scalloped frame into place on the card front; this gave me a guide for all of the remaining pieces. After the frame sections were adhered, I attached the heart and banner and then stamped the bottom scrolls with the Distress Oxide inks. The card was finished off with a few gems. It was fun playing with the color palette for these cards! 


Thanks so much for joining me and I hope everyone has a wonderful Valentine's Day!

Challenge Submissions:


Rachelle 

Friday, February 7, 2020

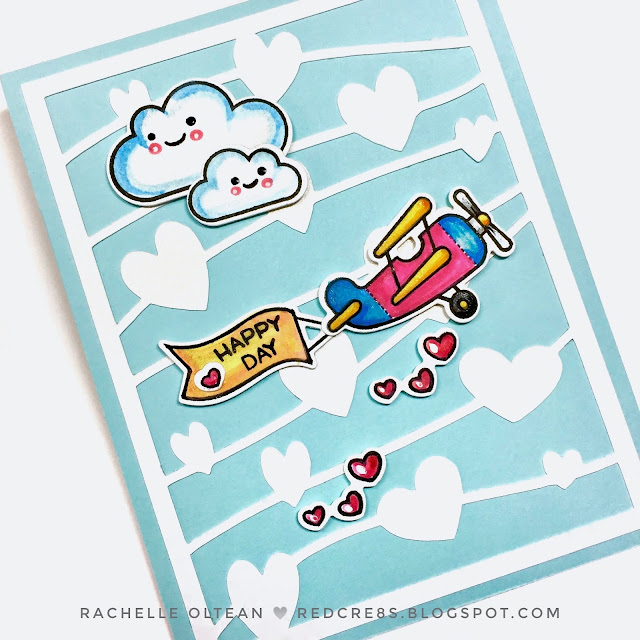
Valentine's Day | Lawn Fawn - Plane and Simple | Cut It Up! Challenge #193 - Love Is In The Air!


Hi!

We've got another great challenge for you over on the Cut It Up! Blog..."Love Is In The Air!" We would love to see your Valentine/Love creations in our gallery and don't forget the die cut! Our wonderful sponsor for this challenge, Michele Gross over at CAS-ual Fridays Stamps, has generously offered a $20 prize code for her on-line store! Her designs are sassy, fun and always on point and we truly appreciate her continued support! We can't wait to view your projects and check out the design team's awesome inspiration!

I adhered a 4.25" x 5.5" panel of sky blue cardstock to the front of a top-folding A2 card base. The floating cloud/hearts background was die cut on the Cricut (from a piece of pearlized white card stock) and carefully glued onto the blue panel. I stamped, watercolored and die cut all the images from the Lawn Fawn Set, "Plane and Simple". I die cut extra 'blanks' and glued them behind the images to provide a bit of dimension and adhered them all into place on the card front. I added a touch of black glaze pen to the eyes on the clouds and WOS to provide a bit of shimmer on all of the images! Hope to see your creations over on the Cut It Up! Challenge Blog!

Additional challenges:


Thanks so very much for stopping by and for taking the time to comment! It's greatly appreciated! : )
Rachelle

Monday, February 3, 2020

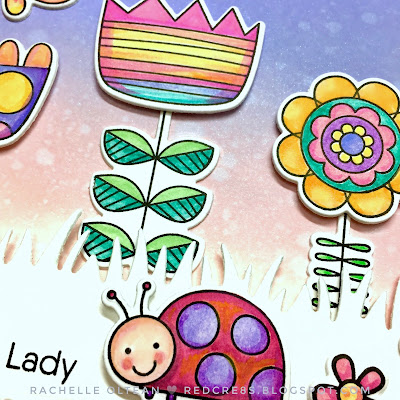
Birthday Card | MFT Stamps - Doodled Blooms & Love Bugs | Guest Designer on the AAA Birthday Challenge Blog - Game #10 "Cute"


Hi There! 
Yippee! I'm so excited to share this card with you today as a Guest Designer over on the AAA Birthday Card Challenge Blog! The current challenge is: Game #10 "Cute" and I decided to go with a bright spring scene featuring two now-retired MFT Stamp sets - "Doodled Blooms" & "Love Bugs". Be sure to head over to see all of the other wonderful projects that the AAA Birthday Team Designers have created for this challenge!


Using Tattered Rose and Shaded Lilac Distress Oxides, I ink blended an A2 background panel and spritzed it with shimmer spray; when dry, I adhered it to the front of a top-folding A2 horizontal card base.


All of the images were stamped (using VersaFine Onyx Black Ink), watercolored and die cut. I die cut extra blanks for most of the images and glued/stacked them together to give added dimension. The bottom grass border was die cut and backed with craft foam. I determined the location of the corner sentiment and stamped it using the MISTI.


I glued the flower stems/butterfly onto the background panel and popped the larger flower heads into place with foam tape. The grassy border was glued over the stems at the bottom of the card and the ladybug/mini flowers were adhered to finish off the card. I really like this rosy-lilac color palette for a feminine birthday card! 

Thanks for joining me and you've got until March 1st to submit your "Cute" Birthday creations over on the AAA Birthday Card Challenge!

Additional Challenges:


Thanks so very much for taking the time to comment - I appreciate each and every one!
Rachelle

Saturday, February 1, 2020

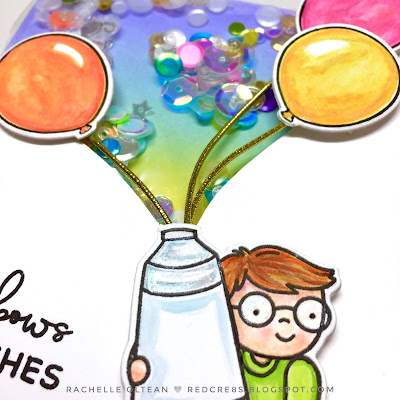
Birthday Card | Neat and Tangled - Complementary Colors | Corner Shaker Card


Hi There!

I have created a corner shaker card to share with you today! It took me a little while to figure out how to do it but I kind of like the final result! Using a clear acetate envelope was the trick to making this work.

I partially stamped, colored and die cut the boy/balloon images; leaving the top off of the paint tube and the attached strings off of the balloons. I knew that I wanted to add my own balloon strings, made from gold cording, which would be coming out of the end of the paint tube, and adjusting the stamped images worked perfectly! A 1.5" strip of the striped pattern paper was added to the bottom of a top-folding A2 card base and the top left corner was ink blended with Distress Oxide Inks: Fossilized Amber, Tumbled Glass and Shaded Lilac.


Using my boy die cut as a guide, I sketched/cut my shaker opening from a piece of heavy white card stock 4.25" x 4.5". I cut/taped my acetate envelope to size, which would fit into the top left corner but be hidden by the white cardstock overlay and filled it with the shaker contents. The shaker pouch was adhered into place on the card front. I adhered the gold cording to the back of the balloons and attached them to the card stock with foam tape making sure that all of the strings came down to the center point of the shaker opening. Using a double layer of foam tape, I popped the boy into place with the end of the paint tube over the balloon strings.


I added total foam tape coverage to the back of the white card stock and adhered the panel into place over the shaker pocket. The sentiment was then stamped using the MISTI! This card has a lot of dimension and the corner shaker worked out better than anticipated! : )

I would like to enter this card into the following challenges:

AAA Birthday: Game #9 - A Shaker Card - this card is a design team submission


Thanks so much for joining me and I really appreciate all of your comments!
Rachelle