Friday, November 29, 2019

Christmas Tag | Cut It Up! Challenge #188 Tic-Tac-Toe


Hello!

Today's post features a Christmas Gift Tag designed for the current Cut It Up! Challenge - Tic-Tac-Toe Board. This challenge has so many great combinations and as long as your project includes a die cut, we would love to see what you create! Thanks to our wonderful prize sponsor, Christy Witschie, from Stinkin' Cute Paper Piecings for her generosity! 

 Penguin 6 Cutting Files

I chose "Circles, Purple and Design Paper "as my game squares and started this tag by die cutting a large circle from both heavyweight white card stock and Lawn Fawn plaid paper; these two were glued together. I cut/glued together two of the largest scalloped circles from Avery Elle's Wonky Circle Framed Elle-ments Dies. This frame was glued onto the plaid circle. 

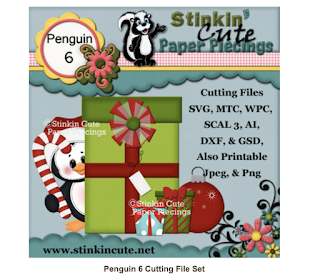
I downloaded the Penguin 6 Cutting File Set into Cricut Design Space, resized/tweaked the file and die cut all of the penguin pieces from white card stock. Each piece was hand colored with water colors and Distress Oxide Inks to give the overall image some depth. After assembly, I gave his face/tuxedo a generous coating of Wink Of Stella for some extra shine, added the small gems as buttons and applied black glaze pen to his eyes. I punched a hole through the scallop frame, tied the ribbon to the tag, glued a white pom-pom to the hat and popped the penguin into place with some foam tape to finish! This tag is quite large (nearly 4" in diameter) and would also make a great handmade ornament as well!

Thanks so much for stopping by and head over to the Cut It Up! Challenge Blog to see the other great projects the Design Team has created! 

Rachelle

Thursday, November 14, 2019

All Occasion Card | Hello Bluebird - Bee Happy | Cut It Up! Challenge #187 "Celebrate Fall (or Any Season)"


Hey there!

We've got a fun theme over on the Cut It Up! Challenge Blog...create a project to "Celebrate Any Season" and I chose to celebrate the growing season with these playful pollinators! I used these cute little honey bees from Hello Bluebird's 'Bee Happy' Stamp Set (Summer 2018) and the Mason Jar Set from "The Cutting Cafe" who is our generous prize sponsor for this challenge. My concept was to make a shaped card with an acetate window, fill it with honeycomb and feature these hardworking bees buzzing on the front : ) Make sure to head over to the blog and see the other creative ways the design team members have used these same die cutting/print files!

I loaded the SVG files into the Cricut Design Space and tweaked the sizing/design just a bit to give me a hinged window card base. I die cut multiples of this design, glued/stacked them together (for stability) and then blended Distress Oxide Inks around the edges to create glass reflections. I ink blended the honeycomb background pattern using a Tim Holtz stencil onto one of the negative die cuts, spritzed it with shimmer mist and glued it onto the inside panel. The ruffled fabric topper/ribbon were die cut from pattern paper and adhered  onto the card front. 


I carefully trimmed a piece of acetate to size and adhered it to the back of the window opening. The bees/honey pot were stamped, colored and die cut. I stamped the Hero Arts' banner design and Stampin' Up's Labeler Alphabet Letters onto heavy-weight vellum with VersaFine Onyx Black Ink and heat embossed it with clear powder. After the banner was trimmed, it was adhered onto the acetate panel with tiny pieces of double-sided tape. The bees finished off the card front and I added a sprinkling of gold confetti to the honeycomb.


This project was so much fun to design and the finished window is really effective! Sending a big THANK YOU to Regina over at The Cutting Cafe for furnishing the files and the prize for this fun challenge!

Rachelle

Tuesday, November 12, 2019

Christmas Card | Winter Scene Shaker Card


Hello!

I'm sharing a CAS shaker card with you today as the weather turns colder here in North Carolina! This design features a simple diecut image, an ink-blended background and lots of shimmer with the shaker bling!

I designed the house scene in PowerPoint, uploaded it into the Cricut Design Space and die cut it from heavy 100# white card stock. I glued/stacked two of the pieces together to ensure stability and then cut this panel again with my Big Shot using a dotted rectangle die (3.75" x 5"). I stamped the sentiment on the front using my MISTI and adhered a piece of acetate to the back of this panel. I blended an aurora borealis night sky with Distress Oxide Inks, sprayed it generously with shimmer  mist and placed it under a heavy book to dry.

I adhered the sky panel onto the center of a horizontal top-folding A-2 card base, backed the acetate panel with foam tape, and added a scoop of shaker fill into the center of the card. I carefully pressed the acetate shaker window into place to finish. One quick tip (and this is just personal preference) - I did glue several stars onto the sky panel before assembly so that when the card stood upright there would still be some scattered in the scene - if you don't do this, most of the filler will generally fall to the bottom of the shaker area and I like a bit to stay suspended.

Thanks so much for stopping by today - I really appreciate your comments : )

I would like to submit this card in the following challenges:


Rachelle

Sunday, November 3, 2019

Pop-Up Window Gift Card | Ellen Hutson - Voices In My Head/A Breve Note | A Place To Start Challenge "Caffeinated Tones"


Hello!
I can't wait to share this fun pop-up window gift card with you! I've mixed 'n matched a ton of products for this project, which focuses on the colors of coffee for A Place To Start's current November Color Challenge - "Caffeinated Tones". This beautiful, neutral palette is shown below:


I decided that I wanted to use some new-to-me stamp sets from Ellen Hutson and the creative designer, Julie Ebersole, for this pop-up gift card - "Voices In My Head" and "A Breve Note". I also wanted to create something that would hold a Starbuck's Gift Card and decided to use a pop-up window for the design. 

I cut a 4.25" x 5.5" panel of chocolate brown textured card stock and adhered it to the front of an A-2 top-folding white card base. I created a coffee-stained background by stamping a pattern with VersaMark Ink onto a piece of kraft card stock measuring 4" x 5.25". I partially die cut a rectangle in the middle of the panel (on three sides only) and scored the flap in three places to create the slider panel. A small half circle was cut from the top with a 3/4" punch.


The face and coffee cup were stamped in chocolate brown dye ink onto cream card stock, colored and fussy cut; a light application of Wink of Stella was added. I wanted the coffee cup to float above her head and so I attached the two with a thin piece of acetate. I die cut 2 vellum speech bubbles from Julie Ebersole's "High Five" Set and lightly blended Antique Linen Distress Oxide Ink onto the back of one die cut. I prepped the other with my anti-static powder tool, stamped part of a sentiment with VersaMark Ink and heat embossed it with white powder. I then carefully glued the two vellum die cuts together, placing glue only behind the embossed letters. This gave my vellum some structure while retaining a bit of transparency.

I cut a small panel from the same cream card stock (3.125" x 4.75") and stamped the sentiment "This One's On Me" at the top along with a few coffee beans. I added a small circular "Pull" tab at the top of the cream panel to finish and adhered it behind the kraft window panel (only at the bottom) with strong double-sided tape.


The face/coffee cup group was glued onto the bottom only of the kraft window panel and the speech bubble was slipped in behind. You want to be sure not to adhere anything to the area above the center scored fold line or else it will not pop-up when the reveal tab is pulled! Small strips of foam tape (double thickness) were adhered to the back of the kraft panel on three sides and this entire panel was pressed into place on top of the card base. I put the Starbuck's Gift Card under the slider and finished off the front with an assortment of coffee-colored sequins.

I really like the simple graphic style of this card and the 3-D pop-up effect works very well here!


Thanks so much for stopping by today and I appreciate your comments!

This card is also entered into the following challenges:


Also submitting this card over on the wonderful Coffee Lovers Blog Hop - thanks to all of the great sponsors for this season's event! (And a big thanks to Amy Tsuruta and Chaitali Narla as the co-hosts and organizers of this amazing hop!)


Rachelle

Friday, November 1, 2019

Thanksgiving Card | Cut It Up! Challenge #186 - "Thankful/Thanksgiving"


Hello!

Thanks so much for stopping by today! I'm so excited because this is my first Design Team submission for the "Cut It Up!" Challenge Blog! The challenge theme is Thankful/Thanksgiving while also using the "smooshing" ink technique. I decided to focus on an autumn color palette in combination with this beautiful sunflower SVG that I chose from Scrappy Dew, who is our prize sponsor for this fun challenge. Cut It Up! Challenges have great themes but do require using some type of die cut(s) in the projects and I know that for most paper crafters, this is a given! 

I used the simple sunflower design from the "Happy Fall Y'all" set but resized and reshaped some of the petals in the Cricut Design Space to create the multiple layers necessary to give this flower face a lot of depth. I die cut multiples of each layer on heavy weight white card stock and set them aside. 

Using MFT's now-retired Geometric Star Stencil, I inked it with Antique Linen Distress Oxide Ink, secured it face down and ran it through my Big Shot to make the imprint onto white cardstock; this panel was then die cut with an A-2 stitched rectangle die and adhered to a top-folding card base. I really like the way this gives you subtle color combined with a "letterpress-like" imprint in the background. I cut four rectangles from kraft card stock using MFT's Elegant Rectangle Die-Namics, glued/stacked them together, and adhered this frame to the card front.

Then came the fun part!!! I smooshed Distress Oxides Inks onto my Ranger Craft Mat, sprayed it liberally with water and started smooshing! I have found that this technique works best for me if I only try to combine 1-2 colors together at a time - if I try to add more colors, the end result looks a bit gray/muddy. I let the pieces dry between applications and kept adding layers until I achieved the depth of color I wanted. I then sprayed the flower petals with a gold shimmer mist to give it some additional shine. After everything was completely dry, I hand curled and scored some of the layers to give the flower a bit more detail then I assembled the pieces by gluing everything together from the bottom up! 

I stamped/die cut my sentiment strip, added a small layer of gingham pattern paper and adhered it into place with foam tape. The flower was then glued inside the frame and the card was finished with a few brown sequins and gold baker's twine. 

Head over to Cut It Up! to see the great projects the Design Team has created for this challenge and GET SMOOSHING! Here is a LINK to my recent blog post which shows lots of photos of this  technique in action.

Additional Card Challenges:


Thanks so much for joining me today and I really appreciate you taking the time to comment!

Rachelle