Monday, December 31, 2018

New Home Card | Avery Elle - Happy Home

Hey There!

The card today is for my niece who just bought her first home! She is a young nurse (at 24) who has been saving every penny to put towards a down payment on a house and kudos to her - she did it! This square Z-Fold card measures 5.5" (short folds 2.75") and features the Avery Elle "Happy Home" dies and "Shut the Front Door" stamp set.

The dark blue card base was scored at 2.75" & 5.5". I used Lawn Fawn's "Cloud Border Die" to create a template from heavy weight card stock, sponged the clouds onto a piece of white card stock, sprayed it with shimmer mist and cut the following pieces: (2) 2.5 x 5.25" (1) 5.25 x 5.25". These cloud background pieces were adhered onto the coordinating scored panels. The grass panel was die cut with Lawn Fawn's "Grassy Border Die" and scored at 5.5 & 8.25". Both sentiments were stamped into place with the MISTI.

The pieces for the house were die cut, embossed, and glued together onto a piece of white card stock to ensure stability. The flowers were embellished with small floral sequins and a tiny brad was added as the door "knob". The house was then glued onto the center of the large grass section and the entire piece was glued onto the left card panel only with very strong liquid adhesive. The opposite side of the grass border was aligned and glued as well to the right edge of the card - thus creating the "Z"-Fold mechanism. I created an additional interior tab behind the house, adhered MFT's "Stitched Sun" to one end of a 1/2" piece of acetate and taped the other end to the tab to create the floating sun in the sky behind the house. 

I submitted this card in the "Celebrate - Friends - Family - Life" Challenge on the "time out" CHALLENGES site.


Thanks for stopping by today!

Rachelle

Friday, December 14, 2018

Christmas Card | MFT Stamps - Lawn Fawn - Sunny Studio Mash-up


Happy Fri-YAY!

Who doesn't love a good Christmas Card Mash-Up??? And this one features some of my favorite products from MFT, Lawn Fawn and Sunny Studio!

I started off by creating the interactive card panel (4.25" x 5.5") with Distress Oxide Inks and pearlized watercolor, which was lightly sponged through MFT's "Snowfall" Stencil. The slider mechanism was cut using Sunny Studio's Sliding Window die and the score lines reinforced using a bone folder. I adhered a piece of white shimmer card stock onto the front of an A-2 top-folding card base and blended a little oxide ink at the bottom where the sliding window would reveal the sentiment. I placed the panel over the shimmer paper and lightly marked the margins of the opening with a pencil. The sentiment was then stamped using a MISTI.

I die cut all of my snowman pieces (hat, scarf, and head) and then die cut a circle slightly larger for his body. I wanted to keep the background simple so I blended a piece of cardstock with darker oxides and cut it with Lawn Fawn's Forest Border die at the top. I adhered this to only the bottom half of the slider window so that it would pop-up when the panel was pulled.  I cut a snow drift using Lawn Fawn's Hillside Border die, blended it with the same Oxide inks and glued it to the bottom of the background panel. The snowman was assembled/glued down and finished off with black jewels for his eyes and buttons. I cut a piece of black card stock to use as the slider piece and rounded the top corners with a punch.  Two punched circles were glued to the top of the card and a piece of baker's twine finished off the pull tab.


♥ LOVE ♥ this simple interactive card!

Thanks for stopping by!
Rachelle

Thursday, December 13, 2018

Christmas Card | MFT's "Filled with Joy" Card Kit


Hey There!

Well we had a couple of very early snow days this week here in central North Carolina and it definitely got everyone in the mood for Christmas! This great card kit got my holiday card making MOJO going way back in October and the possibilities are endless...I LOVE it!

I started with a horizontal top-folding A-2 white card base. I cut a 5.5” X 3” piece of white card stock and sprayed it with blue shimmer mist – after it dried, it was glued onto a 5.5” X 3.25” piece of black card stock. The snowman pieces and letters were die cut from card stock and glitter paper. I lightly sponged rosy cheeks onto the face and then assembled the snowman image. I positioned the negative die cut for the word “joy” onto the center of the sprayed panel and used it as a template to align/glue down the letters…it works like a charm every time! This panel was adhered onto the card base and the snowman was popped into place with foam tape. Moonshine snowflakes were added and the card was finished off with a thin strip of the same red glitter paper glued down on top of the pin striped paper. I really like the clean, graphic feel of this card and hope you do, too!


This card was entered in the "Joyful" Time Out Challenges #124. 
 Time Out Challenges #124 - Joyful

I have several other card designs using this same set that I will be sharing in the next few days. Enjoy!

Thanks for joining me!
Rachelle 

Tuesday, December 11, 2018

Christmas Card | Essentials by Ellen - Julie Ebersole's "Mountain Holiday"


Hey There!

I’m schussing straight into Christmas with Julie Ebersole’s "Mountain Holiday" Stamp Set from the Essentials by Ellen Line – Ellen Hutson, LLC. I blended a distress oxide background panel, spritzed it with shimmer spray and sponged a snow fall pattern with pearl ink onto the sky using MFT’s “Snowfall” Stencil. I really like the graphic feel of this snowfall with these simple skiing designs. The images were all stamped, colored and die cut – I stacked/glued several cuts of the skier image together to give it a bit more “weight”.

I cut the ski slope panel from white card stock, sprayed it heavily with shimmer mist and then added texture with the stitched dies at the bottom - the sentiment was stamped in the corner using the MISTI. The snowfall panel was adhered onto the front of an A-2 top-folding card base and the mountains were glued into place on the panel. The ski slope was adhered on top and the skier was popped off using foam tape. I brushed a generous line of Wink of Stella behind her skis to indicate her trail down the slope.


Thanks for joining me today!

Rachelle 

Tuesday, November 6, 2018

Thank You Card | Essentials by Ellen - Julie Ebersole's S'Whale


Hello!

This card came together easily by combining Julie Ebersole’s great images from the “S’Whale" Stamp/DieSet with Distress Oxide Inks! 

After adhering an aqua panel to a top-folding white A-2 cards base, I lightly blended Distress Oxide Inks (Cracked Pistachio, Salty Ocean, Faded Jeans, and Wilted Lavender) onto the lower right area of white card stock measuring 3 7/8” x 5 1/8”. The panel was spritzed with shimmer spray and allowed to dry - I wanted to leave quite a bit of white space on the card. The whale image was stamped with VersaFine Onyx Black Ink and heat embossed with clear powder. I colored the image with pearlized paint, stamped the barnacle texture with oxide ink, lightly sprayed it with water and die cut the whale. I used the whale die cut to help me determine where to place the waves and fish schools in the background. Once those were stamped, I adhered the whale to the panel with some foam tape and added a few pieces of confetti. To finish the card, I heat embossed the sentiment in white onto black card stock, trimmed it to size and glued it onto the panel.

I love simple cards like this one which feature great imagery (and are fun to create!)  


Thanks for joining me today!
Rachelle

Monday, November 5, 2018

Birthday Card | Lawn Fawn - Out of This World


Hi!

Are you up for an ‘out-of-this-world’ color challenge? I was determined to create a space scene featuring a fiery color palette fit for birthday astronaut!

The background was blended with Distress Oxide Inks (Fossilized Amber, Wild Honey, Abandoned Coral, Wilted Violet, Seedless Preserves.) I cut a sun ray stencil from 130# card stock with my craft knife/straight edge, lightly sponged rays with pearlized white ink, moved the stencil slightly and then spattered additional rays with gold metallic water colors; this gives a real depth to the background. The background was spritzed with water and shimmer spray and blotted dry. I blended just the yellow/coral oxides onto a piece of white card stock, created heat “waves” by sponging of a curved stencil, and die cut a 4” circle from the panel. The circle was cut in half and the sentiment was stamped onto the sun using the MISTI.

Using Lawn Fawn's "Out of This World" set, I stamped, colored and die cut all of the images, keeping in mind that the lighter sides (which were all highlighted with gold metallic/pearlized watercolors) would be leaning toward the sun. A 4.25” X 5.5” piece of black cardstock was adhered to an A-2 top-folding card base and the background panel was glued down on top. The sun was backed with a piece of craft foam and adhered to the bottom of the background and all of the planets were popped up with foam tape. I glued a mix of “Itty Bitty Stars - Rainbow Delight” from Little Thing’s By Lucy onto the background and attached the astronaut onto the card with an action wobbler.


This card almost glows with a vibrant warmth and shimmer thanks to the complimentary color palette and metallic paint! Hope you like this unconventional space colorway!

Thanks!
Rachelle

Tuesday, October 30, 2018

Birthday Card | MFT's "You're Rawr-Some"


Hey There!

I wanted to share a “Dino-Mite” card with you today! 😊 It’s for a family member who is turning 65 and I thought this was perfect for her as she completes her Medicare sign-up paperwork!

I stamped, watercolored and die cut all of the images from MFT’s retired stamp set “You’re Rawr-Some”. I cut a 3.75” x 5.5” panel from white cardstock, die cut the cloud and backed the panel with craft foam. A digital sentiment and a strip of MFT’sBlack & White Stripes Paper were adhered to the bottom of the panel. I glued the background foliage directly onto the panel and popped up both the dinosaur and cloud with foam tape for a bit of dimension. This entire panel was glued onto the front of a top-folding A-2 white card base and it was finished with a sprinkling of Lucy’s Little Things – Clear Iridescent Mix Jewels. I love this jewel mix – it takes on whatever color is nearby and is super versatile!

Here is the digital sentiment I created for the inside of the card:

Thanks for stopping by!
Rachelle

I submitted this card for Seize the Birthday's "Anything Goes" Challenge!


Monday, October 29, 2018

Birthday Cards | Hero Arts - My Monthly Hero Kit July 2018


Hey There!

Sometimes you need a few of masculine birthday cards in the same week and this time I decided to create two similar cards using the images from My Monthly Hero Kit – July 2018. The same blended background is used for both cards but they are finished very differently. The backgrounds were created by blending Distress Oxide Inks (Antique Linen, Mustard Seed, Broken China, Salty Ocean and Faded Jeans ) onto a 5.5” x 4.25” panel of Neenah Classic Crest Solar White 110# paper, which was then spritzed with shimmer spray and blotted with a paper towel. I love this color combo for the sky - it really looks like the moment when the sun sets and the horizon glows into turquoise. Using the MISTI, the silhouette fair background was stamped at the bottom of each panel with VersaFine Onyx Black ink. 


For version #1, I die cut three simple frames from black cardstock and glued them together to give the frame some dimension. The frame was then glued onto the inked background panel. I ink blended a scrap piece of white card stock, stamped the happy birthday sign onto it and trimmed out just the sentiment portion. I ran a black marker around the edges to finish. Using the MISTI, I stamped both the birthday sign and several of the fireworks onto the background panel with the VersaFine Ink. The stamped sign cut-out was glued onto the base image and the fireworks were finished off with Peacock Feather Gems from Lucy’s Little Things.


Card #2 starts with the same background glued down to the white A-2 card base. I die cut a white frame (about a 5/8” wide) from 130# card stock, attached a craft foam frame (just a bit smaller in size) onto the back and then adhered a piece of acetate to the foam. This gives you a dimensional cover for a simple shaker card. I placed a spoonful of confetti mix onto the background panel and taped the shaker frame to the front using foam tape. I lightly blended several of the oxide inks onto a piece of scrap card stock mimicking the sky colors and stamped the biplane with banner image in VersaFine ink. The word “Birthday” was stamped onto the banner and the image was die cut. I stamped/die cut the “happy” script and then die cut several blanks, which I stacked and glued together to give dimension to this word. I adhered both the biplane and “happy” sentiment directly onto the acetate panel with just a bit of tape runner and finished off the images with a little Wink of Stella. 


Our Badge

I submitted this shaker card for Seize the Birthday's "Anything Goes" Challenge.

Thanks for stopping by today!

Rachelle


Tuesday, September 4, 2018

All Occasion Cards | Hero Arts MMH May 2018 - Stampin' Up Enjoy Life


Hey There!

I decided to combine a couple of silhouette-themed stamp sets with a soft, graphic background created with Distress Oxide Inks. I first die cut several sizes of a plain circle onto scrap paper and then used the die cuts as a stencil to blend the shapes together randomly on a 4.25 X 5.5” piece of Neenah Solar White card stock. I wanted to keep the shapes a bit more concentrated toward the bottom left corner where I was going to place my silhouette images. I spritzed the inks with shimmer spray to activate and dried certain areas with a paper towel. I cut several small scalloped rectangles from the same card stock and glued them together to create a dimensional frame that had some visible ‘weight’ to it. I used an extra rectangle as a mask (and for stamp placement) and taped it to the background. Using my MISTI, I inked and stamped the grass silhouette to extend just beyond the edge of the rectangle.


I also used the MISTI to stamp the girl on a swing from Hero Art’s MMH May 2018 Kit and the extended arm “Victory” image from Stampin’ Up’s Enjoy Life stamp set. I blended the oxide inks together on a scrap piece of 2 x 4.5’  white card stock and trimmed off a 3/8” piece. I trimmed down the circle background down to 4.5” and adhered it to the front top of an A-2 white card base. I glued the small inked strip right next to it and finished off the bottom with a piece of black card stock. I adhered the scallop rectangle frame to the front with foam tape, giving it even more dimension. The sentiments were stamped with VersaMark Ink and heat embossed with Lawn Fawn’s white embossing powder. Each sentiment strip was die cut/hand trimmed along the edges and adhered with foam tape. The cards were finished off with a sprinkling of coordinating confetti. 


I was really happy with these finished cards and will be able to switch the images/colors/frame shapes in the future to create entirely new designs! 

Thanks for stopping by and have a great day!
Rachelle

Friday, August 10, 2018

Birthday Card | Sunny Studio's Happy Camper & Lawn Fawn's Starry Skies


Howdy!

My younger sister’s “Happy Place” is anywhere she can set up her RV and this “Feet with Fire Pit” pose is the standard photo she takes when she get there! There was a general discussion about butter vs. shortening vs. lard pie crusts after I saw what book she was reading in this picture! 😉


For her Birthday, I designed the ♥ PERFECT ♥ card combining the “Happy Camper” stamp/die set from Sunny Studio Stamps and several die sets from Lawn Fawn.

I wanted the night sky to seem like a giant planet rising above the camping scene and so I started with a horizontal A-2 card base and played with circle dies until I found one with the right proportion to extend beyond the edge. I blended several Distress Oxide Inks (Wilted Violet, Salty Ocean & Black Soot) onto a piece of navy cardstock, die cut the circle and randomly cut stars using Lawn Fawn's "Starry Skies" die set. I spritzed the circle with shimmer spray to activate the ink, blotted it with a paper towel and then spattered a little gold paint on it as well. I die cut a second circle out of white card stock, trimmed it down slightly and painted the top ½ with pearlized watercolors. After it was dry, I carefully glued the blue circle on top, which allowed the bright stars to shine through.

The camper was stamped, water colored, die cut and finished off with a little Wink of Stella. I die cut the pine trees from green cardstock and shaded them using Distress Oxide Inks. The background elements were die cut using Lawn Fawn’s “Forest Border” / “Stitched Hillside Borders” and shaded as well. After I determined their placement, I trimmed them down using the rectangle dies. I die cut a 4.25” X 5.5” panel out of kraft cardstock using Lawn Fawn’s "Large Stitched Rectangles" and glued it to the card base. The sky and forest border were adhered to the card front using strong tape. After I determined the design for the trees & camper, the rest of the scene was glued into place.

A piece of black cardstock was prepped with an anti-static powder tool. The sentiment was stamped with VersaMark Ink, white embossed, trimmed to size and adhered to finish off the card.

Thanks for stopping by - time to start the s'mores!
Rachelle

Tuesday, August 7, 2018

All Occasion Cards | Hero Arts - MMH Kit June 2018


It's a beach day!

I’m sharing a couple of cards that were made with the fantastic products included in the Hero Arts’ MMH Kit June 2018. I ♥ LOVE  the realistic dimension that you can create from the multiple image layers of sea and clouds. This reminds me of days at the ocean where it's almost too bright to see without your sunglasses and the air seems to sparkle!

I created the sky in this example by covering ½ of a white card stock panel and then lightly blending Distress Oxide Ink (Salty Ocean) upward to represent high clouds. The ocean was stamped using the inks that came with the kit right along the skyline and the beach was blended up to the water line with Antique Linen Ink. Water and water colors were spattered onto the beach to create a sandy texture. I used pearlized paint to highlight the ocean waves and then stamped/die cut the large cloud. I stamped the “Hello” greeting with VersaMark Ink and heat embossed it with the “Sand” powder included in the kit. The birds/sailboat were stamped with VersaFine Onyx Black Ink using the MISTI. The white card stock panel was adhered to black card stock and then put onto the front of a 5 X 7” card base.


The background for this card was created by combining acrylic paint and Distress Oxide Inks – this provides a rich base color and a soft, dusty quality to the image. I painted the background in yellows/oranges/red with a wide brush keeping the light tones at the bottom. I blended Distress Oxide Inks (Wild Honey, Abandoned Coral, Candied Apple, Black Soot) to provide depth and used these same inks to stamp the water/waves in the scene. I stamped the island, palm trees, and sailboat with VersaFine Onyx Black Ink. A large oval was die cut out of white card stock and backed with craft foam. The sentiment was stamped onto a piece of black card stock with VersaMark Ink, heat embossed with white powder and trimmed. The scene was cut down to be just a bit larger than the oval die cut and glued down to the center of the card front. The oval die cut panel was adhered on top of the scene with strong tape and the card was finished off with the sentiment and some Clear Round Drops from Studio Katia.

Thanks for joining me!
Rachelle 

Friday, August 3, 2018

Birthday Card | Lawn Fawn - Jump For Joy / Sliding Pop-Up Card


 Happy Fri YAY!

I’m sharing a fun Sliding Pop-Up card with you today that I entered in the Lawn Fawn Challenge Blog. This challenge features projects with “fun folds” and this card fits the bill perfectly!
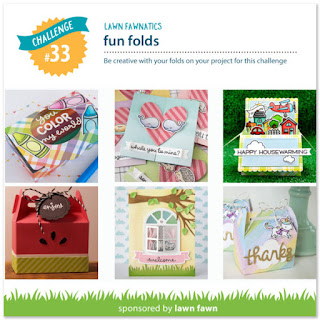

 Lawn Fawn Challenge Blog

I don’t have a die that will cut this type of slide mechanism but I was able to easily create the same functionality using a regular Lawn Fawn Stitched Rectangle Die 4.5” x 3.25”. I centered the rectangle die in the  middle of a 4.25” x 5.5” panel of kraft card stock but die cut just below the top of the shape by moving the cutting plate off of that part of the die before running it through the machine. I was then able to extend the sides of the rectangle upward with my craft knife. This gave me a flap with the same measurements as the die and starting at the bottom, I scored the flap at ¼”, 2” and at the top.  I die cut a large stitched scalloped rectangle from patterned paper and glued it to the kraft panel. I stamped, colored and die cut all of my “Jump for Joy” images – finishing them off with a Wink of Stella and tiny Black Nuvo Drops to accentuate their eyes.


To create the scene, I die cut the clouds, sun, grassy border, and stitched hillside pieces and determined the layout. Some of these landscape pieces were shaded with Distress Oxide Inks and the sky was die cut from blue card stock using the same stitched rectangle die. I scored the sky piece to match the pop-up and glued it down just above the ¼” score line. The grass and hillside pieces were die cut within the rectangle so that the edges were all finished off with the outer stitched lines. Everything in the scene was glued into place making sure that the pieces were adhered only onto one of the panels. You have to leave the middle score line (fold) open or else the pop-up mechanism won’t work. The small sentiment was stamped at the top of the scene with VersaFine Onyx Black Ink using the MISTI.

I cut a 3.25” x 5” piece of contrasting card stock and just by holding it in place at the bottom of the pop-up, I pushed up to move the panel about ½ way. This reveals the area where the second sentiment should go and I marked it with a small post-it note. The “Happy Birthday” sentiment was stamped with VersaMark Ink and heat embossed with white powder. The card front was flipped over, strong tape was put onto the ¼” scored tab and the embossed panel was carefully aligned and adhered to the tape at the bottom.


A 4.25” x 5.5” piece of gold card stock was placed under the card front and I pulled up on the mechanism so that I could see the top sentiment. I determined where I wanted my 3rd sentiment to go by placing the post-it note in the revealed window area. Once the sentiment was stamped,  I flipped the card front over again and adhered strong tape only to the bottom and 2 sides surrounding the sliding panel. You must not get any adhesive on the panel or else the pop-up won’t work. The front panel was adhered to the gold card stock and then affixed to a top-folding A-2 card base. I trimmed the dark brown sliding panel down so it was just visible above the card, punched 2 small circles from the patterned paper and glued them at the top/center of the slider. I stamped the word “PULL” on the front circle and that finished off the card.

I ♥ LOVE ♥ the way this design works! You have a cute scene that changes with the pop-up and several places to hide additional sentiments. I have made several different card designs using this same basic method and it only takes a fraction of the time of my first attempt.

Thanks for joining me today!
Rachelle 

Monday, July 30, 2018

Birthday Card | MFT's - Uncorked/Wine Service


Hey there!

This birthday card features a couple of great products from My Favorite Things’ | Uncorked Stamp Set & Wine Service Die-namics

I chose coordinating pattern papers for this card because I wanted to keep the glasses & wine bottles simple. I used a brick embossing folder to give texture to the background paper and speckled it with a bit of gold paint. I die cut all of the images in several coordinating colors – maroon, dark green, bronze and gold; this gave me extra pieces I could use to decorate the inside of the card and envelope. I assembled the wine bottle pieces together and created the scene on a 3.75” x 5” panel of Neenah Solar White #110 card stock; a piece of white craft foam was adhered to the back of the panel. I stamped the sentiment onto the inside of an A-2 top-folding white card base using the MISTI and glued my die-cut images into place. 


The front panel was adhered on the center of the card front with strong adhesive and I finished off the outside of the envelope as well.


Thanks for joining me today - Cheers!
Rachelle

Friday, July 27, 2018

Birthday Card | Hero Arts - MMH July 2018 Kit


Hey there!

I grew up in Midwestern farm country and believe me, the county fair was (and still is) a very BIG deal! I just LOVE the MMH’s July 2018 Kit, which captures the sweet charm of all the festivities!

To create the graduated sunset, I used an ink brayer and acrylic paint. Several short lines of acrylic paint were overlapped a bit along the edge of a piece of Neenah Solar White #110 card stock. The paint was then rolled onto the paper several times with the brayer, which blends the areas together to create the gradation. I made several backgrounds using this same color combo before cleaning the brayer and switching up the colors to a blue/purple palette.

When the panel was dry, the fair scene was stamped using VersaFine Onyx Black Ink, embossed with clear powder and then die cut. I prepped a piece of black card stock with my anti-static powder tool, embossed the sentiment with VersaMark Ink and heat embossed it with white embossing powder; the strip was then trimmed down to size. I glued a piece of white craft foam to the back of the scene panel to protect it while going through the mail.  A ¾” strip of striped paper was glued to the bottom of an A-2 white card base and the panel was adhered to the center of the card front with strong tape. I added a few gemstones and the sentiment strip to finish the card.


I used the “Happy Birthday” marquee sign from the set for the inside of the card and embossed a sentiment from MFT’s “More Essential Sentiments” to complete the greeting.


Thanks for joining me today!
Rachelle 

Sunday, July 22, 2018

Birthday Card | Ellen Hutson - Mermaid's Tail for the Color Throwdown CTD502


Hey there!

Swimming by to say "Hi" with this colorful birthday card featuring Julie Ebersole's "Mermaid Tail" stamp/die set from Essentials by Ellen. As soon as I saw the Color Throwdown Challenge ctd#502 this week, I had mermaids floating in my mind and who wouldn't with this beautiful combination of cobalt, aqua and gray!

The background was created by watercoloring & blending Distress Inks (Salty Ocean and Blueprint Sketch) on a 3.75 x 5.5" piece of Neenah Solar White card stock.  The background was spritzed with shimmer spray and flicked with pearlized watercolor. Salty Ocean Ink was randomly blended on to a piece of aqua card stock and then the mermaid tail was stamped with VersaFine Onyx Black Ink. After the tail was die cut, I highlighted the scales/flipper with the pearlized water color for just a bit of sparkle.

I attached a piece of gray card stock onto the front of an A-2 top-folding card base. The painted background was glued onto a piece of white craft foam and then adhered to the gray card base. A piece of piece of black card stock was prepped with an anti-static powder tool. The sentiment was stamped with VersaMark Ink and heat embossed with Lawn Fawn's White Embossing Powder. This is my favorite white embossing powder!

I adhered the mermaid tail to the front with large glue dots just along the left edge and flipper so that the tail looks like it's floating above the water. There is enough "give" in the flexibility of the paper that it can pop up or down without getting bent going through the mail. I trimmed/glued the sentiment and a small piece of patterned pater to the card front. I finished the card with a bit of blue bling from Lucy's Little Things - Ocean Breeze Crystal Collection. The inside reads, "Mermaid Kisses and Starfish Wishes on Your Birthday!" 

Head over to the CTD Blog to check out the other beautiful cards featuring this gorgeous color combo!


Thanks so much for stopping by!
Rachelle

Friday, July 20, 2018

Birthday Card | MTF's - More Monsters


HAPPY FRIYAY!
Sending out some monster-sized greetings today courtesy of MFT's wonderful stamp/die set - More Monsters! This Birthday Card will be entered into both the FMS346 Challenge and the Simon Says Stamp Wednesday Challenge featuring die cuts or punches.
  
 Freshly Made Sketch 346

 Simon Says Stamp - Wednesday Challenge

I die cut the circular shapes out of a piece of Neenah Solar White card stock, which measured 4.25 x 7". The monsters were stamped/die cut and given a coat of Wink of Stella. The blue and red monsters were taped into place on the backside of the die cut panel and then glued onto a piece of 5 x 7" black card stock. A strip of 1/4" silver glitter paper was adhered to the edge of the white card stock and a scalloped circle outline was glued down in the negative space of the die cut. All of the monsters were popped off with foam tape for added dimension.

I stamped the sentiment in VersaFine Onyx Black Ink using my MISTI and added a sprinkle of clear sequins to finish the card. This entire panel was adhered onto a white card base.

I just love  the goofy expressions of this motley crew!


Thanks for joining me and have a great day! 

Rachelle

Thursday, July 19, 2018

Birthday Card | Lawn Fawn - Coaster Critters


Hey there!

Who doesn't love a good roller coaster ride? I worked at Cedar Point (in Sandusky, Ohio) for a couple of summers during college and as an employee, we were able to walk the park at night after closing time. I bet I rode each roller coaster at least a hundred times and this fantastic stamp/die set from Lawn Fawn - "Coaster Critters" captures the fun of heading down that first big hill!

I watercolored the sky/grass on cold press watercolor paper and blended a bit of Distress Oxide Inks onto the surface. Using the MISTI, I stamped all of the images on Neenah Solar White Card Stock with VersaFine Onyx Black and heat set the ink. I watercolored and die cut the images and then determined how to build the scene. I decided to ground the roller coaster with a strip of bright green card stock cut with Lawn Fawn's Grassy Border Die and an embossed sentiment strip.

Some of the images were glued directly to the watercolor paper and others were popped up using foam tape. I added shimmer with a Wink of Stella and detail highlights with a white gel pen.


Thanks for stopping by!
Rachelle

Wednesday, July 18, 2018

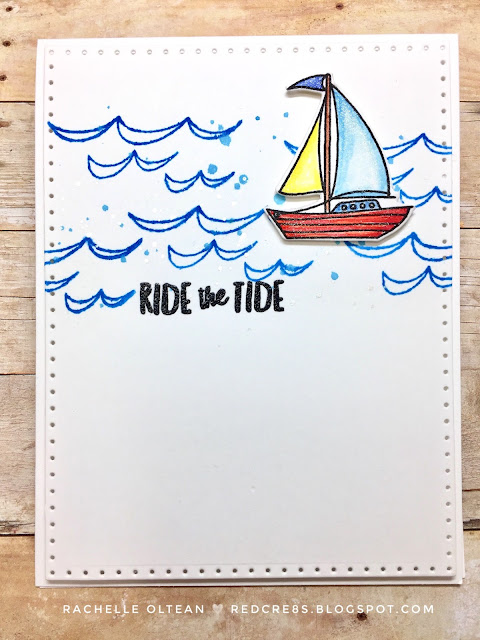
Birthday Card | Ellen Hutson - Stay Salty


AHOY!

Today I am sharing a clean and simple birthday card based on this layout from CAS(E) this Sketch #280. I chose this theme for a good friend who sails the East Coast and Florida panhandle now that he and his wife are retired! 


 CAS(E) this sketch! CTS #280

I die cut a white card stock panel just a bit smaller than the A-2 top folding card base. Using the Essentials by Ellen stamp/die set, “Stay Salty”, I randomly stamped the waves in Distress Oxide Ink (Salty Ocean), spritzed it with shimmer spray and then flicked diluted ink and pearlized watercolor onto the area. The sailboat image was stamped, colored, die cut and finished off with a bit of Wink of Stella. I stamped the sentiment onto the wave panel with VersaFine Ink and heat embossed it with clear powder. The wave/sentiment panel was adhered to the card base with double-sided tape and the sail boat was popped off the card with foam tape.

I really like this CTS#280 layout and sketched out several additional cards for future use - sometimes I struggle with the sketch and at other times it just clicks for me and the creative energy starts flowing! 🙂 


Be sure to check out all of the other great takes on this sketch over on the CTS blog.

Thanks for spending time with me today!

Rachelle