Thursday, December 12, 2019

Christmas Card | Newton's Nook Designs - Cut It Up! Challenge #189 - Anything Goes Christmas


Hi There!

Thanks so much for joining me today! We have a great challenge for you over on the Cut It Up! Challenge Blog - "Anything Goes Christmas!" Our generous sponsor for this challenge is Newton's Nook Designs and I have a card today which features a couple of their wonderful products! The design team has come up with some show-stopping inspiration for this challenge so head over and take a peek!

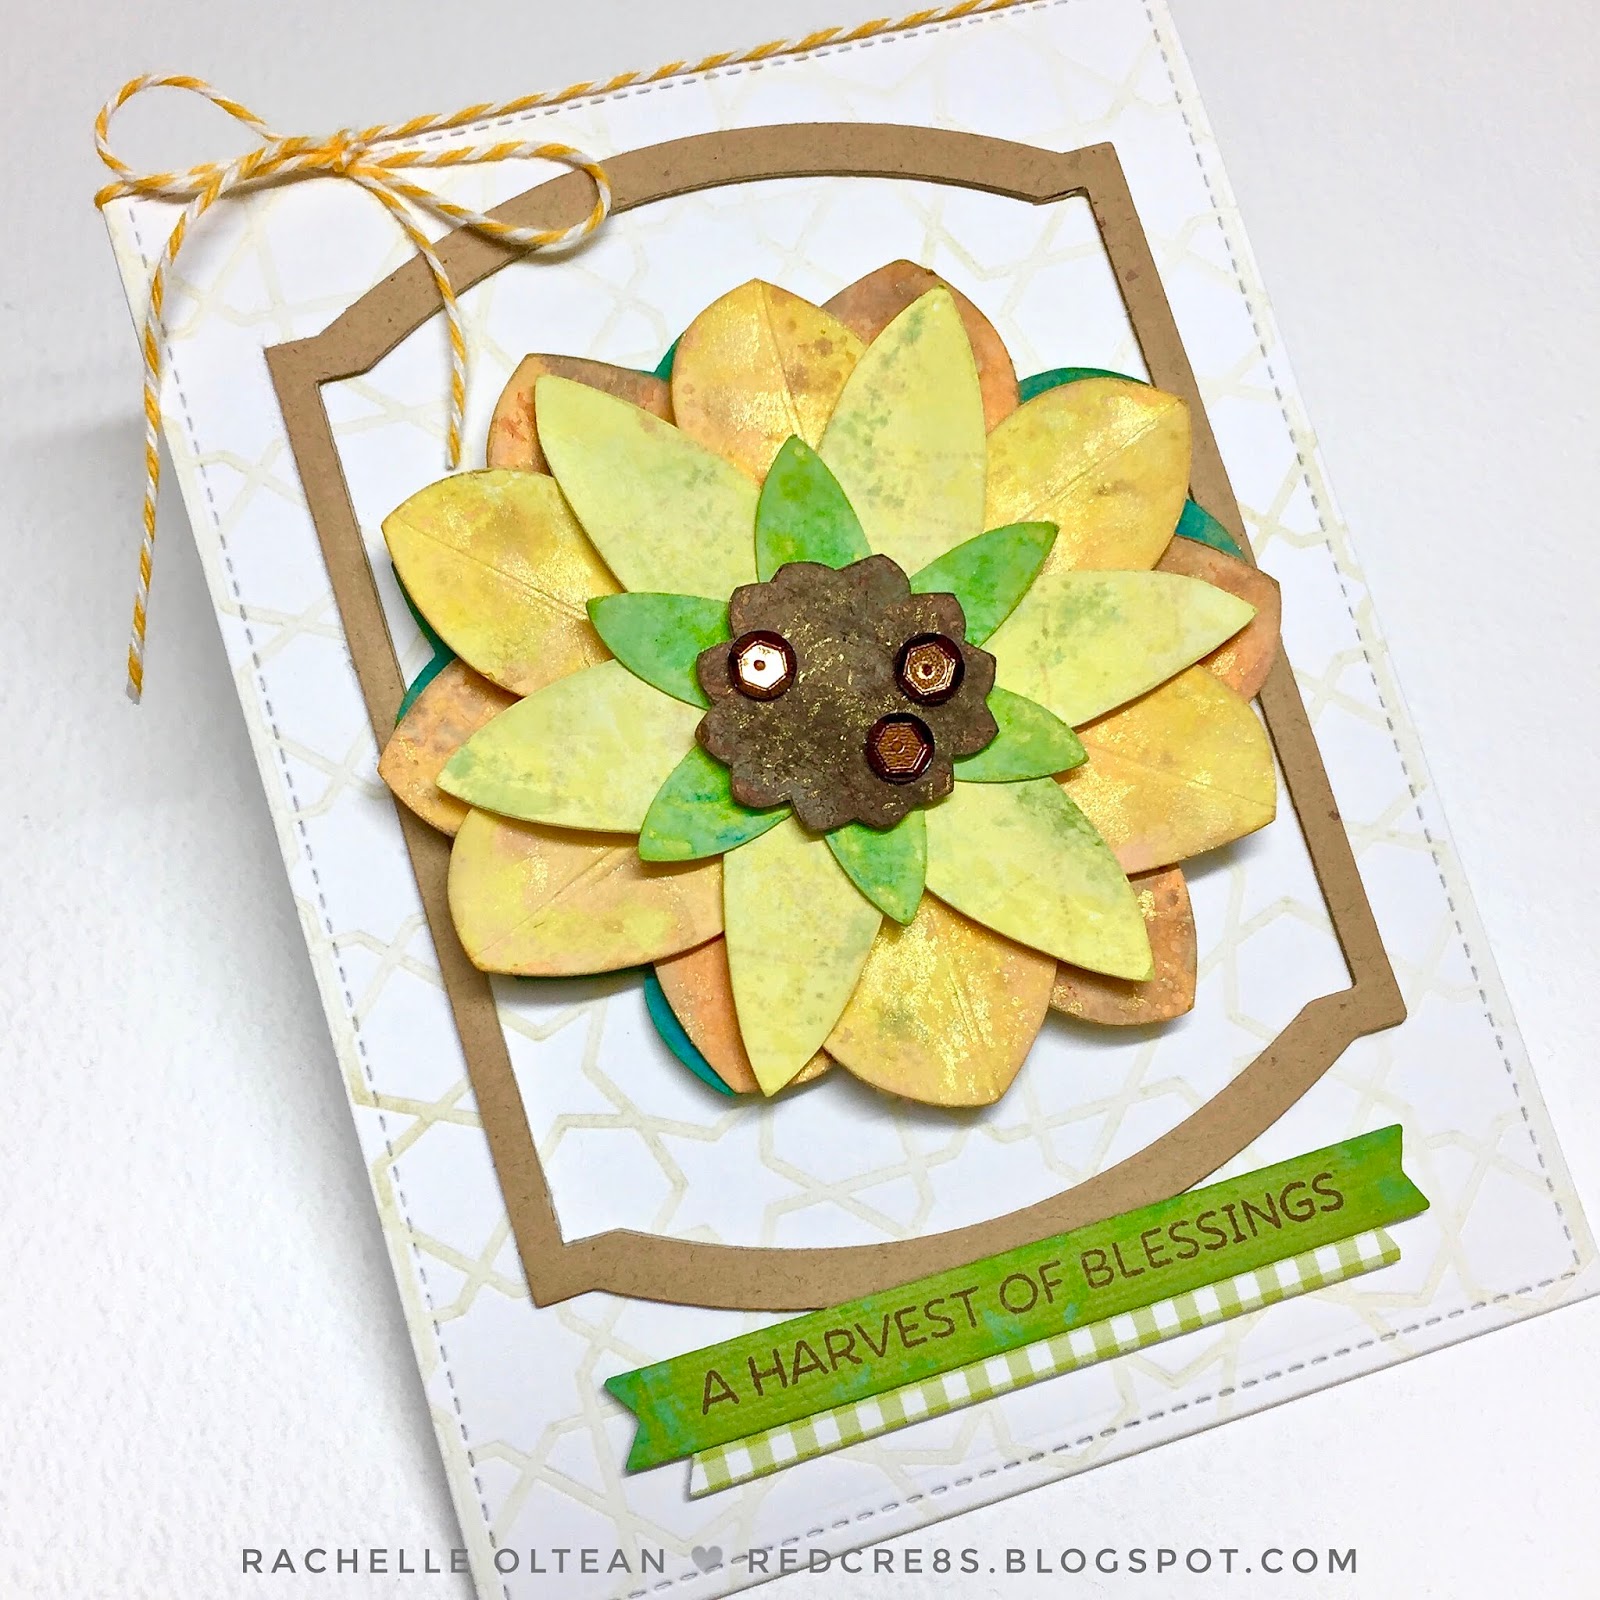
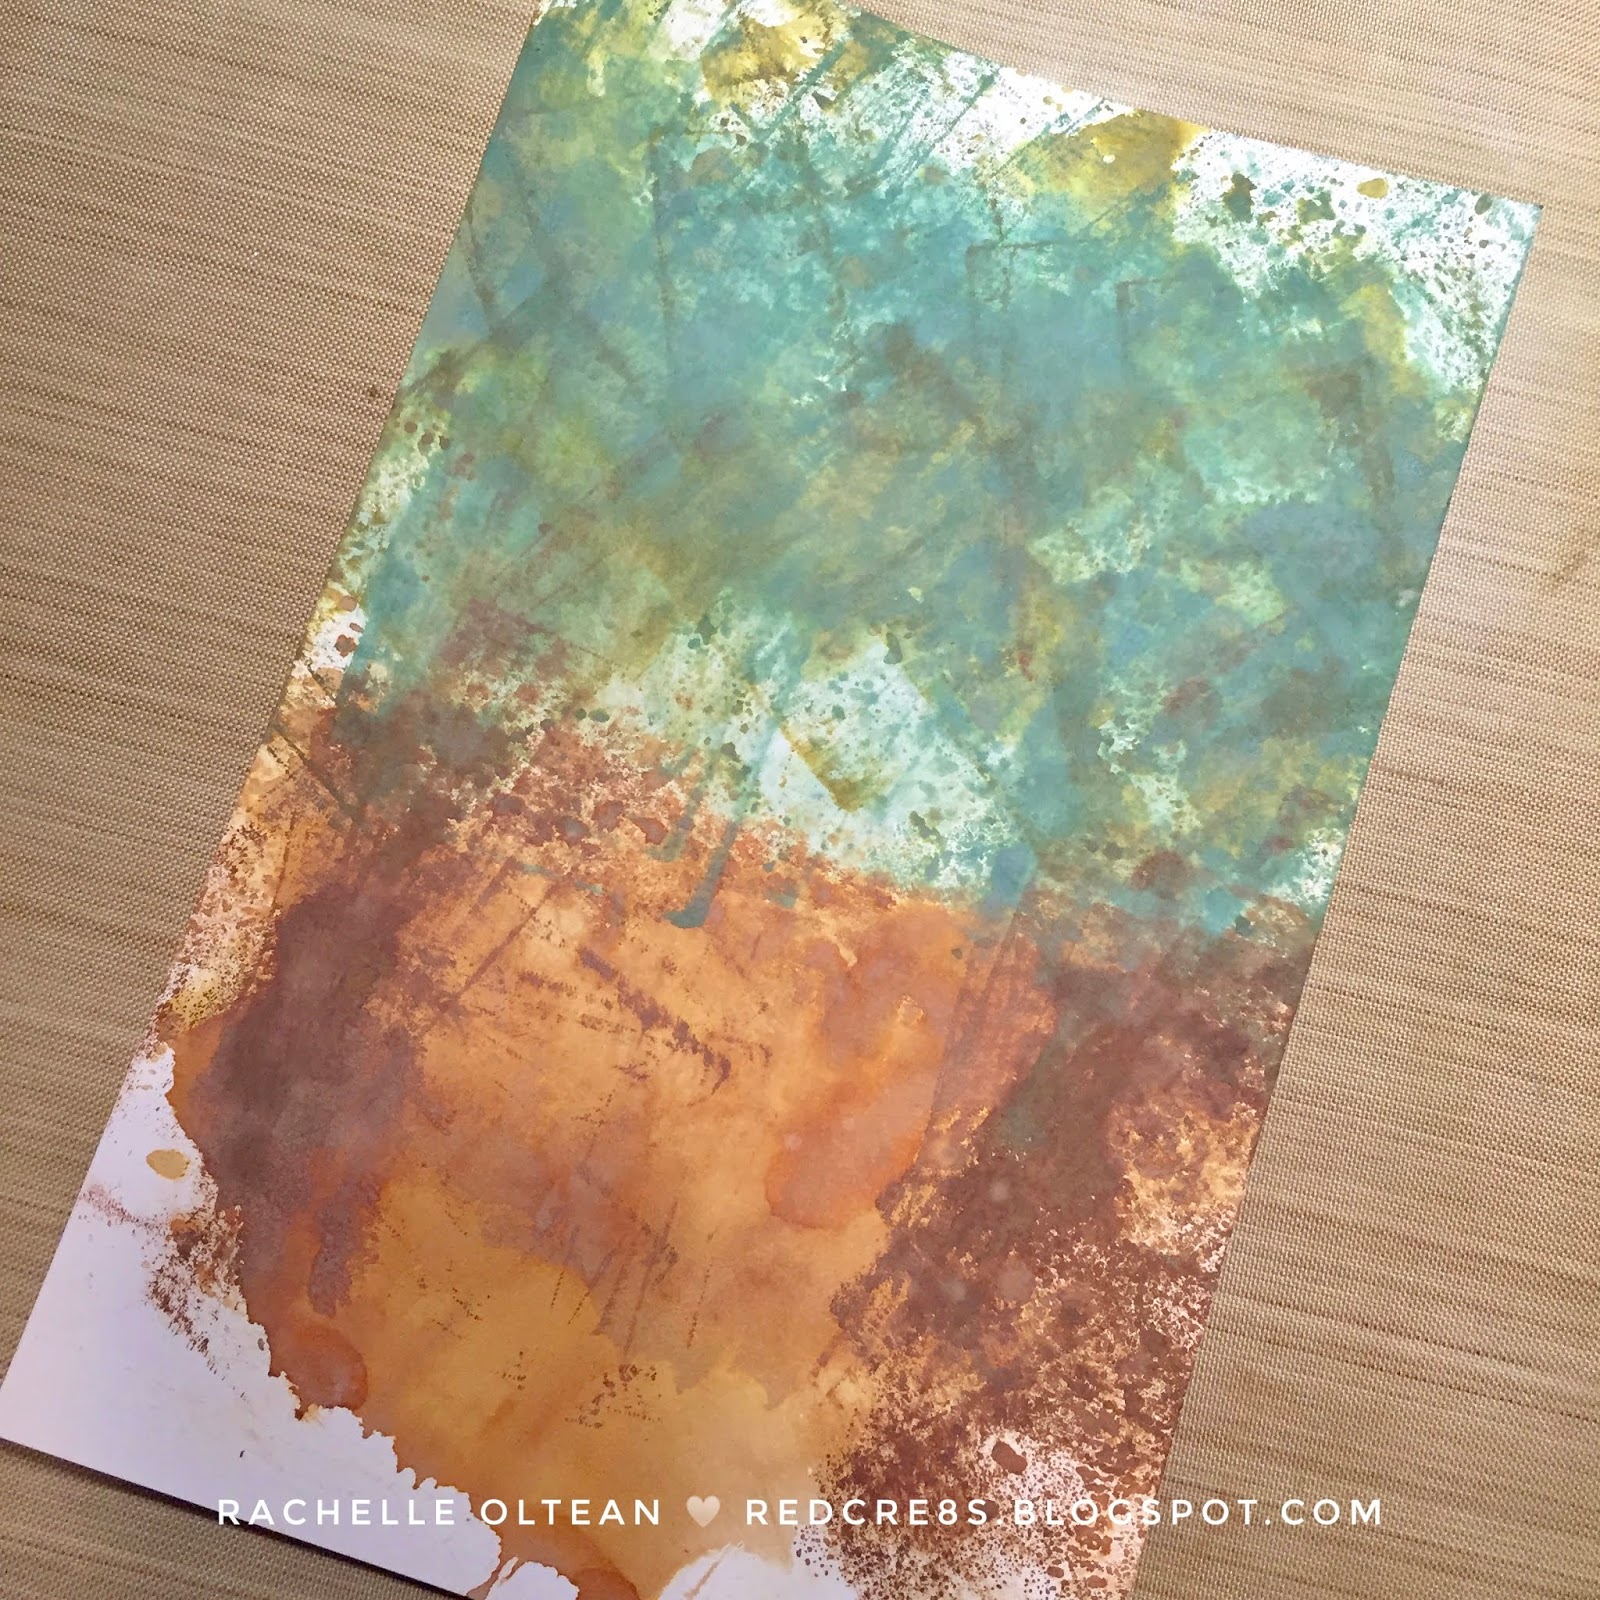
I started this design with Newton's "Plaid Stencil Set" and inked a two-toned rose plaid onto cream card stock using "Worn Lipstick" and "Picked Raspberry" Distress Oxide Inks. I spattered the plaid with some "Peeled Paint" Ink and gold metallic watercolors. I die cut the plaid background with an A-2 stitched rectangle and adhered it to a horizontal top-folding card base. Using Avery Elle's "Wonky Rectangular Frame Dies", I cut several frames from olive card stock, glued them together and set them aside. 


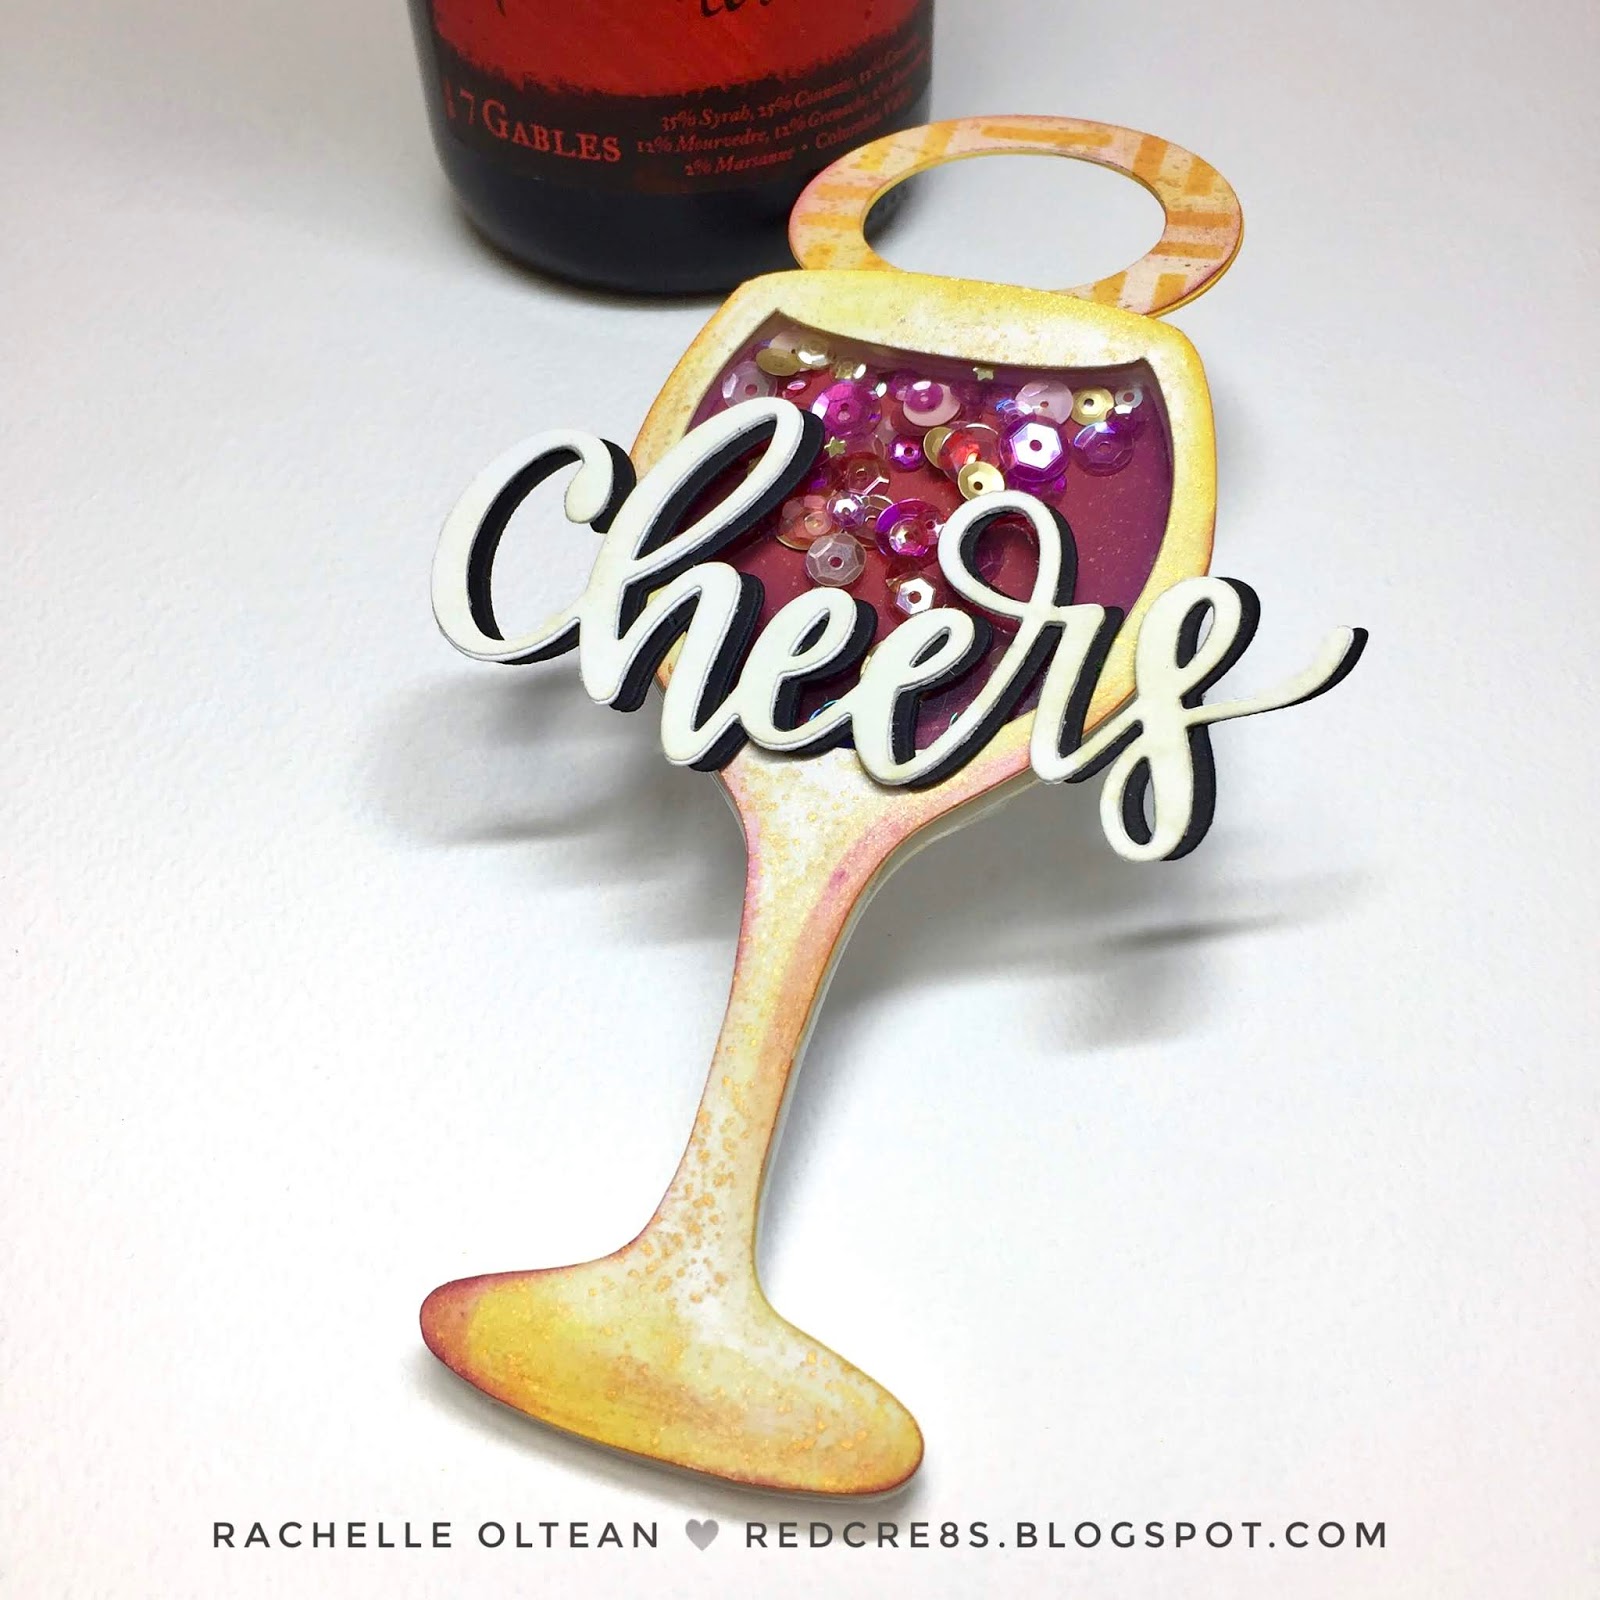
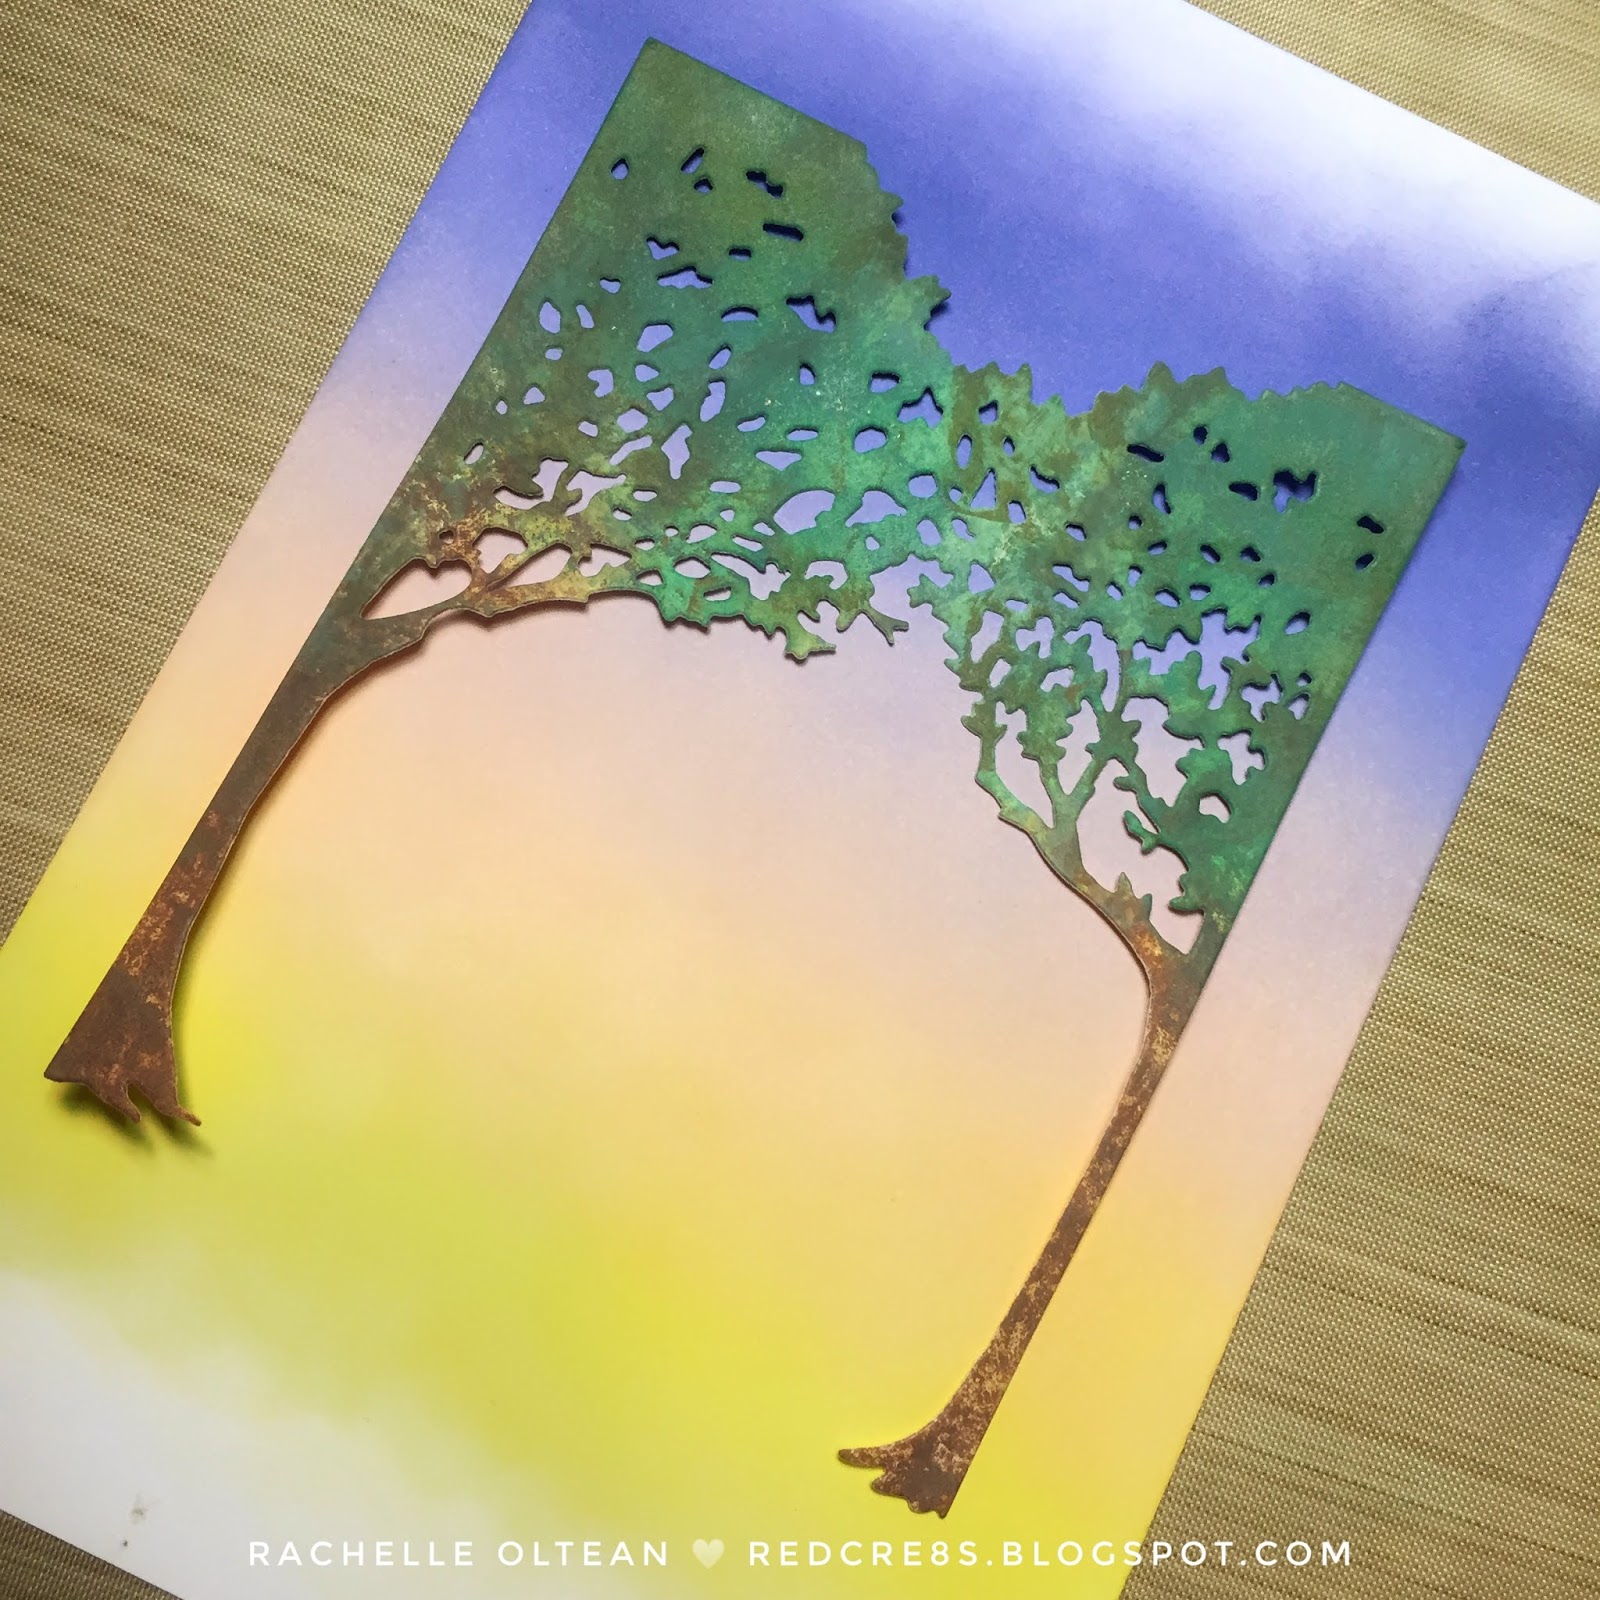
The holly branch was cut using the Cricut, water colored and brushed with a top coat of Wink Of Stella. I die cut the ornament using Newton's "Ornament Shaker Set", ink blended the main shapes, cut the top hanger from gold card stock and glued the pieces together. The words were cut from the same cream card stock, glued onto the ornament and finished with a light application of Wink Of Stella. I attached the branch behind the frame, and adhere this to the card front. Gold thread was used to string the ornament onto the holly and the card was finished with a few gem stones.


I really liked the way this soft olive/rose color palette came together on this card in combination with the cream base. Hope you like it, too! 

Additional challenge submissions:


Thanks so much for all of your comments!
Rachelle

Friday, November 29, 2019

Christmas Tag | Cut It Up! Challenge #188 Tic-Tac-Toe


Hello!

Today's post features a Christmas Gift Tag designed for the current Cut It Up! Challenge - Tic-Tac-Toe Board. This challenge has so many great combinations and as long as your project includes a die cut, we would love to see what you create! Thanks to our wonderful prize sponsor, Christy Witschie, from Stinkin' Cute Paper Piecings for her generosity! 

 Penguin 6 Cutting Files

I chose "Circles, Purple and Design Paper "as my game squares and started this tag by die cutting a large circle from both heavyweight white card stock and Lawn Fawn plaid paper; these two were glued together. I cut/glued together two of the largest scalloped circles from Avery Elle's Wonky Circle Framed Elle-ments Dies. This frame was glued onto the plaid circle. 

I downloaded the Penguin 6 Cutting File Set into Cricut Design Space, resized/tweaked the file and die cut all of the penguin pieces from white card stock. Each piece was hand colored with water colors and Distress Oxide Inks to give the overall image some depth. After assembly, I gave his face/tuxedo a generous coating of Wink Of Stella for some extra shine, added the small gems as buttons and applied black glaze pen to his eyes. I punched a hole through the scallop frame, tied the ribbon to the tag, glued a white pom-pom to the hat and popped the penguin into place with some foam tape to finish! This tag is quite large (nearly 4" in diameter) and would also make a great handmade ornament as well!

Thanks so much for stopping by and head over to the Cut It Up! Challenge Blog to see the other great projects the Design Team has created! 

Rachelle

Thursday, November 14, 2019

All Occasion Card | Hello Bluebird - Bee Happy | Cut It Up! Challenge #187 "Celebrate Fall (or Any Season)"


Hey there!

We've got a fun theme over on the Cut It Up! Challenge Blog...create a project to "Celebrate Any Season" and I chose to celebrate the growing season with these playful pollinators! I used these cute little honey bees from Hello Bluebird's 'Bee Happy' Stamp Set (Summer 2018) and the Mason Jar Set from "The Cutting Cafe" who is our generous prize sponsor for this challenge. My concept was to make a shaped card with an acetate window, fill it with honeycomb and feature these hardworking bees buzzing on the front : ) Make sure to head over to the blog and see the other creative ways the design team members have used these same die cutting/print files!

I loaded the SVG files into the Cricut Design Space and tweaked the sizing/design just a bit to give me a hinged window card base. I die cut multiples of this design, glued/stacked them together (for stability) and then blended Distress Oxide Inks around the edges to create glass reflections. I ink blended the honeycomb background pattern using a Tim Holtz stencil onto one of the negative die cuts, spritzed it with shimmer mist and glued it onto the inside panel. The ruffled fabric topper/ribbon were die cut from pattern paper and adhered  onto the card front. 


I carefully trimmed a piece of acetate to size and adhered it to the back of the window opening. The bees/honey pot were stamped, colored and die cut. I stamped the Hero Arts' banner design and Stampin' Up's Labeler Alphabet Letters onto heavy-weight vellum with VersaFine Onyx Black Ink and heat embossed it with clear powder. After the banner was trimmed, it was adhered onto the acetate panel with tiny pieces of double-sided tape. The bees finished off the card front and I added a sprinkling of gold confetti to the honeycomb.


This project was so much fun to design and the finished window is really effective! Sending a big THANK YOU to Regina over at The Cutting Cafe for furnishing the files and the prize for this fun challenge!

Rachelle

Tuesday, November 12, 2019

Christmas Card | Winter Scene Shaker Card


Hello!

I'm sharing a CAS shaker card with you today as the weather turns colder here in North Carolina! This design features a simple diecut image, an ink-blended background and lots of shimmer with the shaker bling!

I designed the house scene in PowerPoint, uploaded it into the Cricut Design Space and die cut it from heavy 100# white card stock. I glued/stacked two of the pieces together to ensure stability and then cut this panel again with my Big Shot using a dotted rectangle die (3.75" x 5"). I stamped the sentiment on the front using my MISTI and adhered a piece of acetate to the back of this panel. I blended an aurora borealis night sky with Distress Oxide Inks, sprayed it generously with shimmer  mist and placed it under a heavy book to dry.

I adhered the sky panel onto the center of a horizontal top-folding A-2 card base, backed the acetate panel with foam tape, and added a scoop of shaker fill into the center of the card. I carefully pressed the acetate shaker window into place to finish. One quick tip (and this is just personal preference) - I did glue several stars onto the sky panel before assembly so that when the card stood upright there would still be some scattered in the scene - if you don't do this, most of the filler will generally fall to the bottom of the shaker area and I like a bit to stay suspended.

Thanks so much for stopping by today - I really appreciate your comments : )

I would like to submit this card in the following challenges:


Rachelle

Sunday, November 3, 2019

Pop-Up Window Gift Card | Ellen Hutson - Voices In My Head/A Breve Note | A Place To Start Challenge "Caffeinated Tones"


Hello!
I can't wait to share this fun pop-up window gift card with you! I've mixed 'n matched a ton of products for this project, which focuses on the colors of coffee for A Place To Start's current November Color Challenge - "Caffeinated Tones". This beautiful, neutral palette is shown below:


I decided that I wanted to use some new-to-me stamp sets from Ellen Hutson and the creative designer, Julie Ebersole, for this pop-up gift card - "Voices In My Head" and "A Breve Note". I also wanted to create something that would hold a Starbuck's Gift Card and decided to use a pop-up window for the design. 

I cut a 4.25" x 5.5" panel of chocolate brown textured card stock and adhered it to the front of an A-2 top-folding white card base. I created a coffee-stained background by stamping a pattern with VersaMark Ink onto a piece of kraft card stock measuring 4" x 5.25". I partially die cut a rectangle in the middle of the panel (on three sides only) and scored the flap in three places to create the slider panel. A small half circle was cut from the top with a 3/4" punch.


The face and coffee cup were stamped in chocolate brown dye ink onto cream card stock, colored and fussy cut; a light application of Wink of Stella was added. I wanted the coffee cup to float above her head and so I attached the two with a thin piece of acetate. I die cut 2 vellum speech bubbles from Julie Ebersole's "High Five" Set and lightly blended Antique Linen Distress Oxide Ink onto the back of one die cut. I prepped the other with my anti-static powder tool, stamped part of a sentiment with VersaMark Ink and heat embossed it with white powder. I then carefully glued the two vellum die cuts together, placing glue only behind the embossed letters. This gave my vellum some structure while retaining a bit of transparency.

I cut a small panel from the same cream card stock (3.125" x 4.75") and stamped the sentiment "This One's On Me" at the top along with a few coffee beans. I added a small circular "Pull" tab at the top of the cream panel to finish and adhered it behind the kraft window panel (only at the bottom) with strong double-sided tape.


The face/coffee cup group was glued onto the bottom only of the kraft window panel and the speech bubble was slipped in behind. You want to be sure not to adhere anything to the area above the center scored fold line or else it will not pop-up when the reveal tab is pulled! Small strips of foam tape (double thickness) were adhered to the back of the kraft panel on three sides and this entire panel was pressed into place on top of the card base. I put the Starbuck's Gift Card under the slider and finished off the front with an assortment of coffee-colored sequins.

I really like the simple graphic style of this card and the 3-D pop-up effect works very well here!


Thanks so much for stopping by today and I appreciate your comments!

This card is also entered into the following challenges:


Also submitting this card over on the wonderful Coffee Lovers Blog Hop - thanks to all of the great sponsors for this season's event! (And a big thanks to Amy Tsuruta and Chaitali Narla as the co-hosts and organizers of this amazing hop!)


Rachelle

Friday, November 1, 2019

Thanksgiving Card | Cut It Up! Challenge #186 - "Thankful/Thanksgiving"


Hello!

Thanks so much for stopping by today! I'm so excited because this is my first Design Team submission for the "Cut It Up!" Challenge Blog! The challenge theme is Thankful/Thanksgiving while also using the "smooshing" ink technique. I decided to focus on an autumn color palette in combination with this beautiful sunflower SVG that I chose from Scrappy Dew, who is our prize sponsor for this fun challenge. Cut It Up! Challenges have great themes but do require using some type of die cut(s) in the projects and I know that for most paper crafters, this is a given! 

I used the simple sunflower design from the "Happy Fall Y'all" set but resized and reshaped some of the petals in the Cricut Design Space to create the multiple layers necessary to give this flower face a lot of depth. I die cut multiples of each layer on heavy weight white card stock and set them aside. 

Using MFT's now-retired Geometric Star Stencil, I inked it with Antique Linen Distress Oxide Ink, secured it face down and ran it through my Big Shot to make the imprint onto white cardstock; this panel was then die cut with an A-2 stitched rectangle die and adhered to a top-folding card base. I really like the way this gives you subtle color combined with a "letterpress-like" imprint in the background. I cut four rectangles from kraft card stock using MFT's Elegant Rectangle Die-Namics, glued/stacked them together, and adhered this frame to the card front.

Then came the fun part!!! I smooshed Distress Oxides Inks onto my Ranger Craft Mat, sprayed it liberally with water and started smooshing! I have found that this technique works best for me if I only try to combine 1-2 colors together at a time - if I try to add more colors, the end result looks a bit gray/muddy. I let the pieces dry between applications and kept adding layers until I achieved the depth of color I wanted. I then sprayed the flower petals with a gold shimmer mist to give it some additional shine. After everything was completely dry, I hand curled and scored some of the layers to give the flower a bit more detail then I assembled the pieces by gluing everything together from the bottom up! 

I stamped/die cut my sentiment strip, added a small layer of gingham pattern paper and adhered it into place with foam tape. The flower was then glued inside the frame and the card was finished with a few brown sequins and gold baker's twine. 

Head over to Cut It Up! to see the great projects the Design Team has created for this challenge and GET SMOOSHING! Here is a LINK to my recent blog post which shows lots of photos of this  technique in action.

Additional Card Challenges:


Thanks so much for joining me today and I really appreciate you taking the time to comment!

Rachelle

Wednesday, October 30, 2019

Birthday Card | Ellen Hutson - Everyday Doodles & Concord & 9th - Stuck on You


Hi!

Sharing a festive CAS birthday card featuring a combination of Essentials By Ellen and Concord & 9th Stamp Sets! The color palette is from the current AAA Birthday Card Challenge and I immediately thought of a bright birthday cactus with these "comic-book-like" colored candies!


I stamped the long landscape block (Julie Ebersole's Winterscape Stamp Set) at the bottom of an A-2 top-folding card base with VersaFine Onyx Black Ink. The cactus, balloon and party hat images were stamped, die cut and assembled together. Once I determined placement, I stamped the grass, triangles and sentiment using the MISTI. I popped the cactus/balloon grouping off of the card front with some foam tape to give it some dimension and finished the card with a few shiny green stars. These products really work well together and I can't wait to pop this in the mail!


This card is entered in the following challenges:


Thanks so much for stopping by!
Rachelle

Wednesday, October 16, 2019

Wine Bottle Shaker Gift Tag | MFT Stamps - Cheers Die-Namics


Cheers to You!

Today's post is a special shaker gift tag designed to hang around a wine bottle. With the holiday season fast approaching, I needed a few tags ready to pair with my hostess gifts! This was pretty easy to put together (after I created the tag in the Cricut Design Space!) I used a simple copyright-free wine glass silhouette SVG I found on the internet as my starting point and created a few extra layers in order to convert it into the pieces needed to assemble the shaker. The basic shapes used for this tag are shown below and here are the # of die cuts needed for each color:

3 - Yellow Ringed Base - Glued together and Colored with Distress Oxides/Metallic Watercolors
1 - Rose Wine Base - Blended with Distress Oxide Inks and spattered with metallic watercolors
1 - Green Shaker Base 
4 - Black Glass Outline - Only the top die cut was blended with Distress Oxide Inks and spattered with metallic watercolors


If you have an electronic die cutting machine, here is a B&W version that you can copy/save as a JPG and then upload to create this shaker tag:


The smaller wine base die was glued into the correct place on the green base and I adhered a piece of acetate behind the the opening of the top black die cut with Scor-tape. I glued the remaining three black die cuts together and adhered them behind the acetate. This gave me a good stability for the shaker and enough depth for the filler pieces. I used really narrow pieces of double-thick foam tape around the back of the acetate and down the stem of the glass. I ran my anti-static powder tool around the foam tape just at the top to keep my filler from sticking to its adhesive residue. Then I added my shaker bits onto the wine base area and carefully placed the acetate piece on top, pressing down firmly so that the entire unit was adhered together. I scored the yellow ringed base along the line shown above and glued the shaker to it. Depending on the weight of your card stock, you may not need quite as many die layers but I like to overcompensate a bit just to make sure the final shaker isn't too flimsy.


Using MFT's "Cheers" die, I cut multiples from both the white and black card stock - the die cuts were glued/stacked together with the black stack slightly offset from the white in order to give it a shadow effect and adhered to the front of the tag. There is plenty of room on the back to write your sentiment or just a simple "To:/From:" would also work! I really like the way this tag looks on the bottle itself! 

I am entering this project into the challenge over at the current Cut It Up! Challenge Blog #184 - Tags, Bags or Boxes.

Additional Challenges:


Thanks so much for stopping by!
Rachelle

Saturday, October 12, 2019

Halloween Card | MFT Stamps - Happy Hauntings


Happy Halloween!

It will be here before we know it and all of my neighbors have started to decorate outside with giant spider webs covering their front porches, zombies crawling out of the lawns and scary ghosts floating from trees! It's AWESOME! Today I am sharing a card featuring MFT's now retired "Happy Haunting" Stamp Set (you can still purchase it on the Frantic Stamper site) and here is the simple sketch that I worked from:


I began by creating a Distress Oxide Ink background with the following colors: Carved Pumpkin, Twisted Citron, Wilted Violet and Blueprint Sketch. I spattered the blended panel with diluted inks, metallic watercolors and opaque white ink to create the night sky. I cut 2"-wide vertical strips from the panel and set them aside. The images were all stamped onto white cardstock, colored and die cut. I glued additional blank die cuts behind the witch, moon and smallest cloud to give the scene some dimension.

The Halloween fence was cut with an old Martha Stewart paper punch and I lightly blended some Squeezed Lemonade Distress Ink across the top of the fence to indicate moonshine - the same thing was done on the clouds. A piece of black cardstock was prepped with an anti-static powder tool, the sentiment was stamped with VersaMark ink and heat embossed with white powder. The sentiment was die cut and glued onto a small strip of MFT's striped pattern paper.

The blended background strip was adhered along the right side of the card front and all of the remaining pieces were glued into place on top. I used some foam tape to pop the moon off of the card front, which added nice dimension and allowed me to slip the small cloud just underneath the sleepy moon! I added a few matte gold stars to finish off the card.


Challenge Submissions:


Thanks you so much for all of your comments and I really appreciate you stopping by!

Rachelle

Sunday, October 6, 2019

Birthday Card | Pinkfresh Studio - A Place To Start Challenge Blog - "Create Your Own Challenge"


Hey There!

We've got a great challenge for you this month over on A Place To Start's Blog - Create Your Own! Head on over to the APTS Blog to see the great inspiration the design team has created!
Here are the challenge instructions: 


I chose the following items from each column in order to fit the challenge:
#1 - Image  |  #2 - Die  |  #3 - Embossing Powder  |  #4 - Sequins  |  #5 - Faux Stitching

Using the MISTI, I lightly sponged Blueprint Sketch, Chipped Sapphire and Black Soot Distress Oxide Inks onto the large round universe background stamp from Pinkfresh Studio's Constellation Set on the upper middle area of a 4.25" x 5.5" panel of white card stock. I spritzed the panel with clear shimmer mist and blotted it with a paper towel. I die cut the large Constellation Sketch Star Die from shiny matte silver card stock and glued/stacked 2 additional die cuts behind it to add dimension. I stamped the sentiment using black pigment ink on the card front and heat embossed it with clear powder.

The silver star die cut was glued into place and I added a handful of itty bitty silver star sequins to the sky. I trimmed 1/4" from the bottom of the card front and backed the entire panel with craft foam. A line of faux stitching was embossed onto a 1/2" strip of the same matte silver card stock using MFT's "Basic Stitch Line Die-Namics" and glued to the bottom of an A-2 top-folding card base. The front panel was then adhered into place on top of the stitching. I stamped the sentiment/stars on the inside of the card and added a silver constellation die cut to complete the card.


Additional challenge submissions:


Thanks so much for stopping by and I really appreciate all of your comments!
Rachelle

Thursday, October 3, 2019

Thank You Card | Guest Designer Spot - CAS(E) this sketch! #CTS342


Hello! 

I am so excited to share this card with you today as the Guest Designer over on the CAS(E) this Sketch Blog! I flipped Donna Mikasa's sketch upside down and went with a fall-inspired thank you  card, featuring wheat die cuts from Concord & 9th and a background texture from MFT. Head over to the CTS blog to see what the talented design team has created for this challenging sketch #CTS342!


The background was created using MFT's now-retired "Make Your Mark" Stamp; the ombre texture started with Gathered Twigs Distress Ink at the top and then blended into Brushed Corduroy and Antique Linen at the bottom. The card stock was sprayed generously with clear pearl & gold shimmer mists and flecked with diluted inks/gold watercolor. I really like how this background fades into the white card stock at the bottom. I cut this panel down to 4.25" x 5.5" and adhered it to the front of an A-2 top-folding card base.

The Lawn Fawn banner was stamped onto plaid pattern paper, shaded with Rusty Hinge Ink and fussy cut. I used a black marker to finish the stamped edges of the banner and made small slit along the middle line so that I could slip my wheat stalks in behind the sentiment area. I stamped the sentiment in the middle of the banner and set it aside.


Using Concord & 9th's "Layering Leaves" Wheat Die, I cut multiple stalks from different colors of card stock (including matte gold shimmer paper.) I carefully glued 2-3 stalks together to give me the stiffness/strength I needed to maneuver them into position. I like this die because it is so delicate but as a single layer, it can be too thin to work with - so I usually glue/stack a couple together and I'm good to go! I added a bit of color to some of the stalks by just swiping Distress Oxide Inks across the surface and once dry, I began to create the simple bouquet. When I had the stalks positioned through the banner, I took a quick photo, lightly taped the die cuts in place on the front with purple craft tape, and removed the wheat bouquet. I added just a bit of foam tape to the outside curved edges on the back of the banner and adhered it into place on the card front. By adding the foam tape on the banner edges, this gave me a great dimensional "pocket", making it easy to glue the stalks back into place (using my photo as a guide!) I added a minimal amount of Ranger Multi-Matte Adhesive to each of the wheat stalks and left most of the tops unsecured so that I could bend them outward to add dimension.

I took just a little design liberty with the sketch and am so happy with the result!


Thanks so much for joining me today! 

Additional challenges:


Thanks for all of your comments!
Rachelle

Wednesday, October 2, 2019

Sympathy Card | Hero Arts Fancy Tree Die


Hello...

Sympathy cards are never easy for me to make - especially when both parents of a long-time friend pass away within three days of each other. They had been married for nearly 68 years and I'm sure that she died of a broken heart without him. It seems nearly impossible to find sufficient words to express your heartfelt condolences to someone who has just lost both parents.

I began by blending a background panel of Distress Oxide Inks - Squeezed Lemonade, Tattered Rose, Shaded Lilac and Blueprint Sketch. Additional inks were smooshed onto my craft mat one at a time and spritzed with water. I tapped the white card stock onto the wet ink several times until I got the coverage I wanted, let it dry for a moment and moved onto the next color. 


I divided the panel into the green leaf foliage and brown trunk areas to match my die - Hero Arts' Fancy Tree Die. Once I finished with the smooshing technique, I swiped the ink pads directly onto the paper to intensify the color in certain areas.


I duplicated this process one more time with slightly lighter colors because I knew that I wanted to layer one die cut on top to create some depth on the trees. Once I determined the tree placement, I cut the ink-blended panel down to 4.25" x 5.5", adhered it to the front of an A-2 top-folding card base and glued the first set of trees in place. The card front was prepped with an anti-static powder tool, the sentiment was stamped with VersaMark Ink and heat embossed with a matte gold powder. This sentiment is from a Michaels' scrapbook line circa 2017.


Tiny strips of foam tape were added to the back of the second tree die cut and it was adhered just slightly offset of the one below to give the scene depth. I spattered the entire card front with pearl shimmer mist/gold watercolor and the card was finished with a few sequins.


Challenges:


Thanks so much for joining me today.
Rachelle 

Tuesday, September 10, 2019

All Occasion Card | MFT Stamps - Harvest Mouse | Retro Rubber Guest Designer for Fall Colors Challenge #119


Hello!

Thanks so much for joining me today ♥ I can't tell you how excited I am to be the Guest Designer over on the Retro Rubber Challenge Blog for the current Fall Colors Challenge - #rrcb119! This is especially true because I will be sharing this adorable card featuring MFT's Harvest Mouse Stamp Set, which is still as fresh as when it was released in the fall of 2015! I think it's proof that well-drawn images really can stand up to the test of time.


I created the Swiss dot background by stamping MFT's Itsy-Bitsy Polka Dot Stamp with VersaMark Ink onto a piece of 110# Neenah Card Stock and heat embossing it with white powder. Distress Oxide Inks (Peeled Paint & Bundled Sage) were blended over the embossed dots, the surface was lightly rubbed with a paper towel (to remove any excess ink) and cut to a 5" square. This was adhered to the front of a top-folding 5" square card front.

Using the Gina K. Wreath Builder Template, I stamped many small images from older, retired MFT stamps sets (including Bold Blossoms) to create my harvest wreath and spattered it with diluted inks/metallic watercolors to soften the design. I cut the inverted scallop circle in the center with the smallest option from Pink Fresh's die set, added a handful of small sequins and backed this entire panel with a piece of craft foam for added stability.
  

I stamped the pumpkin-carrying mouse with VersaFine Onyx Black Ink, heat embossed it with clear powder, colored and fussy cut the image. I ink blended a small panel (with Fired Brick Distress Oxide Ink) to fit behind the center scallop opening with Distress Oxide Ink and glued it to the center of the dotted background; the wreath panel was adhered on top. The mouse was popped into the center with a double layer of foam tape and a piece of heavy twine was tied/knotted at the top to finish off the card.


Thanks so much for joining me today and head over to the Retro Rubber Blog to check out the great ideas from the Design Team!

Additional Challenge Submissions:


Rachelle